moparrob66
Pre-takeoff checklist
- Joined
- Mar 31, 2024
- Messages
- 491
- Display Name
- Moparrob
- Home Airfield
- S75
Those skinny kid arms are handy...maybe too short, though.


Hopefully they grow longer in time for the wing bottom skins. Those would have been a rather interesting challenge to rivet solo and, unless the kid can contort enough to crawl out through rib lightening holes, long arms are the key required attribute.Those skinny kid arms are handy...maybe too short, though.

Those skinny kid arms are handy...maybe too short, though.
Hopefully they grow longer in time for the wing bottom skins. Those would have been a rather interesting challenge to rivet solo and, unless the kid can contort enough to crawl out through rib lightening holes, long arms are the key required attribute.


Not sure why, but again reminded of a story from Bob Hoovers Blog (no, not THAT Bob Hoover).They should create a Girl Scout / Brownie merit badge for riveting!

 bobhooversblog.blogspot.com

Not sure why, but again reminded of a story from Bob Hoovers Blog (no, not THAT Bob Hoover).
The Ugliest Toolbox
The World’s Ugliest Toolbox sits all by itself near the bandsaw. People sense it is somehow special since it sits atop a wooden stool appar...

 , but it was fun having her out there too. I had them both sign the inside of the skin, above where an access panel will be located.
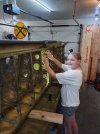


As good as it is for the project, it’s 10x as good for her!
Maybe pick her up one of these at OSH. Bought one for my daughter 3 or 4 years ago when we were at OSH - now at 14, it’s still the only hat she wears.

She must want something. That's how it works right?We finished the second half of the rivets in an hour and a half this afternoon. Unreal. With her helping it goes about 6X faster. She quickly picked up how to identify a properly set rivet vs one that needs some more attention. If it looked funny she went straight to the gauge tool and made a determination. I checked them all after we were done and didn't find one that looked bad. We also got the stiffeners installed, so the left wing is complete through chapter 16 and we started prepping the RH skins. She told me she "really likes riveting" and to come get her any time I need help. I was really hoping this project would get the kids' attention and get them to spend some time in the shop with me, but honestly she was the last one I expected. The 7 year old also came out and handed me rivets, which actually slowed us down a bit
I sent an email to Pioneer Sunday before our trip and never heard anything, so I called today. The CSR didn't have much to say and asked me to send her pictures. I did so, along with a brief narration explaining that the damage was not apparent from outside the box when I unloaded it. To my surprise and delight, she responded a bit later saying they'd send out a new unit and a return label for the damaged one. Surprisingly good customer service for a discount online retailerHeat index is like 110 or something today. I drove rivets until I was soaked through with sweat, and decided I'd start working on installing the mini split i ordered, which arrived this week. Went and got it, still wrapped in plastic on the pallet. Opened the box and... whomp whomp.
View attachment 142157View attachment 142158
Looking forward to them telling me to take it up with the freight company, and the freight company telling me it was fine when they dropped it off.

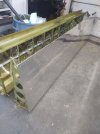


Later, they recommend "empty promises" of food or beer to get help doing a major assembly step. You know you are near the end of the build when you get to that step, because making empty promises implies you won't need the helpers to come back again.Don't remember if I posted this before or not, but it tickled me when I actually got to this step last night:
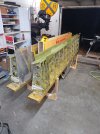
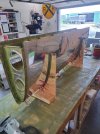
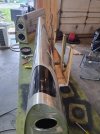
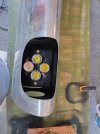
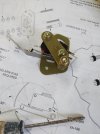
I did. The holes were already there, and I'm still on the fence about AOA. I still need to figure out how to mount the Piper pitot blade i bought.Did you install the stall warning vane? I skipped it in mine. Incidentally, I began condition inspection #4 tonight. Started out with a short local flight and a (rare for me) three-point landing.
I almost forgot: I brought my new decibel meter with. 107 dB peak on takeoff, 104 dB at 2400 RPM, and 102 dB at 2300 RPM (but a noticeably gentler noise in my opinion). Next week I can compare that against the 310.
and I'm still on the fence about AOA
Paul Dye has a trick with the Piper pitot where he hooks the AOA line to the port Piper used for static pressure. The actual hole for static pressure is plugged, and the drain hole becomes the AOA pressure port. Obviously this needs to be calibrated and isn't supported by anyone, but it does supposedly work. The point of all of this is that I think getting AOA is just a matter of another pitot line and some software fiddling, assuming it is a g3x, which is about a 90% certainty. I've never flown an AOA, but it seems silly not to do it at this point.At OSH I noted a section of a poster in the FAA Safety building about doing AOA familiarization in a Redbird sim during Airventure. It took a phone call by a rep to another rep to figure out how to signup and where to go. More in a sec.
Visited Alpha Systems booth and talked with the owner at length. I’ve been contemplating installing their AOA system for a few years but other upgrades or maintenance have always superseded it. I’m looking at about $4k with the options I want. I’m guessing your future glass panel will probably have an input for that display at little additional cost, maybe a few hundred bucks.
I also sat in on a presentation on Tuesday by 5 old gents of high repute about AOAs (Air Force, NASA, astronaut, design engineer, CFI). They had high praise about flying with AOA indicators.
Redbird sim in the training center (next to the museum). A bit disorganized about what I showed up for, but they squeezed me in even though they were behind schedule. Nice enough folks (very). “Flew” about 45 min in various configs to see how the AOA meter would react. First time on a Redbird. Kind of underwhelming, but got the jist.
If I have no maintenance surprises after my next annual, I might get one finally.
It’s not the first engine you’ve built though. You’ll also have taxi tests done and a DAR having gone over the plane.….As I look ahead, I am worried about making the first flight of a new airframe I built behind an unflown engine that I built...

Taking a Qualified Pilot (QP) under AC 90-116, Additional Pilot Program for Phase I Flight Test, up with you on those first Phase I flights might be worth considering to put your mind at ease.As I look ahead, I am worried about making the first flight of a new airframe I built behind an unflown engine that I built. It's nothing that thousands of other homebuilders haven't done before though. I am definitely going to pay to have G&N break my engine in for a couple hours on their dyno so at least it is somewhat proven.
It kind of puts into perspective guys in the poberezny and wittman era, who were flying completely untested designs. At least with the van's product, you have a pretty good idea of what it should do if you follow the formula.
As the saying goes. “no balls, no babies”, with your track record, you should be good to go.As I look ahead, I am worried about making the first flight of a new airframe I built behind an unflown engine that I built. It's nothing that thousands of other homebuilders haven't done before though. I am definitely going to pay to have G&N break my engine in for a couple hours on their dyno so at least it is somewhat proven.
It kind of puts into perspective guys in the poberezny and wittman era, who were flying completely untested designs. At least with the van's product, you have a pretty good idea of what it should do if you follow the formula.
I have had the chapter technical advisor out. He was happy with my work and said to call him again before I close the wings out. He did NOT, however, make fun of my second-string toolshttps://www.eaa.org/eaa/aircraft-building/volunteer-assistance/eaa-technical-counselors Or, just post detailed pictures here so we can pick the nits like that Craftsman screwdriver that needs to get wire brushed and have the handle treated (Ammonia is supposed to work).
That thing really does look like **** in macro, doesn't it? I don't think it looks that bad IRL, but that may be a symptom of my rapidly deteriorating eyesight. Craftsman screwdrivers weren't really all that great when they were new though, amiright?
FIFYwith your track record, you shouldbe good to go. make the first flight the trip to Oshkosh next year.
ETA: Also, speaking of nits, no one has noticed that the vane is installed upside down on the stall warning switch. I wish I could say I figured it out before I put it in the wing
Well, the first flight after completing Phase 1FIFY
 . Back in 2015, I finished my 40-hr Phase 1 the week before Osh. That next flight was very memorable as it was the first flight with my family, the first X/C, the first IFR flight, the first flight in IMC, and last but not least my first flight into Osh in any plane.

I think the engine break-in is a good idea. As long as you properly connect all your controls (elevator, rudder, flaps, trim, ailerons, brakes, throttle, mixture, and prop), it is hard to screw up the new RV kits. Getting a checkout for insurance may be your biggest hurdle. Go ahead and figure that out/get it done so you're not pressed to do something expedient at the end of the project. I think you'll find the -14 flys like an airplane and shouldn't give you any problems.As I look ahead, I am worried about making the first flight of a new airframe I built behind an unflown engine that I built. It's nothing that thousands of other homebuilders haven't done before though. I am definitely going to pay to have G&N break my engine in for a couple hours on their dyno so at least it is somewhat proven.
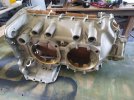
“I’m just going to let it sit in the corner until I’m ready for it”
Reported for pornography.
The real irony is that this one i dont need for a couple years yet.You really did drip it at the front of the line when you were down there, didn’t you. Smooth; real smooth.
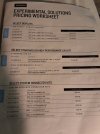
I'm not sure you want to know. The price difference between experimental and certified might make you sad.What’s going into your panel?