Still thinking about an RV-14

Yep. Bottom of the fuse. to the spar carrythrough. Looks like they might be exposed permanently so it won't be a show stopper. Do you remember if those are visible on the completed plane?

ETA: Actually Spruce has an expected ship date of Jan 6 on that size, so it may not be an issue at all. The 4s appear to be backordered for all eternity. I suppose that's a much more commonly used size.
They probably definitely remain visible on the completed plane.
 
Last edited:
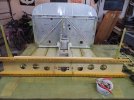
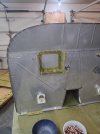
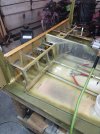
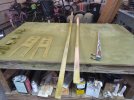
Finished chapter 28 yesterday. It involves joining the firewall to the front floorpans. Also installed the battery box and cabin heat valve boxes. I made the final decision to go with the exp-119 cowl option. It replaces the single exhaust running through the tunnel with duals that exit between the cowl and fuse. The tunnel then gets turned into a cowl flap which requires a bunch of extra nutplates at this step. The last step is attaching the front half of the spar carry through to the tunnel and floor pans.

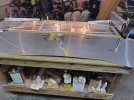
I still haven't gotten the parts to do chapter 26. Van's shipped them dec. 8. Thanks USPS. Because ch. 29 involves marrying the front and rear floor sections, I can't move forward until I get those parts. So, today I started going through and deburring/priming parts and building any subassemblies I can. That should speed things up significantly when I eventually can proceed. Built the longerons and started prepping the side skins today along with some other bits.

IMG_20251218_212004132_HDR.jpg
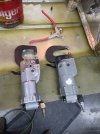
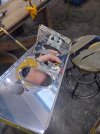
IMG_20251219_164546337_HDR.jpgIMG_20251219_210130375.jpgIMG_20251220_150622792.jpgIMG_20251220_210944506_HDR.jpg

I've been thinking about my MVP tools. I have to give first place to my pneumatic squeezer. I love it so much that I bought a second, used one i found at Oshkosh. That allows me to keep a 3" yoke on one, and a "longeron yoke" (which nearly doubles the squeezer's usefulness) on the other.

Runner up is probably the spring loaded cleco pliers. The one handed operation they allow is infinitely better than the standard type. The tungsten bucking bar is right there with it though.

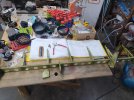
The little 1" belt sander has also been a surprisingly big time saver. A somewhat unconventional one is drywall sanding sponges. They work great for deburring.

IMG_20251219_212849979_HDR.jpg

.
 
Last edited:
Nothing beats the right tools, they increase quality, speed, and satisfaction for the user.

Without them, frustration and slow or no progress.

50 years ago, part of my work included very precise measuring devices that controlled major machines. Tiny screws or bolts with cloverleaf internal drive for one company, hex splines on a competitor. With the very smallest jewelers screw driver, it was possible to adjust the hex splines, but the proper wrench might never fit again. When that was done, new screws were ordered, and a proper wrench, and the distorted ones replaced.

There were only about 3 of us who knew how to work on those devices, and I was the only one who had not gone to the factory school, which provided a complete set of special tools. EDITED to add, the man who taught me to work on the equipment gave me his tools when he was promoted into management.

Amazing progress, and obvious fine craftmanship... and craftgirlship! :)
 
Last edited:
I've been thinking about my MVP tools. I have to give first place to my pneumatic squeezer [...] Runner up is probably the spring loaded cleco pliers. [...] The tungsten bucking bar is right there with it though.
This could be an interesting thread in and of itself. I built without the aid of any of these, and of the three if I were building a new one today would probably only add a squeezer to my collection. The one tool I absolutely couldn't function without is a Bluetooth speaker and finely-curated Pandora account. Others on my hangar row would probably add soundproofing to that list but I haven't seen a need so far. Of normal airplane stuff you can have my DMC crimper and bag of turrets when you pry my cold, dead fingers from the handle.
I also cherish every handmade alignment fixture and jig that I made for a non-prepunched kit. Most don't see much use anymore but they're precious all the same :)

Nauga,
tooling up
 
a Bluetooth speaker and finely-curated Pandora account
I'd probably still be working on the tail kit if not for the old TV and firestick. YouTube is my usual companion, although this summer Netflix provided both seasons of Tires and all 9 of Seinfeld. A lot of the work is pretty mindless deburring and dimpling operations.

Something I didn't mention above, but would be of general interest to anyone, not just those building airplanes, are these blue plastic bowls. These are 50 cents at Walmart, and Teresa bought them to keep the kids from overfilling our Corelle bowls. Well, turns out that they will fill whatever vessel you give them to the very rim with cereal and milk, so these oversized ones got tossed out. I took them to the shop, and fell in love with them. They're indestructible, perfectly sized, hard to tip over, and the constant curve means no corners for parts to hide in. I've got a dozen of them now and use them for everything both airplane and farm.

I'm also quite proud of how my rivet storage solution worked out. I bought 2 dozen empty spice jars from ol' buddy Bezos and 3D printed some interlocking hexagonal...thingies to hold them. Pour out a few at a time and you prevent hours of picking up rivets when you inevitably knock the bowl off the table.

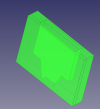
The red dimple die/countersink holder as well as the green drill bit holder were also 3D printed and have turned out to be far more useful than expected.

IMG_20251022_211732319.jpg
 
Last edited:
Something I didn't mention above, but would be of general interest to anyone, not just those building airplanes, are these blue plastic bowls. These are 50 cents at Walmart, and Teresa bought them to keep the kids from overfilling our Corelle bowls. Well, turns out that they will fill whatever vessel you give them to the very rim with cereal and milk, so these oversized ones got tossed out. I took them to the shop, and fell in love with them. They're indestructible, perfectly sized, hard to tip over, and the constant curve means no corners for parts to hide in. I've got a dozen of them now and use them for everything both airplane and farm.
I got a thing for Christmas that would be of good use for this sort of thing too - Some collapsible parts bins with magnetic bases: https://www.amazon.com/Collapsible-Magnetic-Foldable-Silicone-Organizes/dp/B0B7JBHK2N/ref=sr_1_6?adgrpid=188069094684&dib=eyJ2IjoiMSJ9.ON5dIWmojhl00JoeyFktf_FXLdg7XNW3v6JCd-khgJ301NzSmS0iMDCKwGvq74dsc61fp-Th0aTSQoKjWKsFq6GqWDfMrrGDIyH3b8w3d89kmB3rdAbzo93ETZv4V4_tfI-_TiEiKl9PAZl--5LyhVrHfe9H13k4Yr69DxTUidMsTMaf5RXgu0-Ouu43K-09xuAiyyPgvHA80cFA8REfHOWzQTlBk3TkXEXcb6tImakKLjrkJv9SqkEky9V45uKTiJyEHAOpMBZfgMvtUT7je3rscc5_sP0FfJ2XMjbfw9g.O7uiqD80ApLMbExY3R3YS8obUjzLnBWbnLPdBp4jHfY&dib_tag=se&hvadid=779590119103&hvdev=c&hvexpln=0&hvlocphy=9018723&hvnetw=g&hvocijid=17522738062962186092--&hvqmt=e&hvrand=17522738062962186092&hvtargid=kwd-1947117389965&hydadcr=28109_14512673_2063379&keywords=magnetic+collapsible+bowl&mcid=81e9ca5fea5c3dc09ca84759fa83523b&qid=1766952754&sr=8-6&th=1

Pretty cool, but certainly pricier than plastic bowls you already have!

I'm also quite proud of how my rivet storage solution worked out. I bought 2 dozen empty spice jars from ol' buddy Bezos and 3D printed some interlocking hexagonal...thingies to hold them. Pour out a few at a time and you prevent hours of picking up rivets when you inevitably knock the bowl off the table.

The red dimple die/countersink holder as well as the green drill bit holder were also 3D printed and have turned out to be far more useful than expected.
Nice... An excellent use of a 3D printer!
 
I made my die and countersink holder by drilling 3/16" holes in a piece of plywood. Good, cheap, fast. The rare trifecta.

As long as we are picking on people for 3d printing... The least sensible request for a 3d print that I got for a student project was a rectangle about probably 3 inches by 6 inches and probably 1/2 inch thick. No holes, nothing. Just a block. I suggested that a square of wood would suffice and they could find some scrap over in the wood shop for free.

OTOH, my favorite 3d printed 3d printer accessory is a holder for the micro SD to SD card adapter that I stuck to the shelf next to the printer. Now I don't have to remember where I left it last... A silly little thing, but more handy than I would have thought.

1766954521981.png
 
I've made a couple of 3D printed bit holders. Because while they may take a little while to print, they're very fast to design. There's no way I could drill all the holes at comparable speed. Loading blocks would be another example...I could probably make up a fixture to hold and index a block of wood to make loading blocks on the drill press, to match the wooden ones I've bought from Midway. But if I wanted to make my own now, I'd 100% just 3D print them.
 
Finally making tangible progress again. USPS delivered the seat ribs i was waiting for. Van's mailed them Dec. 8, and they arrived Jan. 2. They spent two weeks sitting in Chicago.

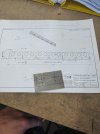
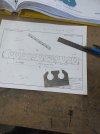
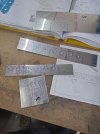
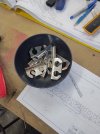
Bad news is that one of the parts they shorted me, which actually attach to the ribs in the same step, is backordered. It looked fairly simple, so I called vans support and asked for a drawing, which to their credit, they sent me. It didn't have all the dimensions, but it had enough i could figure it out with a little educated guesswork & math. So today I fabricated 12 "routing angles", which is a fancy way to say brackets that support and retain the wiring harnesses.

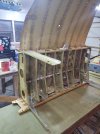
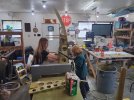
IMG_20260103_123025927.jpgIMG_20260103_123759683.jpgIMG_20260103_125923674_HDR.jpgIMG_20260103_140227075_HDR.jpgIMG_20260103_160703353_HDR.jpg

Actually had to match drill the holes.. I'm sure @nauga would be proud :biggrin:

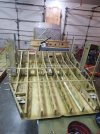
Then those ribs got attached to the rear spar carrythrough and the... "rear spar" carrythrough. Got as far as clecoing that assembly to the bottom skin, but I'm going to have to draft some help to set those rivets tomorrow.

IMG_20260103_210455597.jpg
 
Finally making tangible progress again. USPS delivered the seat ribs i was waiting for. Van's mailed them Dec. 8, and they arrived Jan. 2. They spent two weeks sitting in Chicago.

Bad news is that one of the parts they shorted me, which actually attach to the ribs in the same step, is backordered. It looked fairly simple, so I called vans support and asked for a drawing, which to their credit, they sent me. It didn't have all the dimensions, but it had enough i could figure it out with a little educated guesswork & math. So today I fabricated 12 "routing angles", which is a fancy way to say brackets that support and retain the wiring harnesses.

View attachment 148707View attachment 148708View attachment 148709View attachment 148710View attachment 148711

Actually had to match drill the holes.. I'm sure @nauga would be proud :biggrin:

Then those ribs got attached to the rear spar carrythrough and the... "rear spar" carrythrough. Got as far as clecoing that assembly to the bottom skin, but I'm going to have to draft some help to set those rivets tomorrow.

View attachment 148712

Can’t tomorrow, but I can be there Tuesday. :)
 
Just as a point of interest (mainly for myself in the future)...
Jan 2, 2025-Jan 2, 2026---> 910.5 hours total. Average 2.5 hours/day
Empennage kit took 302 hours to complete

Wing kit: 421
 
Just as a point of interest (mainly for myself in the future)...
Jan 2, 2025-Jan 2, 2026---> 910.5 hours total. Average 2.5 hours/day
Empennage kit took 302 hours to complete
Wing kit: 421

Where’d the other ~200 hours go?
 
Where’d the other ~200 hours go?
About 160 so far into the fuselage, then a few scattered around engine, prop, wiring, and general research.
 
your build logbook has surpassed your flying logbook. for now, of course.
 
your build logbook has surpassed your flying logbook. for now, of course.
not quite...1017 TT. It's going to happen soon though.
 
Finally finished chapter 26 tonight. All floor ribs riveted in. 27 & 28 are already done, so i get to jump to 29, where we join the front and rear halves of the cabin and put the side skins on. Pretty soon I'll be able to sit in it and make airplane noises.

IMG_20260107_192956784.jpg

Over the last few days, I discovered that Van's doesn't supply the main chassis harness or an instrument panel blank. That got me thinking about wiring and avionics. After some research, it appears that there is a chunk of money to be saved constructing the main harness yourself instead of buying it, and then you can modify it to suit your options. There's a fair number of unused wires depending on garmin vs. dynon and other stuff that you might or might not install, as well as wires that I would've had to move and/or lengthen anyway.

That led to the idea of making custom wiring diagrams, and.... today I really got a handle on how big a project this is. I spent probably 6 hours today just drawing the wings, tail, and about 15% of the fuselage in an online program called Skywire. The free version is working well for the the chassis wiring, and they offer a paid version that pre-populates the connectors for most avionics. That will be handy when I get to the panel. Thankfully the g3x canbus seems to simplify things a lot.

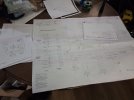
The big multi-page one is the van's "stock" harness that I'm working off as a starting point. I'm kind of enjoying this process too. Not sure what that says about me.

17678377663611281842305642012916.jpg
 
Wires can be fun. Until they turn brown and start smoking. Although some people like that kind of fault finding.
Consider using PTC self-resetting fuses in place of circuit breakers. Cheaper, lighter weight, higher installation density. Cons: they can't be manually opened, so no different from a 1960s-70s Cessna or Piper.

There's a fair number of unused wires depending on garmin vs. dynon and other stuff that you might or might not install
Add between 5 and 10% spare wires. They'll come in handy some day.
 
Are you pre wiring for an eventual auto pilot?

Got a panel already designed/finalized?
 
Are you pre wiring for an eventual auto pilot?

Got a panel already designed/finalized?
Yes, I plan to install the A/P with all the other avionics, and the pre-fabbed harnesses that came with the wings and tail have wires for the servos.

No, panel design isn't done, that's my next "indoor" project. Garmin has 2D and 3D models of all their stuff, so I'm going to see if I can put it together in Fusion. I'm also planning to print out the fullsize 2D models and tape them to a cardboard panel to see what it looks like. That will also be fun to have when I'm sitting in it and pretending to be flying. That's how they train for jets, right? :biggrin:

I also need to figure out what needs physical switches, what Garmin can and can't control, which switches are actual switches and which ones are just inputs for the avionics, what type of switches to use, where they go, what needs to have breakers/fuses, whether I want breakers or fuses and what type, backup batteries, then that starts to tie into FWF stuff like ignition, alternator, EIS .... Building the airframe is starting to look like the easy part, at least if you don't want to outsource all this stuff. It is fun starting with a blank slate though, and I'm learning a lot, which is kind of the point.
 
Last edited:
…whether I want breakers or fuses and what type, …
I’ve always been intrigued by the Vertical Power Electronic Circuit Breaker System. I dislike pull-type breakers.
 
Hey! Let’s all chip in at Rough River and design the panel - at 1:00 am in the middle of the festivities. I’m sure clear heads will provide a great layout! IMG_1266.jpegIMG_1267.jpeg
 
You may be wise to design for specific electronics, but do not buy any of it until near installation time.

A friend bought his ideal, state of the art electronic suite at about the midpoint of his construction. He was an airline pilot, and knew what he desired, and what brands and exact products would provide it.

He did not knows the construction time rule, 90% done, 90% left to do, time wise.

When it came time to mock up the panel, and finalize the wiring, his expensive boxes were both out of warrantee, and obsolete; resale was difficult, both in finding customers, and negotiating prices.

On a more positive note, I continue to be very impressed with your rate of progress, and quality of build. As a child, I was expected to take an active role in the work of the home, and feel strongly that such activity is a valuable part of becoming a strong adult, I applaud your use of your children in the plane construction.

Be sure to have their names inside the plane in places that can be seen when inspection panels are removed! They do own part of it and should be able to show that to friends in the future. Their pride is just as strong as yours.

I still remember with pride helping my grandfather replace the roof on half of his house when I was just 8 years old.
 
I’ve always been intrigued by the Vertical Power Electronic Circuit Breaker System. I dislike pull-type breakers.
I agree it's pretty cool. I'm not certain I want to add that level of complexity. I have nightmares of the VPX computer failing and losing everything electrical. Probably irrational. I'm not saying I definitely won't go that route, but I'm leaning against it currently.

I kind of like the pullable breakers, but they're big and expensive.

Fuses retain the pullable feature and are light and cheap, but feel kind of outdated. The difficulty in "resetting" them is a feature, not a bug.
Hey! Let’s all chip in at Rough River and design the panel - at 1:00 am in the middle of the festivities. I’m sure clear heads will provide a great layout! View attachment 148828View attachment 148829
Only if you chip in to pay for it, too :biggrin:
 
I don’t know the science or accepted practice (EAA?), but seems like if I’m sitting in a partially constructed cockpit, I’m going to close my eyes and picture where things are as they “naturally” pop into my head - where will my eyes go and my hands reach out to first. I would think it’s closely tied to the configuration of what plane you learned on and what plane you fly. Ergonomics and logic play a role, but I would think that your own tendencies based on experience should play a role in making the most efficient, effective, and safest layout (think IMC, distraction, emergency, etc).
 
I don’t know the science or accepted practice (EAA?), but seems like if I’m sitting in a partially constructed cockpit, I’m going to close my eyes and picture where things are as they “naturally” pop into my head - where will my eyes go and my hands reach out to first. I would think it’s closely tied to the configuration of what plane you learned on and what plane you fly. Ergonomics and logic play a role, but I would think that your own tendencies based on experience should play a role in making the most efficient, effective, and safest layout (think IMC, distraction, emergency, etc).
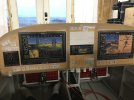
In my RV-14, I made a big piece of paper for the panel and then printed out the avionics mock-ups and switches with labels, then went through various scenarios. I ended up moving some switches around as a result. This was obviously informed by my flying experience up to that point as well as to the things I was doing my own way in this plane. My panel is better because of the time I spent sitting in the half-finished fuselage kit making airplane noises.
 
In my RV-14, I made a big piece of paper for the panel and then printed out the avionics mock-ups and switches with labels, then went through various scenarios. I ended up moving some switches around as a result. This was obviously informed by my flying experience up to that point as well as to the things I was doing my own way in this plane. My panel is better because of the time I spent sitting in the half-finished fuselage kit making airplane noises.
Nice - could you post a picture?
 
I have nightmares of the VPX computer failing and losing everything electrical. Probably irrational. I'm not saying I definitely won't go that route, but I'm leaning against it currently.
Read as much as you can on the VPX. There's been a lot of discussion on the usual RV sites. It came well after I did my first electrical system, but even if it were available I would not have used one and will not in the future.

Fuses retain the pullable feature and are light and cheap, but feel kind of outdated. The difficulty in "resetting" them is a feature, not a bug.
Bob Nuckolls' "AeroElectric Connection" was my bible when doing my wiring design and I refer to his basic wiring diagrams frequently. His insistence on simplicity and reliability resonated with me. Per his philosophy, I use fuses on every non-essential circuit and breakers on the essential ones. As such, I have a lot of fuses and a single breaker. This is an IFR-capable panel with significant redundancy and no autopilot.

Nauga,
fused but not broken
 
Last edited:
I'm more impressed with the kids willingness to help more than anything. Especially the girls. Come to think of it, I don't think ive seen the boy buck a rivet yet... Granted I have zero experience with kids and my point of reference is my sister who absolutely wouldn't be caught dead holding a rivet gun or doing any sort of manual labor ever.

Regardless... Well done Dad!
 
Back
Top