Windshield polishing

Getonit

Line Up and Wait
Joined
Apr 15, 2013
Messages
500
Display Name

Display name:
Mark
Has anybody done this?
I have seen the repair kits, but curious about real world experiences.
I currently have pretty clean glass, but some scratches that can be seen and interfere with vision just a tiny bit. What I don't want to do is F it up and make it worse.
 
I have used the Novus series of polishes on my RV's canopy. I have never gone full gonzo to remove the (very few) deeper scratches, but I can do the windscreen and the whole sliding canopy in an hour or two and it makes the smaller scratches much less noticeable.
 
Has anybody done this?
I have seen the repair kits, but curious about real world experiences.
I currently have pretty clean glass, but some scratches that can be seen and interfere with vision just a tiny bit. What I don't want to do is F it up and make it worse.

Use a vary speed angle grinder with a felt pad covered with a terry cloth bonnet. go slow and never allow it to get hot. You'll do OK. when you use McGuire's products.
It is the same as polishing a clear coat on your car.
 
I'll second the Novus kit for removing scratches. Won't unfog a fogged window, but will remove scratches.
 
Mark

I have also used the Meguiras products. Apply and polish is shaded area. I start with the Meguiars #17 cleaner and finish with Mequiars #10 polish. Each available at Aircraft Spruce for about $7.00 a bottle.

I use a 7" air grinder with a foam pad, the pad has two sides and has a quick release. Release pad and flip over. As Tom says don't get hot and use a slow speed.

I park outside and use a canopy cover and small scratches occur over time. I apply at least once a year.
 
We're talking about two different processes here. One you fill the scratch in with a waxy substance and buff it out, scratch is still there but remains invisible for a period of time at which point you rinse and repeat. Second is where you remove material to blend the scratch out permanently. Takes considerably more effort and some skill.
 
I'll second the Novus kit for removing scratches. Won't unfog a fogged window, but will remove scratches.

And will leave a distorted area of magnification. best is to buff it out with a 7" angle grinder with the pads I mentioned above.
 
lg.jpg


Try to find a buddy with one of these. You cannot burn anything with it.

I get pretty good results and I'm a novice. It'll do windshields. :yes:


lg.jpg


Try to find a buddy with one of these. You cannot burn anything with it.

I get pretty good results and I'm a novice. It'll do windshields. :yes:


Yes those are nice, I like the one lying on the floor. ( It's a me thing)
 
We're talking about two different processes here. One you fill the scratch in with a waxy substance and buff it out, scratch is still there but remains invisible for a period of time at which point you rinse and repeat. Second is where you remove material to blend the scratch out permanently. Takes considerably more effort and some skill.
Is there a limit as to how much material can be removed? And how would you measure that?
 
And will leave a distorted area of magnification. best is to buff it out with a 7" angle grinder with the pads I mentioned above.

And using a 1/2 inch open end wrench will result in rounded off bolt heads. Not true if used properly.
 
Has anybody done this?
I have seen the repair kits, but curious about real world experiences.
I currently have pretty clean glass, but some scratches that can be seen and interfere with vision just a tiny bit. What I don't want to do is F it up and make it worse.

The Micromesh kit is awesome for the inexperienced as well as experienced user. An experienced user who has a buffer can skip a third of the steps, but even the inexperienced user gets all the required material and instructions to produce a superlative result. There is crazing and such that is not repairable, but if you do the window inside and out (hazing is an 'inside' the glass issue which has mixed results, but never worse, addressing with a Micromesh kit.) you will end up with as good of results as you can get with no scratches left.

The key to using the kit is that it has elements to fix bad stuff, typically worse than you have, and is more aggressive than you need, so test which material you should start with, and choose the least aggressive that gets to a clean base with moderate effort. Then just keep working up in grades until you see about 70% of it at the new texture, then switch to the next finer. As you get to the last 2 grades, you increase your coverage percentage to 85% then full coverage with the final. This preserves the maximum amount of plastic while still getting the optimum result, which means it's also the least work to get the optimum result.

I always keep a kit in my plane.
 
Last edited:
The Meguiar's products work well, I use the cleaner wax after almost every flight with a microfiber towel.

As to the OP's actual question, a variable speed polisher with extremely fine compound works well, (so does the cyclo I just don't feel as in control) but keep it moving and make sure that the pad is CLEAN!! One little burr can get ugly in a hurry, I have seen it happen. :hairraise:
 
lg.jpg


Try to find a buddy with one of these. You cannot burn anything with it.

I get pretty good results and I'm a novice. It'll do windshields. :yes:


The one with the single round pad is the one responsible for that, not the orbital thing.
 
Is there a limit as to how much material can be removed? And how would you measure that?

Yes, what the limit is I can't tell you, but there is always a specification for continued airworthiness and repair damage published somewhere if the thing is on a plane. Typically you gauge thickness on a blind surface with a little ultrasonic gauge.
 
And will leave a distorted area of magnification. best is to buff it out with a 7" angle grinder with the pads I mentioned above.

No distortion if you do it right. That's where the skill comes in.

I'd hesitate to tell a novice to use a grinder for buffing a canopy. If it's only light scratches you're trying to hide, buff it by hand. This isn't like polishing an aluminum wing or fuselage.
 
No distortion if you do it right. That's where the skill comes in.

I'd hesitate to tell a novice to use a grinder for buffing a canopy. If it's only light scratches you're trying to hide, buff it by hand. This isn't like polishing an aluminum wing or fuselage.

Yep, a novice is best served by a Micromesh kit, just work it step by step by hand, it really isn't that much work to do the whole thing well, just work with warm, slightly soapy (I use half of what I would use for dishes in bucket with 2-3 gallons of hot/warm water and Palmolive) water, and I dunk a sponge in it and let it drool down from above where I'm working. This minimizes effort and optimizes result. You do need a towel to wipe it and judge how much coverage you've achieved.

Really, doing the outside of a windshield is easy. Doing the inside is downright painfull and requires a little duct tape, plastic, and a shop vac, for water control. I did it once on a work plane that was horrible and the owner wouldn't spring for a new one. I got a 70% improvement which made it tolerable, but I'll never do it again. For the effort and pain I went through, **** it, I'll buy a new windshield myself and install it. It would have been less work, and I could have gotten way more pleasure for my pain $$$ with Helga down at The Chamber.
 
Last edited:
The one with the single round pad is the one responsible for that, not the orbital thing.

Negative. The single pad buffer is used at low speed for the initial compounding which is normally only done once. The Cyclo is 100% responsible for the shine. There is a specific, well known process to this and the Cyclo (along with Nuvite) is by far the most preferred polisher on the market.
 
Negative. The single pad buffer is used at low speed for the initial compounding which is normally only done once. The Cyclo is 100% responsible for the shine. There is a specific, well known process to this and the Cyclo (along with Nuvite) is by far the most preferred polisher on the market.

Then you're using the buffer wrong and working way harder than you need to.:rofl: You'll not see a real polishing pro polishing metal with an orbital, they're amateur tools.
 
The one with the single round pad is the one responsible for that, not the orbital thing.


It's that shiny after the orbital. The buffer I use just to remove any remaining residue and give it a little more sheen, but I don't know where you're coming from on this point.

The buffer is unnescessary.

You can use the orbital with a buffing pad or drape a micro-fiber towel over the pads and polish with it. Or give it a final hand rub with a micro fiber, but you're dead wrong on this point.
 
No distortion if you do it right. That's where the skill comes in.

I'd hesitate to tell a novice to use a grinder for buffing a canopy. If it's only light scratches you're trying to hide, buff it by hand. This isn't like polishing an aluminum wing or fuselage.

If you are not smart enough to wash the window first, you probably should not be near the aircraft in the first place.

That's probably why I see so many windows that already have a distortion people are not skilled enough.
 
You can't just remove material, and keep removing material, until it fails structurally.

yes you can, there is no limit written anywhere, common sense dictates. And remember if an A&P has never done it before they are not allowed to do it with out supervision or training.
So, If you don't know how, don't have an A&P that knows how, who will make the return to service entry?
 
Negative. The single pad buffer is used at low speed for the initial compounding which is normally only done once. The Cyclo is 100% responsible for the shine. There is a specific, well known process to this and the Cyclo (along with Nuvite) is by far the most preferred polisher on the market for metal.

FTFY...
 
It's that shiny after the orbital. The buffer I use just to remove any remaining residue and give it a little more sheen, but I don't know where you're coming from on this point.

The buffer is unnescessary.

You can use the orbital with a buffing pad or drape a micro-fiber towel over the pads and polish with it. Or give it a final hand rub with a micro fiber, but you're dead wrong on this point.

:rofl::rofl::rofl: The orbital is unnecessary, the buffing machine would do the whole job in 1/3rd of the time and 1/4 the effort if you put on a rag wheel and use it first, then use that pad to clean up. Personally I prefer good old rouge sticks for initial polishing, and Flitz for final/maintenance polishing. I promise you, I polish FAR more metal than you and maintain it in far harsher environments. I do it professionally, I do not waste time or effort, I use the fastest simplest, lowest cost material that make people go "wow" and pay my ass very well for my work.

Orbitals are more work than they are worth. Use the same materials with the flat pad first, and the same result you have there happens at 2sq every 3 seconds. Don't turn the speed down either, full speed, just keep it moving and don't make hot spots. If something isn't coming out, apply more compound.

Polishing bare metal though is best done with a rag wheel, I prefer linen and denim. I can rock down a rail with a rag wheel about 3' every 15 seconds doing top, bottom, and support stubs and joints.
 
Last edited:
Do any of these processes/products help with crazing?

Negative, crazing requires replacing to get rid of. You can potentially lessen the optical effects with penetrating coatings, but I was not particularly impressed by the results or cost of the stuff, but someone was hawking it at S-n-F a while back.
 
LOL, I've worked at an airline where we evaluated cockpit side windows, doors windows and pax cabin windows using an optical micrometer to determine depth of crazing and we repaired windows that were within MM limits.

Show me the limits for a 172 windshield. or a PA 28. We are not talking the heavies here, and besides who has a optical mike? Gotta keep it real :)
 
:rofl::rofl::rofl: The orbital is unnecessary, the buffing machine would do the whole job in 1/3rd of the time and 1/4 the effort if you put on a rag wheel and use it first, then use that pad to clean up. Personally I prefer good old rouge sticks for initial polishing, and Flitz for final/maintenance polishing. I promise you, I polish FAR more metal than you and maintain it in far harsher environments. I do it professionally, I do not waste time or effort, I use the fastest simplest, lowest cost material that make people go "wow" and pay my ass very well for my work.

Orbitals are more work than they are worth. Use the same materials with the flat pad first, and the same result you have there happens at 2sq every 3 seconds. Don't turn the speed down either, full speed, just keep it moving and don't make hot spots. If something isn't coming out, apply more compound.

Polishing bare metal though is best done with a rag wheel, I prefer linen and denim. I can rock down a rail with a rag wheel about 3' every 15 seconds doing top, bottom, and support stubs and joints.


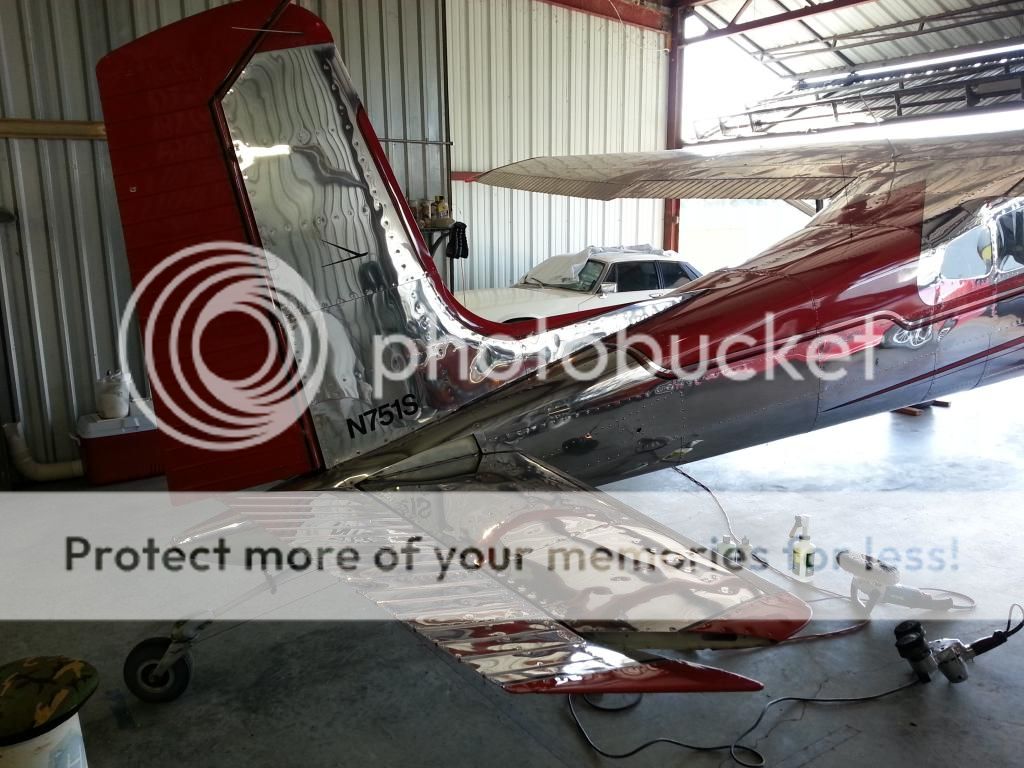
Whatever H. :rolleyes:

As usual, if someone asks the time, you build them a watch.

My original point was a novice will not burn metal with an orbital. But you can with a high speed polisher.
 
Whatever H. :rolleyes:

As usual, if someone asks the time, you build them a watch.

My original point was a novice will not burn metal with an orbital. But you can with a high speed polisher.

Just trying to save your time and effort, what you choose to do with the information is of your free will.
 
Back
Top