My wife and I flew it 1.9 hours today. XC at 55 and 6500 under the clouds. She is such a test co pilot! Lol
You are using an out of date browser. It may not display this or other websites correctly.
You should upgrade or use an alternative browser.
You should upgrade or use an alternative browser.
Cessna flap bearings maintenance tips wanted. Other maintenance related pictures.
- Thread starter Gary Ward
- Start date
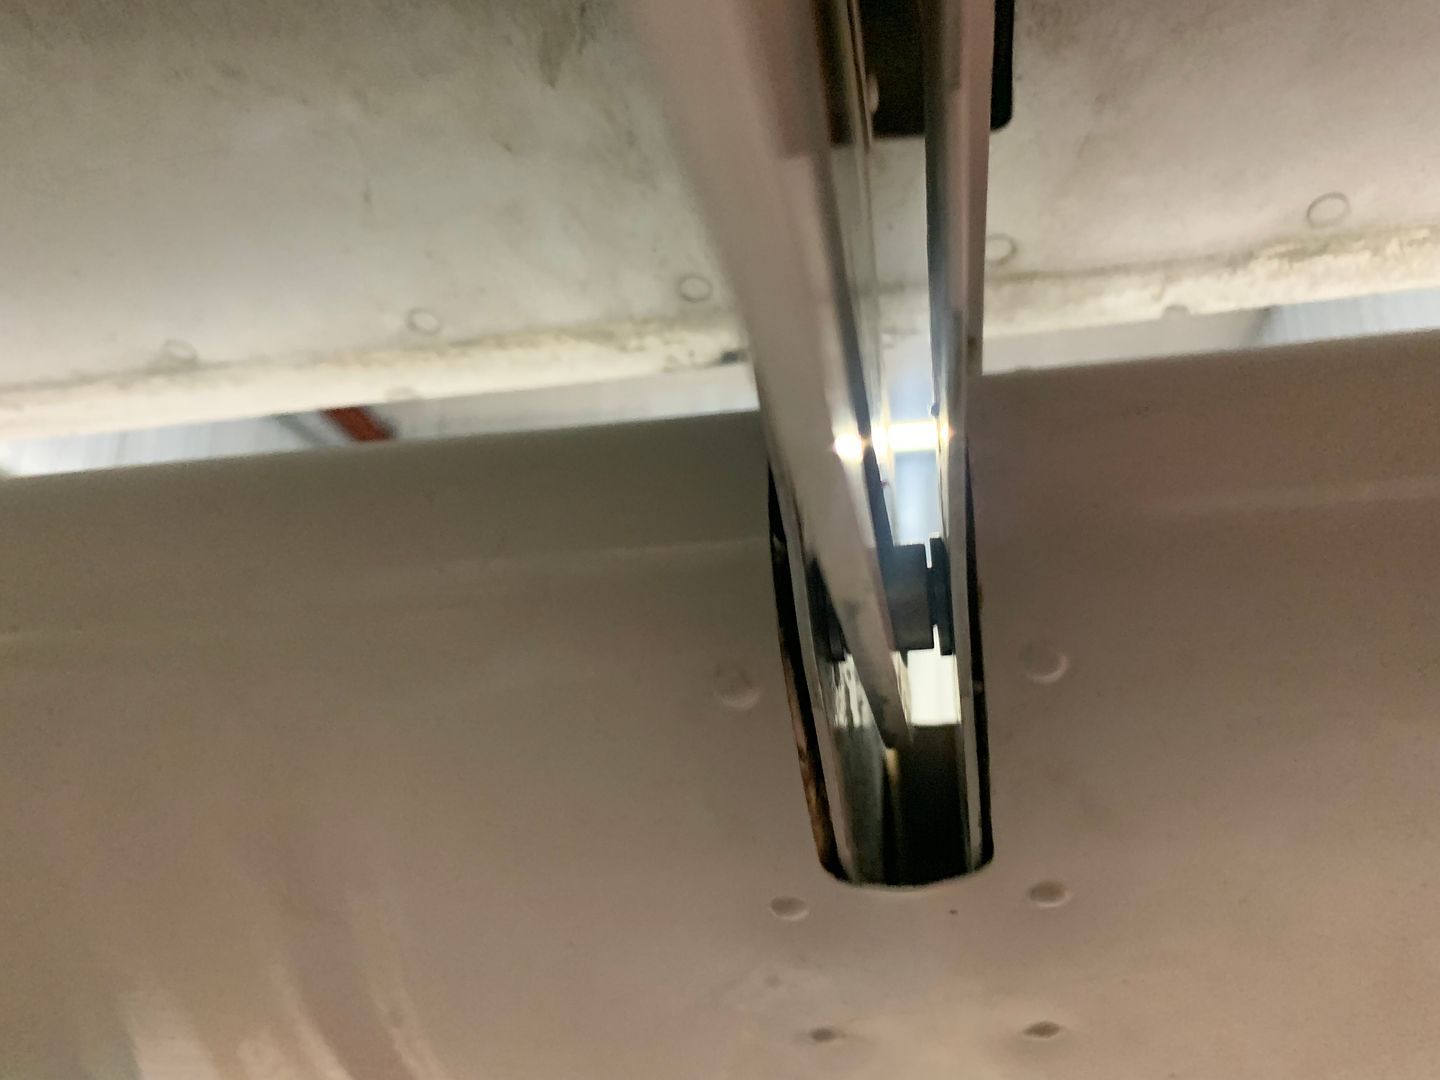
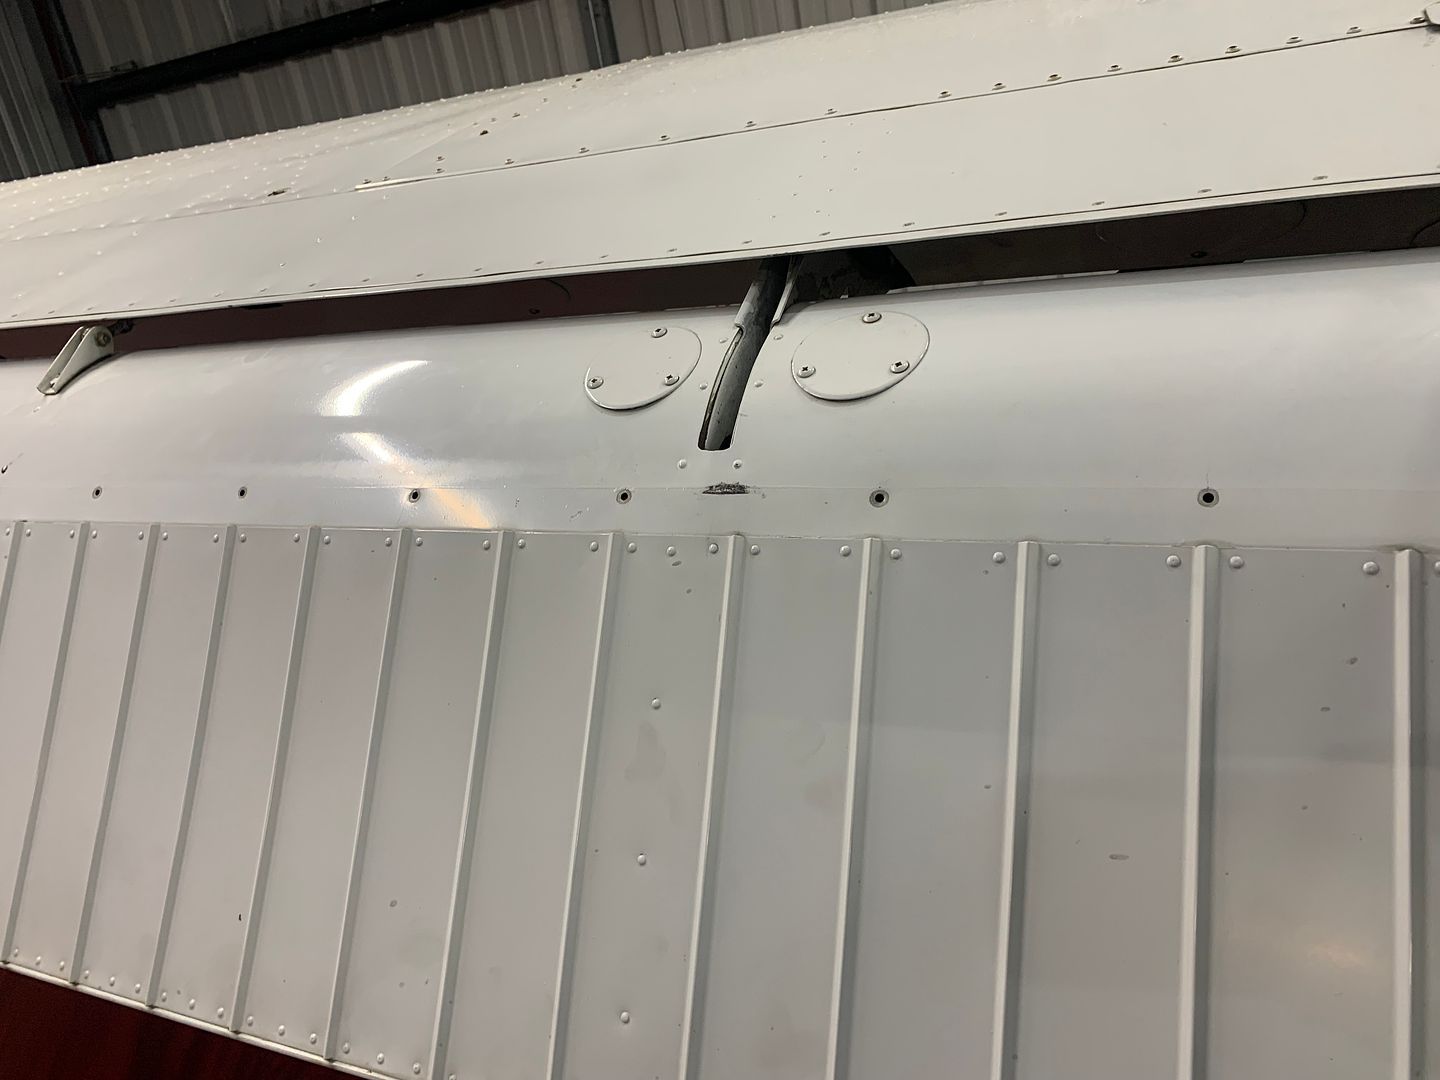
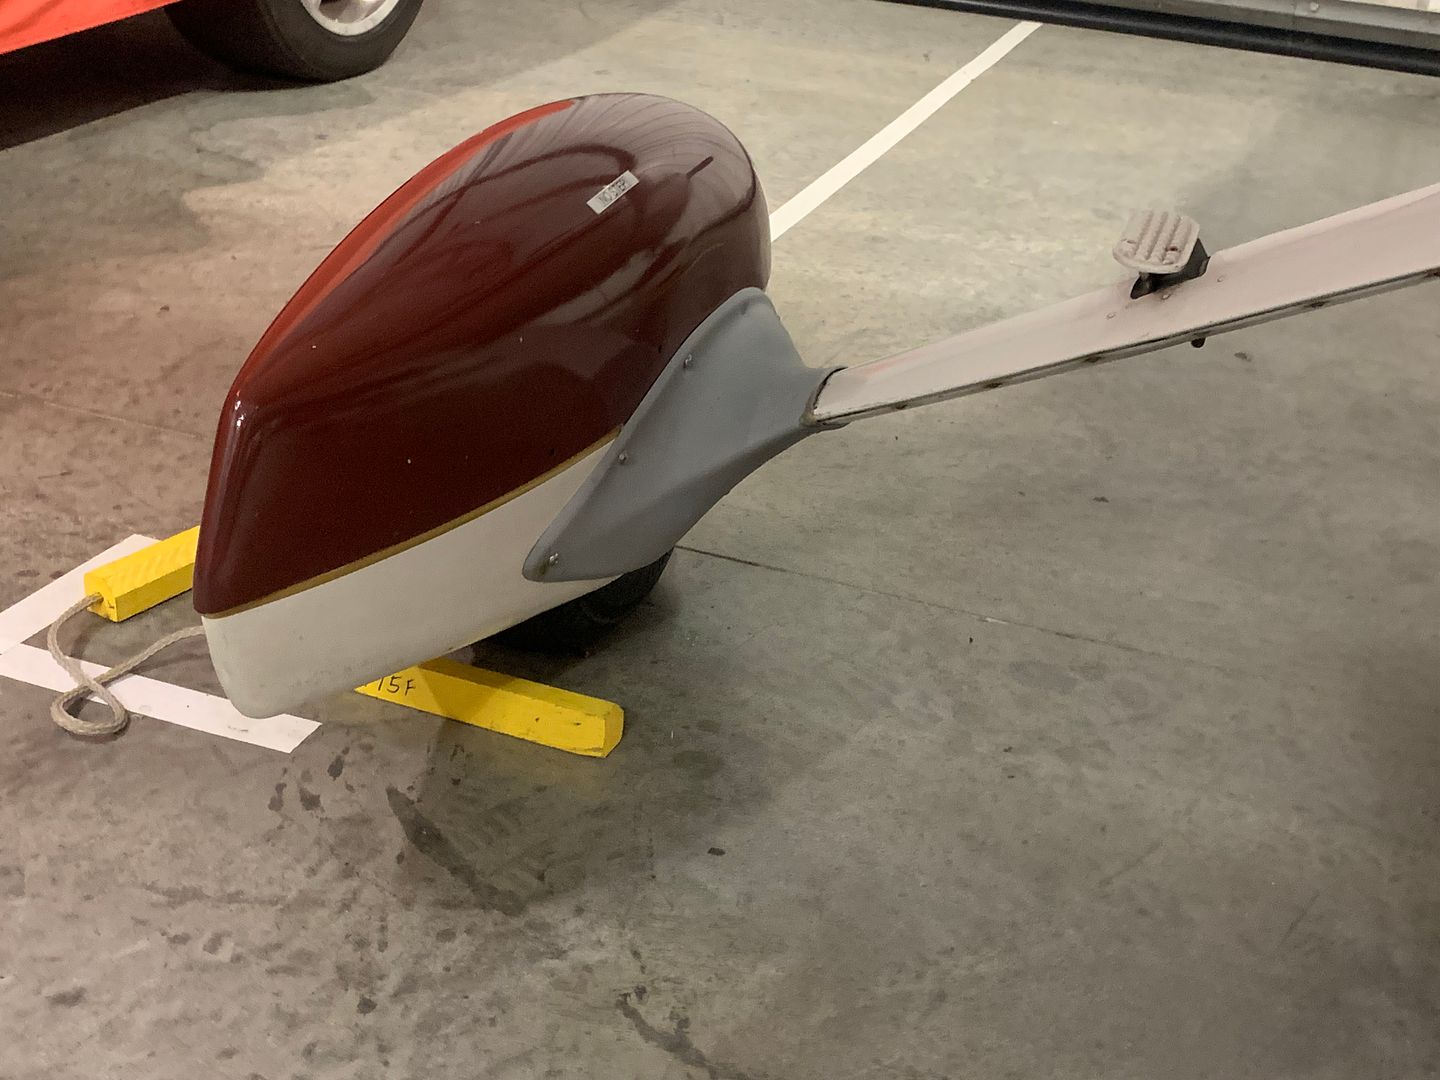
Never seen this done before. Really strange to see people doing this.This a flap actuator I took out of a Cessna R172K (Hawk XP). It is typical of mechanics who do their own thing.
View attachment 123176
The mechanics had been using the moly grease that was not applicable to this actuator; the grease is intended for the plain-screw actuators.
View attachment 123177
The microswitch was full of it. That round collar below the switch is the recirculating-ball nut. The balls run in semicircular grooves in the screw.
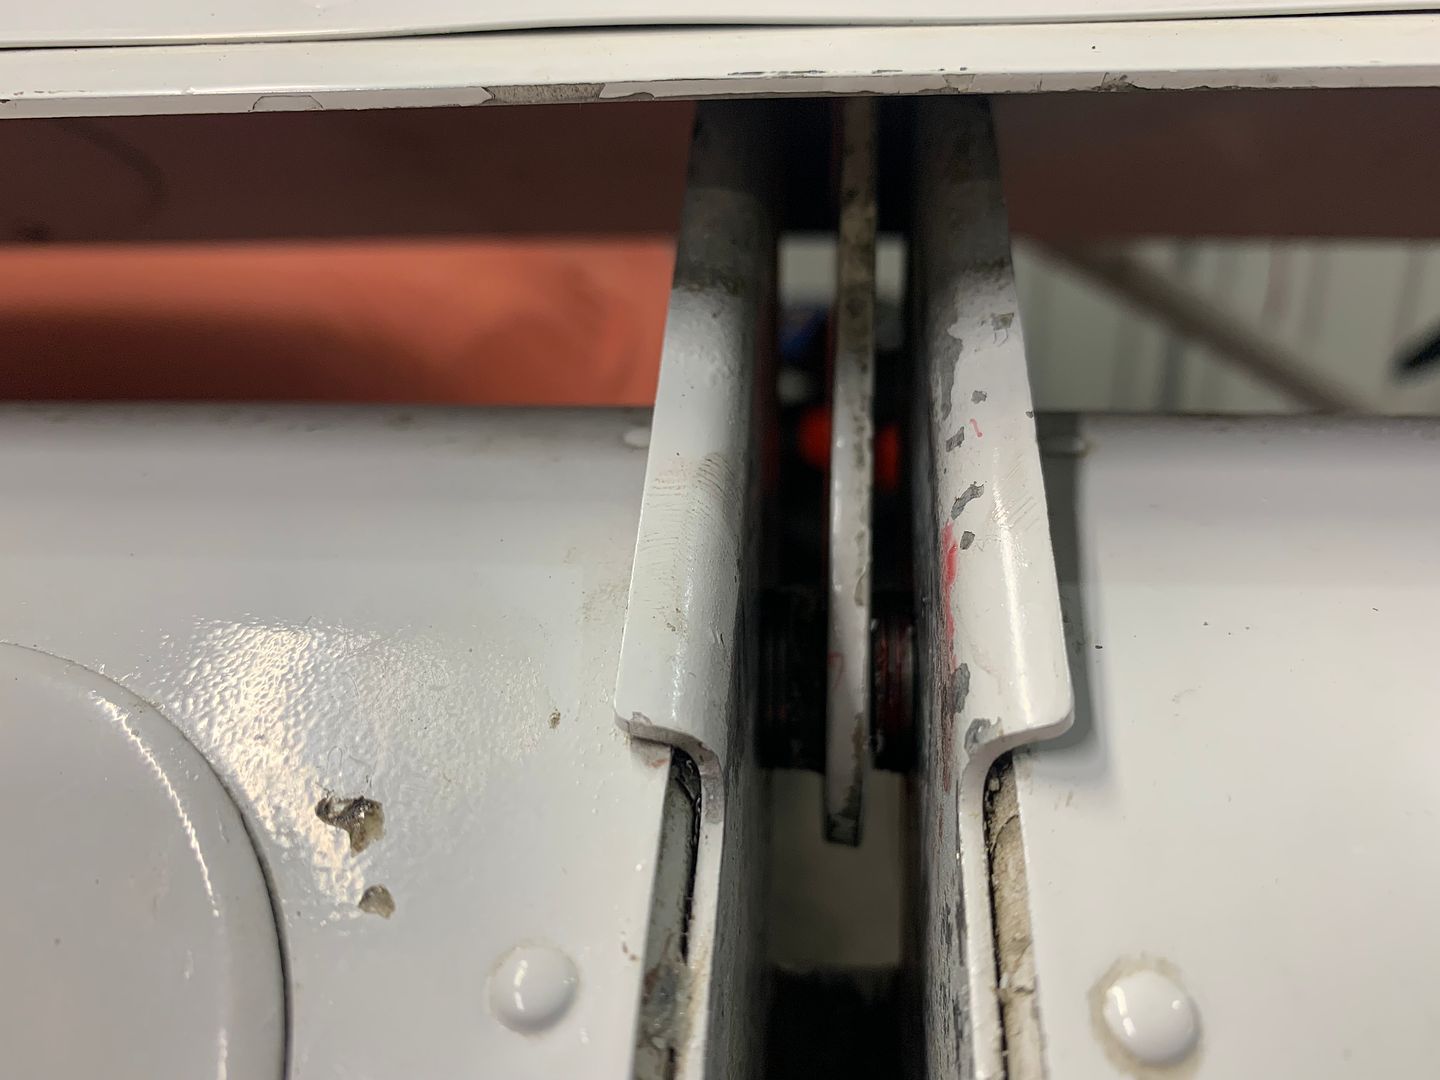
Even the electrical connectors were greasy.
View attachment 123178
Even the down-limit switch had grease on and in it, carried there by the travelling nut.
View attachment 123179
It took a long time to get the grease out of everything, especially that ball nut. Replaced connectors, and I think I may have used new switches, too, to be safe. Hard to get all that stuff out of them.
View attachment 123180
Now, if the mechanics had taken the ten minutes to read the section on jackscrew lubricating, this owner wouldn't have had to pay for a lot of shop time to correct it all.
It is common for props to have a sticker designating the type of grease to be used.
Why not here? It’s kind of a waste of time to have each Tech make a determination
of the type of lube to be used.
Correct lubrication can be critical. An example of that was the Air Alaska stab jackscrew .
Either grease could be used but they could not be mixed.
Not a happy ending.
Why not here? It’s kind of a waste of time to have each Tech make a determination
of the type of lube to be used.
Correct lubrication can be critical. An example of that was the Air Alaska stab jackscrew .
Either grease could be used but they could not be mixed.
Not a happy ending.
Capt. Geoffrey Thorpe
Touchdown! Greaser!
- Joined
- Jun 7, 2008
- Messages
- 15,635
- Location
- DXO124009
- Display Name
Display name:
Light and Sporty Guy
OK, I don't own no 172 and ain't never likely to even work on one, but I do appreciate you posting your progress with the pictures - I find this type of content very interesting.My wife and I flew it 1.9 hours today. XC at 55 and 6500 under the clouds. She is such a test co pilot! Lol
Thanks.
Dan Thomas
Touchdown! Greaser!
- Joined
- Jun 16, 2008
- Messages
- 10,769
- Display Name
Display name:
Dan Thomas
Strange to see people doing what? Screwing things up? Or fixing the screwed-up things? Neither are uncommon at all.Never seen this done before. Really strange to see people doing this.
Never seen people lube flap actuator threads.Strange to see people doing what? Screwing things up? Or fixing the screwed-up things? Neither are uncommon at all.
Never seen people lube flap actuator threads.
The real question is “ Are their actions helping or hurting?”
Dan Thomas
Touchdown! Greaser!
- Joined
- Jun 16, 2008
- Messages
- 10,769
- Display Name
Display name:
Dan Thomas
Of course not. Many shops seem to do the absolute minimum, and that's where problems start. Once the problem gets too big to ignore, it has become an awfully expensive thing to fix, much more than if the manufacturer's recommendations were followed.Never seen people lube flap actuator threads.
From a Cessna 182 manual:


Note the different lube treatments for different serial numbers or of airplanes with flap actuator modifications. That greased-up mess I posted was from a later-model airplane that should have just been lightly oiled.
Often items like carbs , mags, brakes and instruments require a stamped or
painted dot to identify the change in the configuration.
Ie. V, red and yellow dots, 64, 24 degrees etc.
Seems this should be a standard thing.
Having it readily observable would be a +.
Even if a mag glass or phone was used to enlarge.
painted dot to identify the change in the configuration.
Ie. V, red and yellow dots, 64, 24 degrees etc.
Seems this should be a standard thing.
Having it readily observable would be a +.
Even if a mag glass or phone was used to enlarge.
Ah okay I see. I didn't notice there was a serial number range for the procedure. I've only ever touched a few 182s. I see your second point and yeah it seems people got into a routine without verifying.Of course not. Many shops seem to do the absolute minimum, and that's where problems start. Once the problem gets too big to ignore, it has become an awfully expensive thing to fix, much more than if the manufacturer's recommendations were followed.
From a Cessna 182 manual:
View attachment 124203
View attachment 124204
Note the different lube treatments for different serial numbers or of airplanes with flap actuator modifications. That greased-up mess I posted was from a later-model airplane that should have just been lightly oiled.
I try to make it interesting and I learn from everyone here. Thank you.OK, I don't own no 172 and ain't never likely to even work on one, but I do appreciate you posting your progress with the pictures - I find this type of content very interesting.
Thanks.
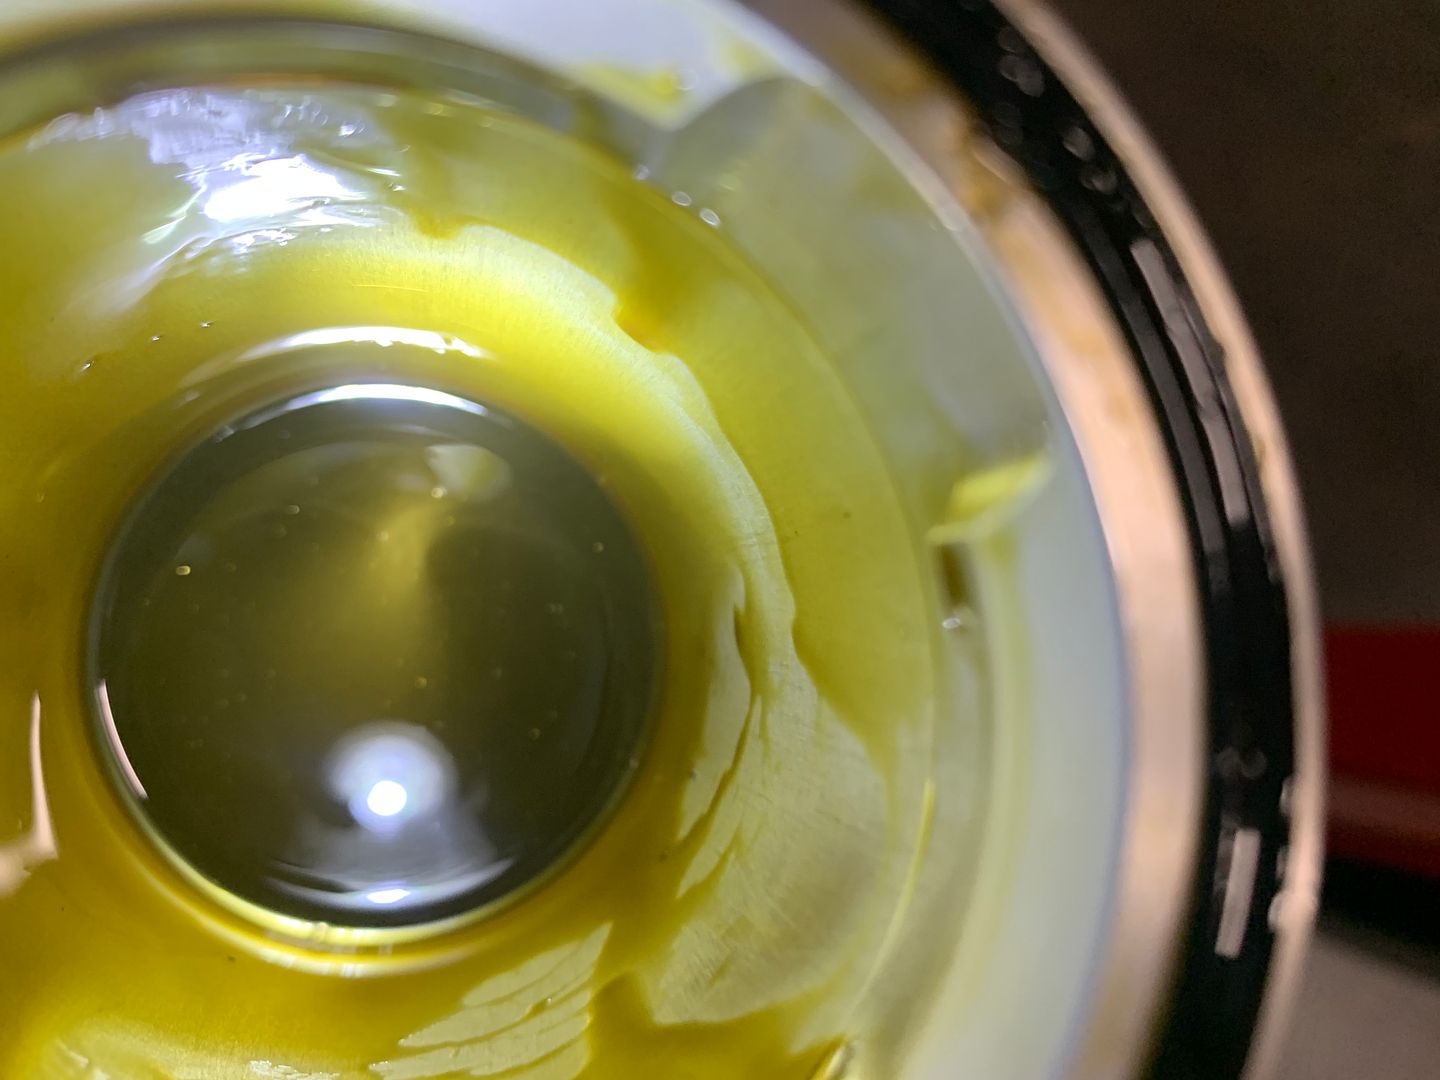
I changed my oil yesterday, it had 52.9 hrs on it. I normally change between 49-55 hrs. This is the 3 rd change with the challenger oil filter, 150 hrs of use now.

The first time it was pretty well loaded with black carbon and some metallic particles. Oil analysis came back good like always. I stick this magnetic in there and not much is stuck to it.
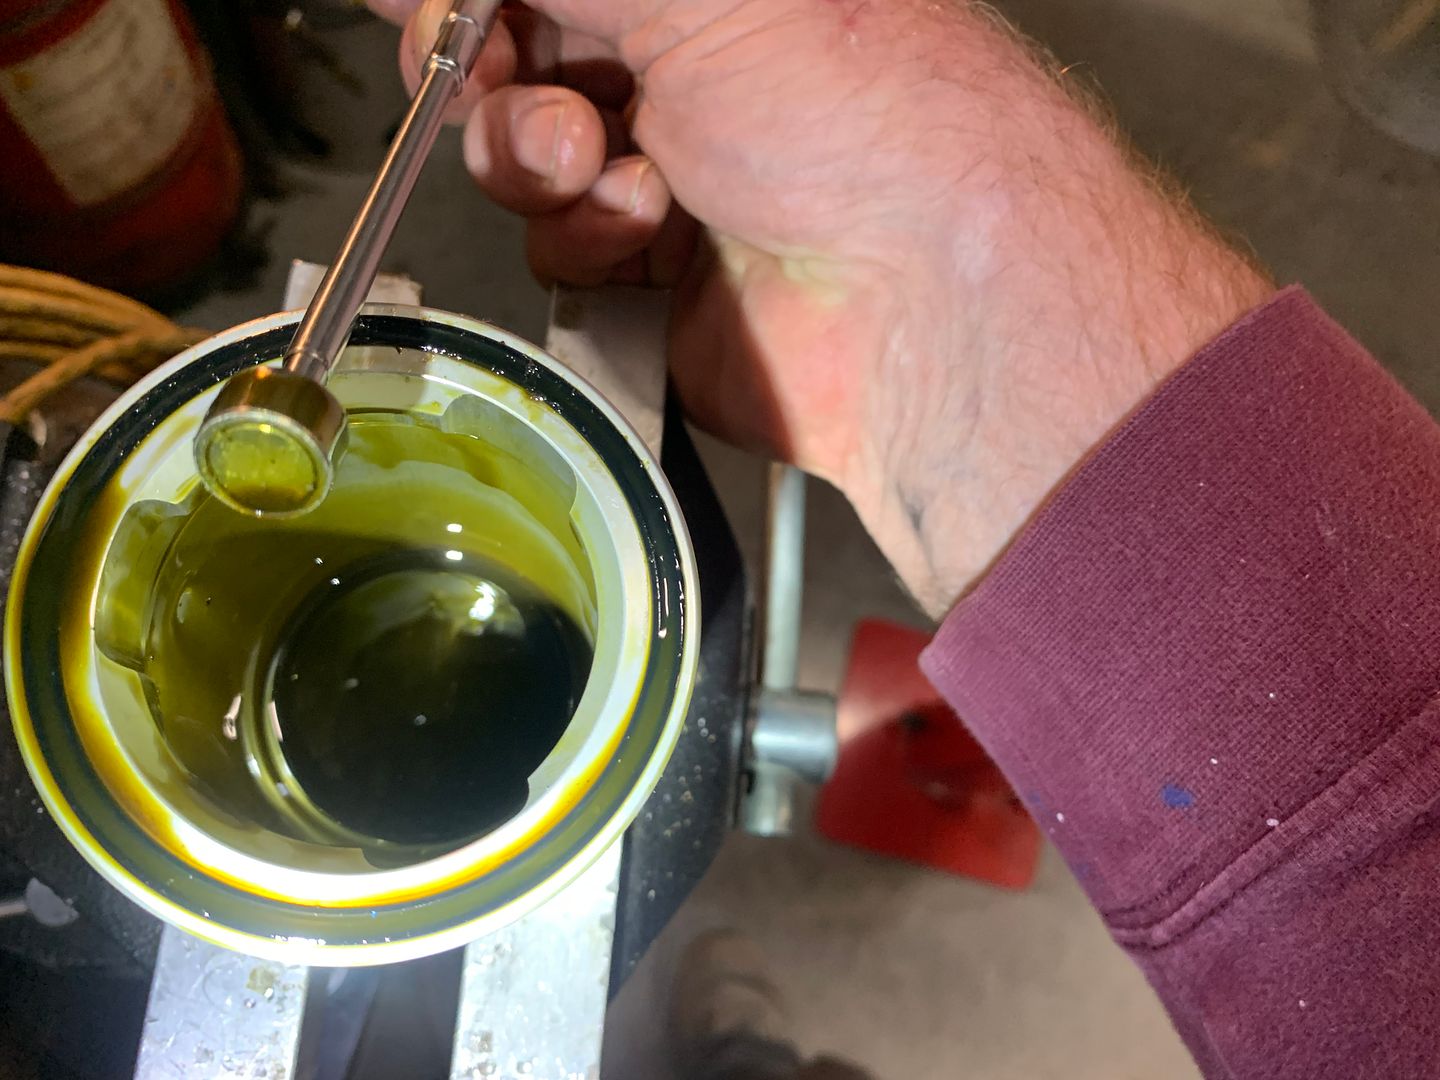
The thing I am excited about is each time it is cleaner after 50 hrs of use. This time it was the cleanest, not much black carbon. It really seems to be cleaning up my engine, the engine now has 630 hrs on it since zero time.
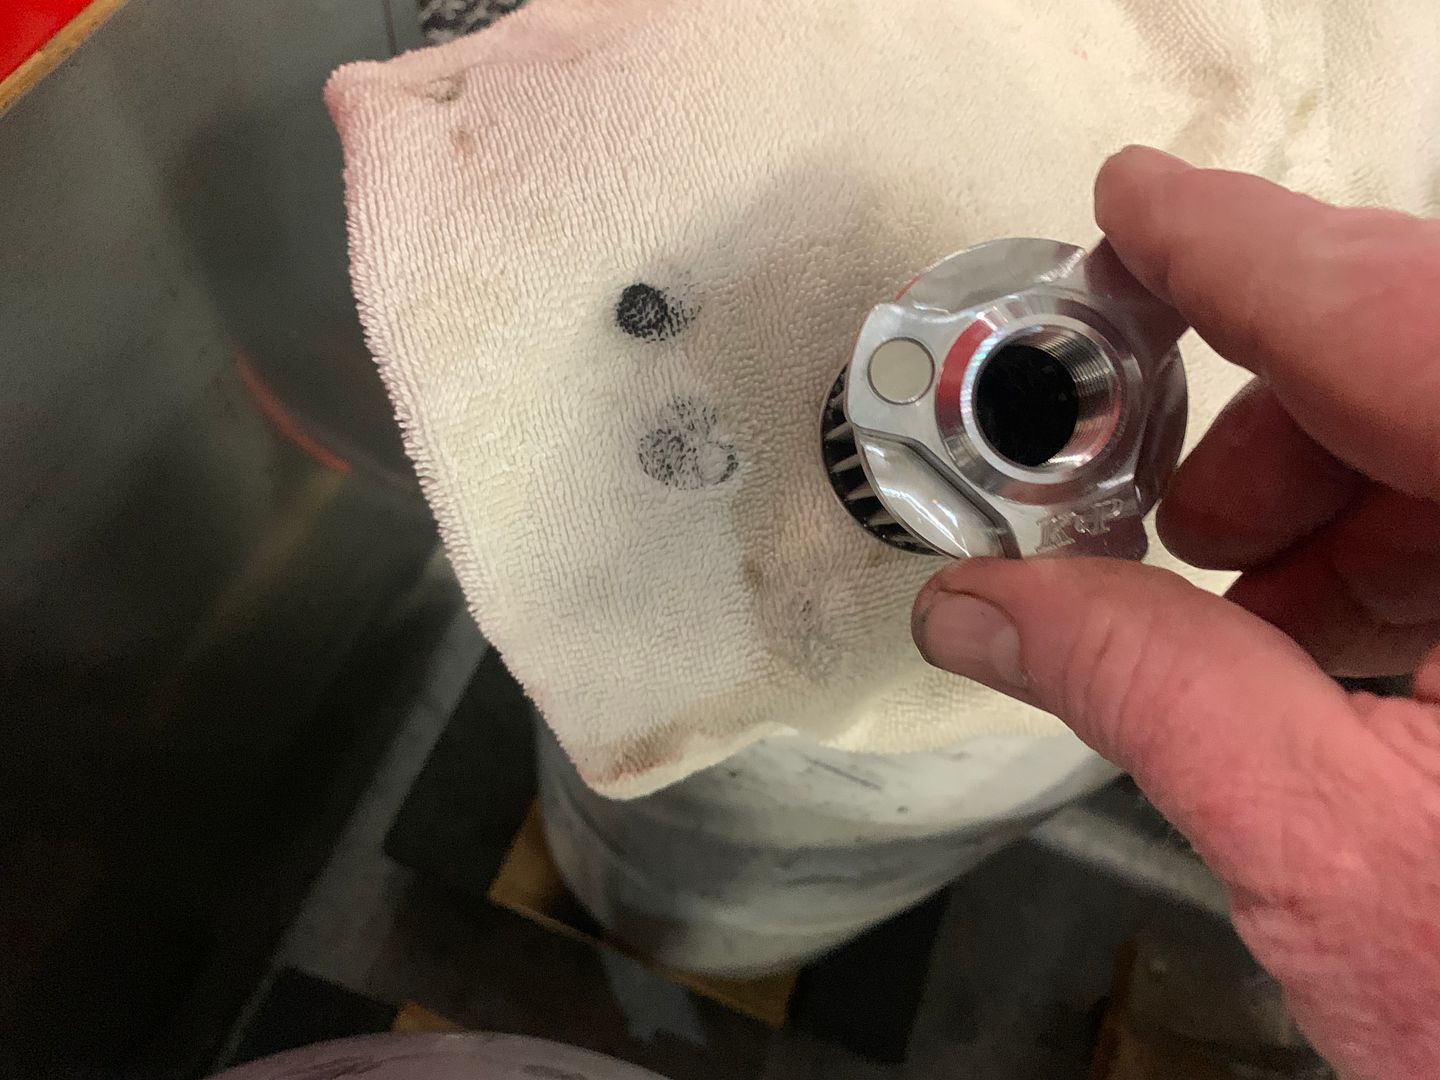
I reused the gasket twice before and I feel it could have gone another 50 hrs easy but I replaced it this time.
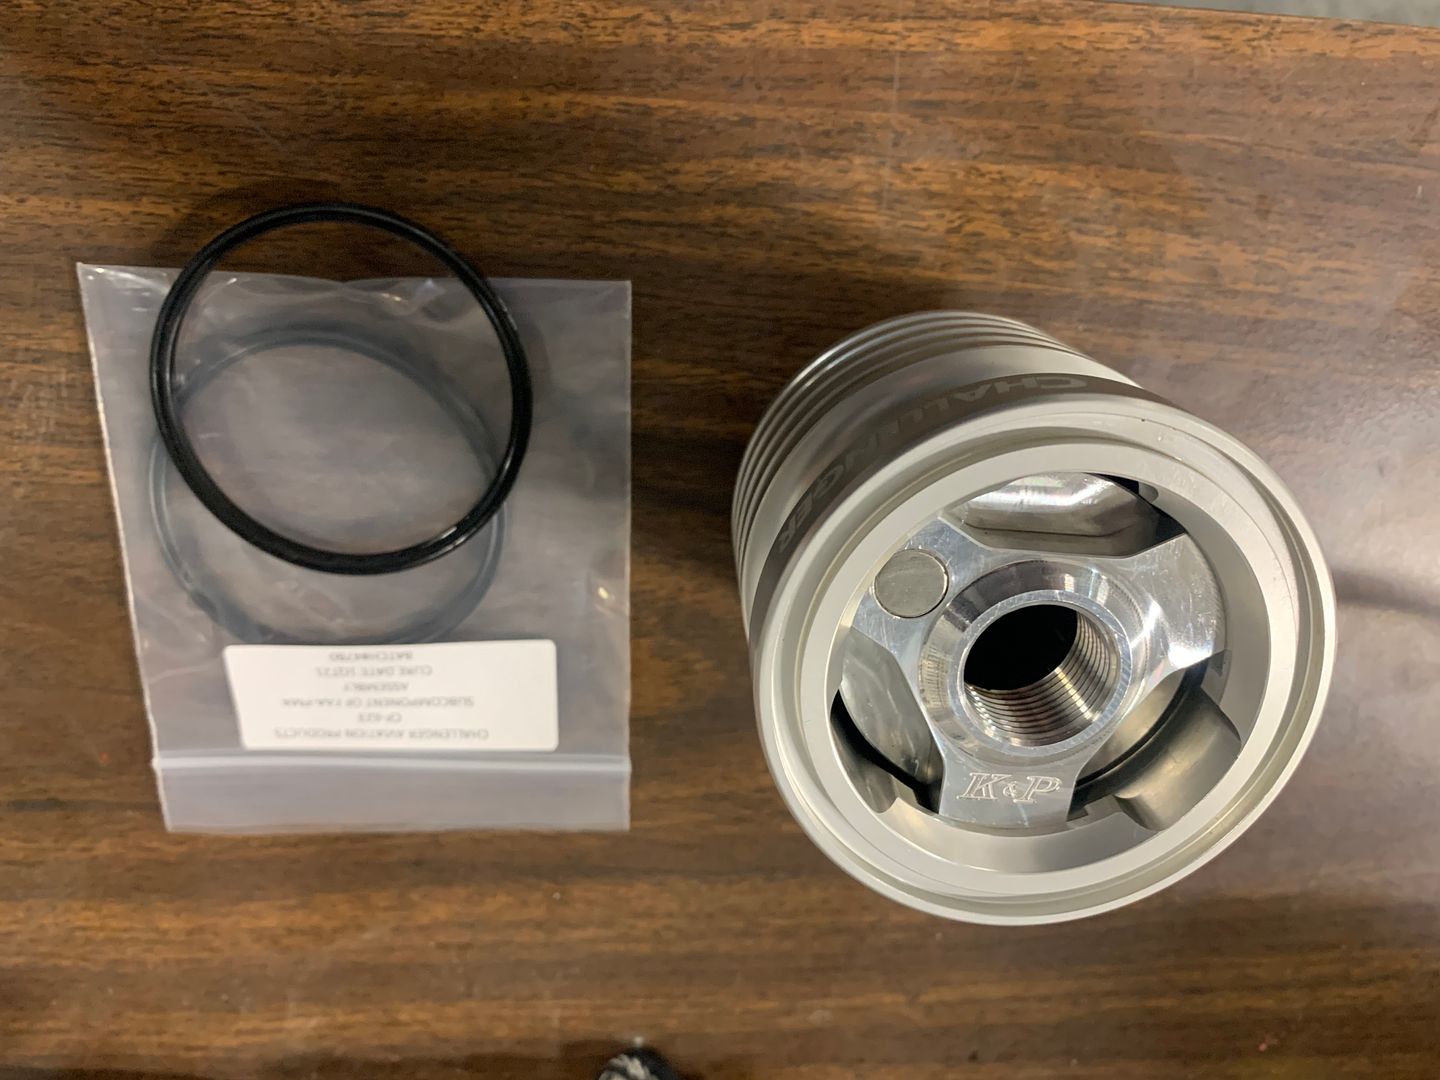
I really like this filter.
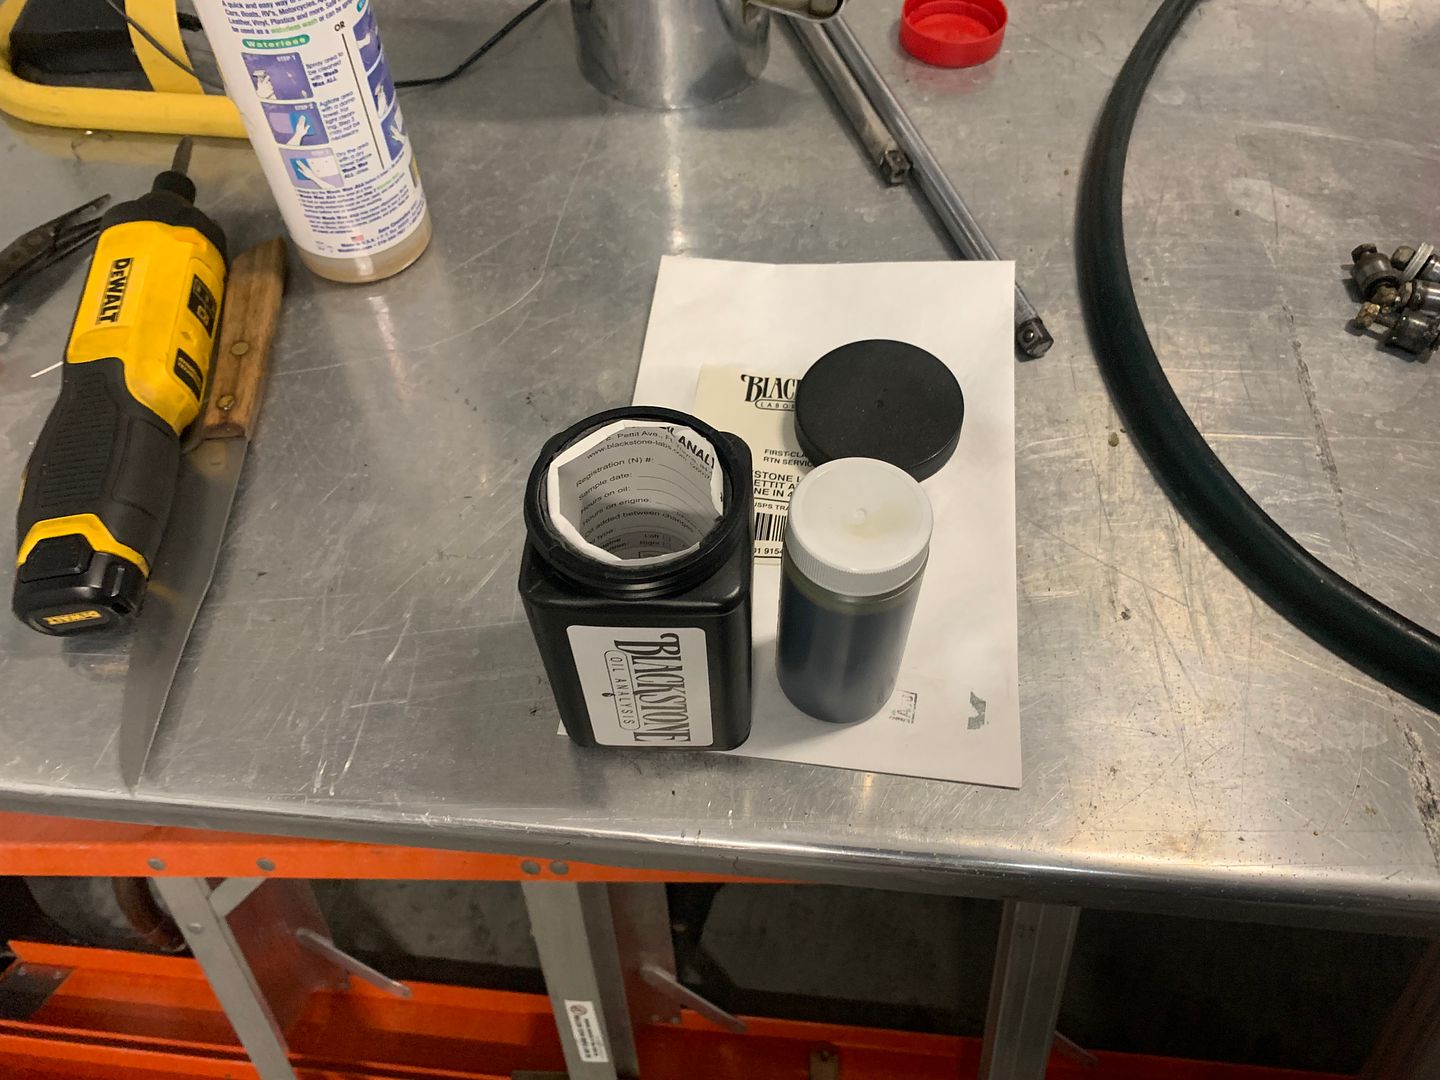
I will let you know what Blackstone says.
The first time it was pretty well loaded with black carbon and some metallic particles. Oil analysis came back good like always. I stick this magnetic in there and not much is stuck to it.
The thing I am excited about is each time it is cleaner after 50 hrs of use. This time it was the cleanest, not much black carbon. It really seems to be cleaning up my engine, the engine now has 630 hrs on it since zero time.
I reused the gasket twice before and I feel it could have gone another 50 hrs easy but I replaced it this time.
I really like this filter.
I will let you know what Blackstone says.
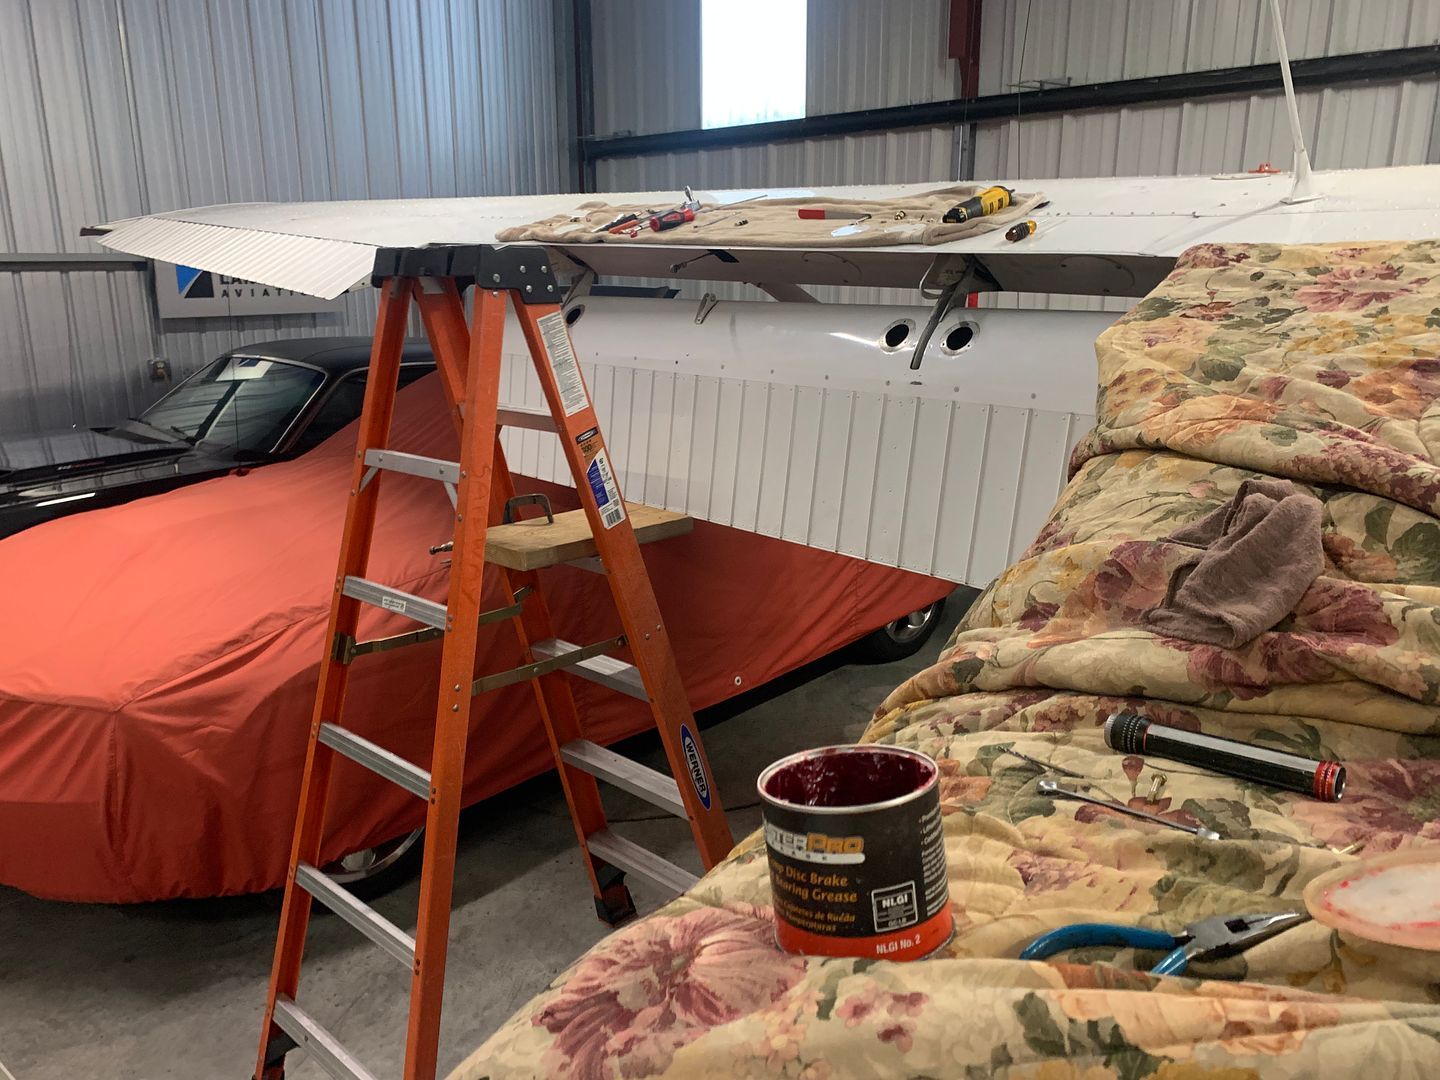
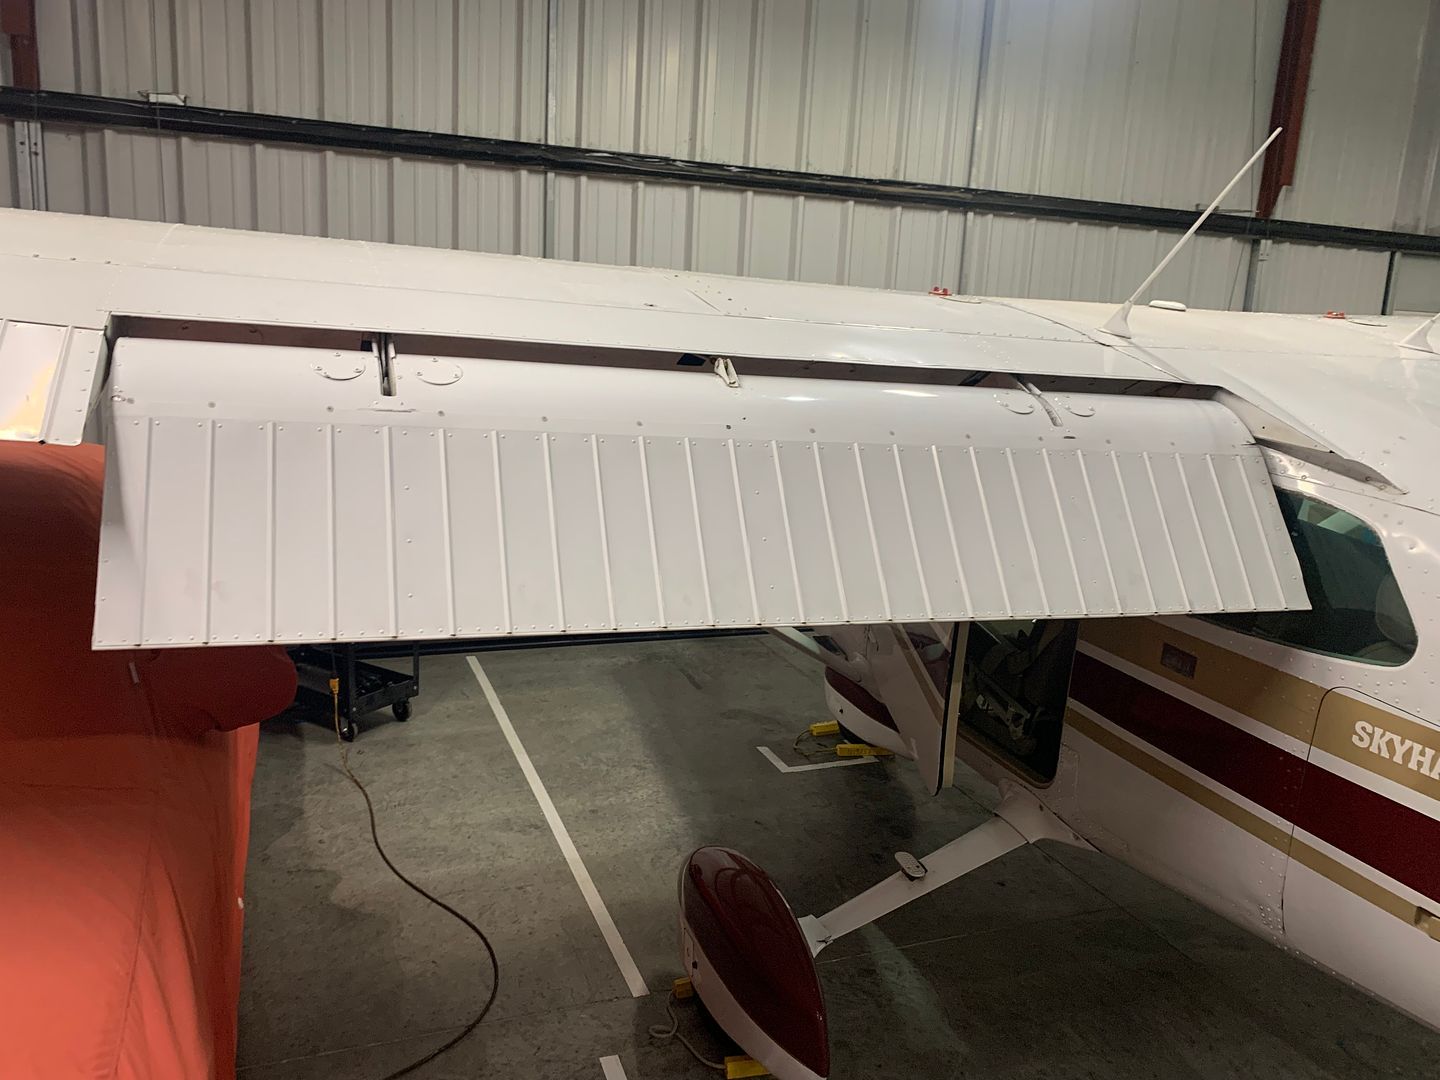
The weather has been crap for days now but the temperatures warmed up so last night I took the other flap off. I was able to remove it myself and realistically it took about 20 minutes about the same as the other side to remove it.
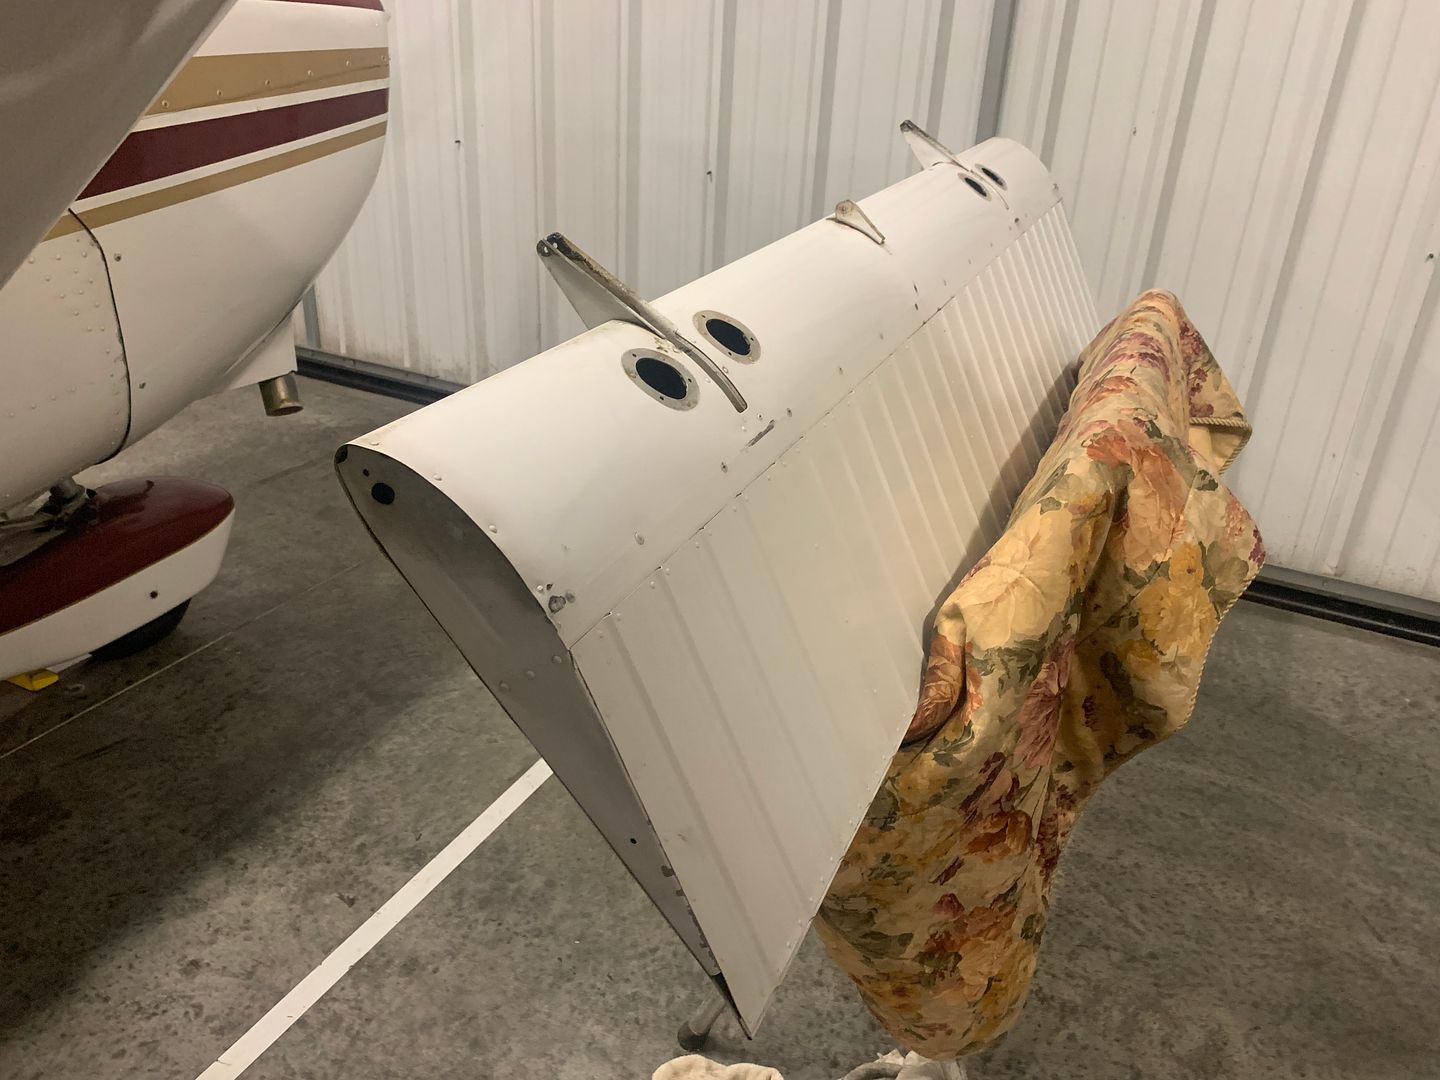
I did find one small mud dauber nest and this wasp nest inside.
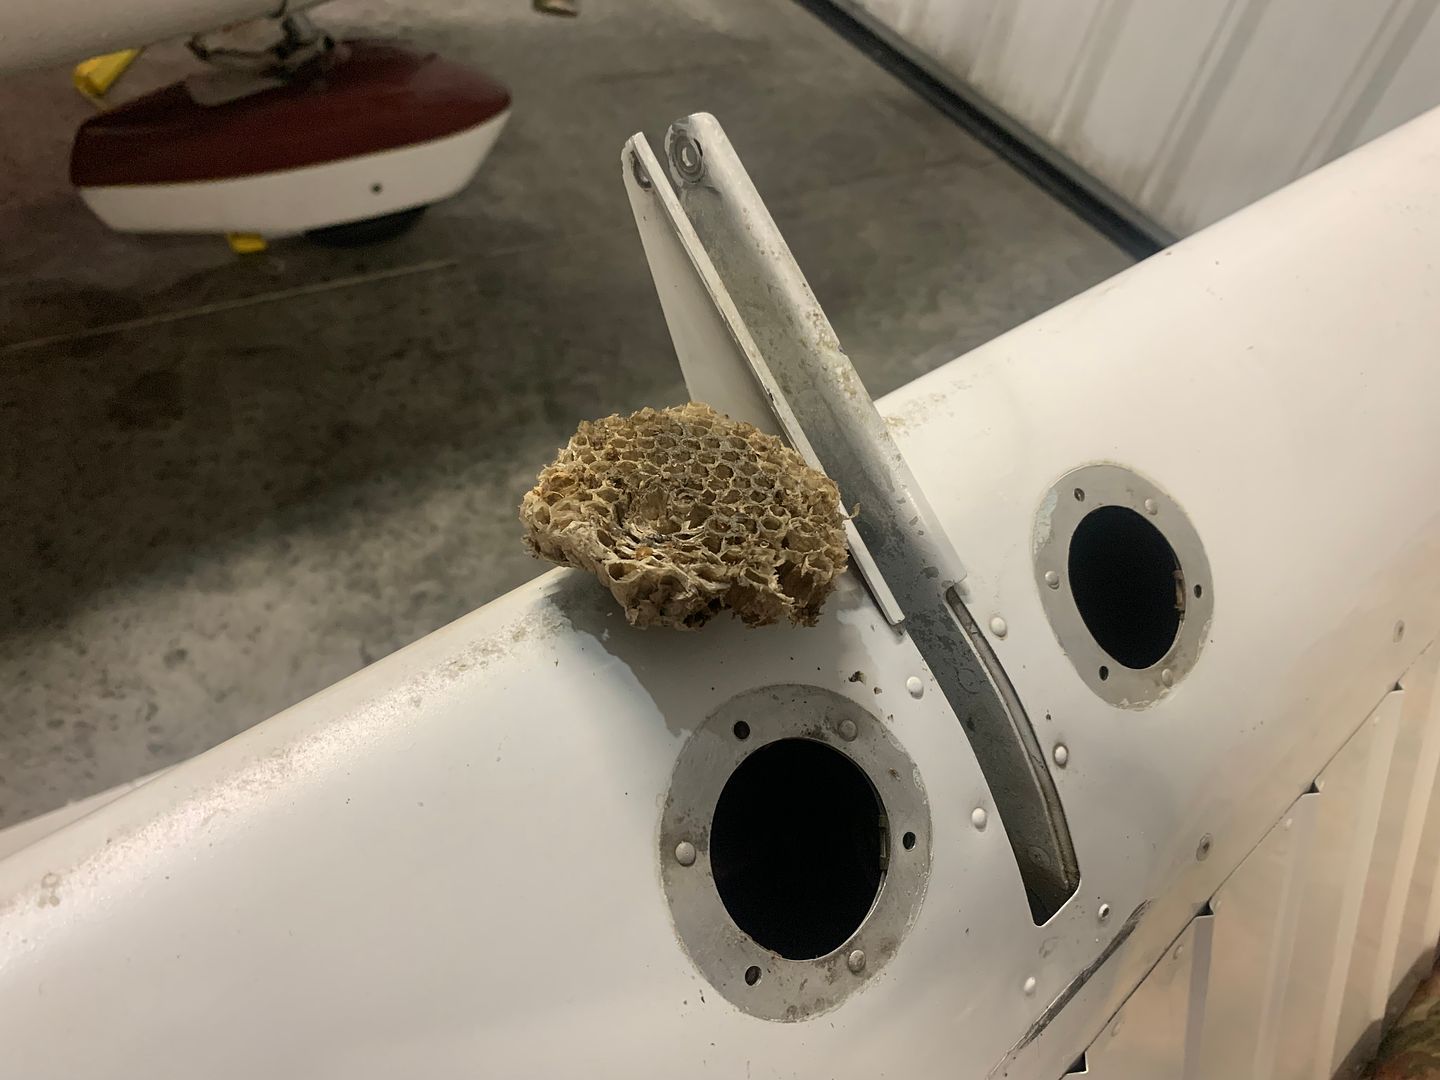
All of it was loaded with old grease.
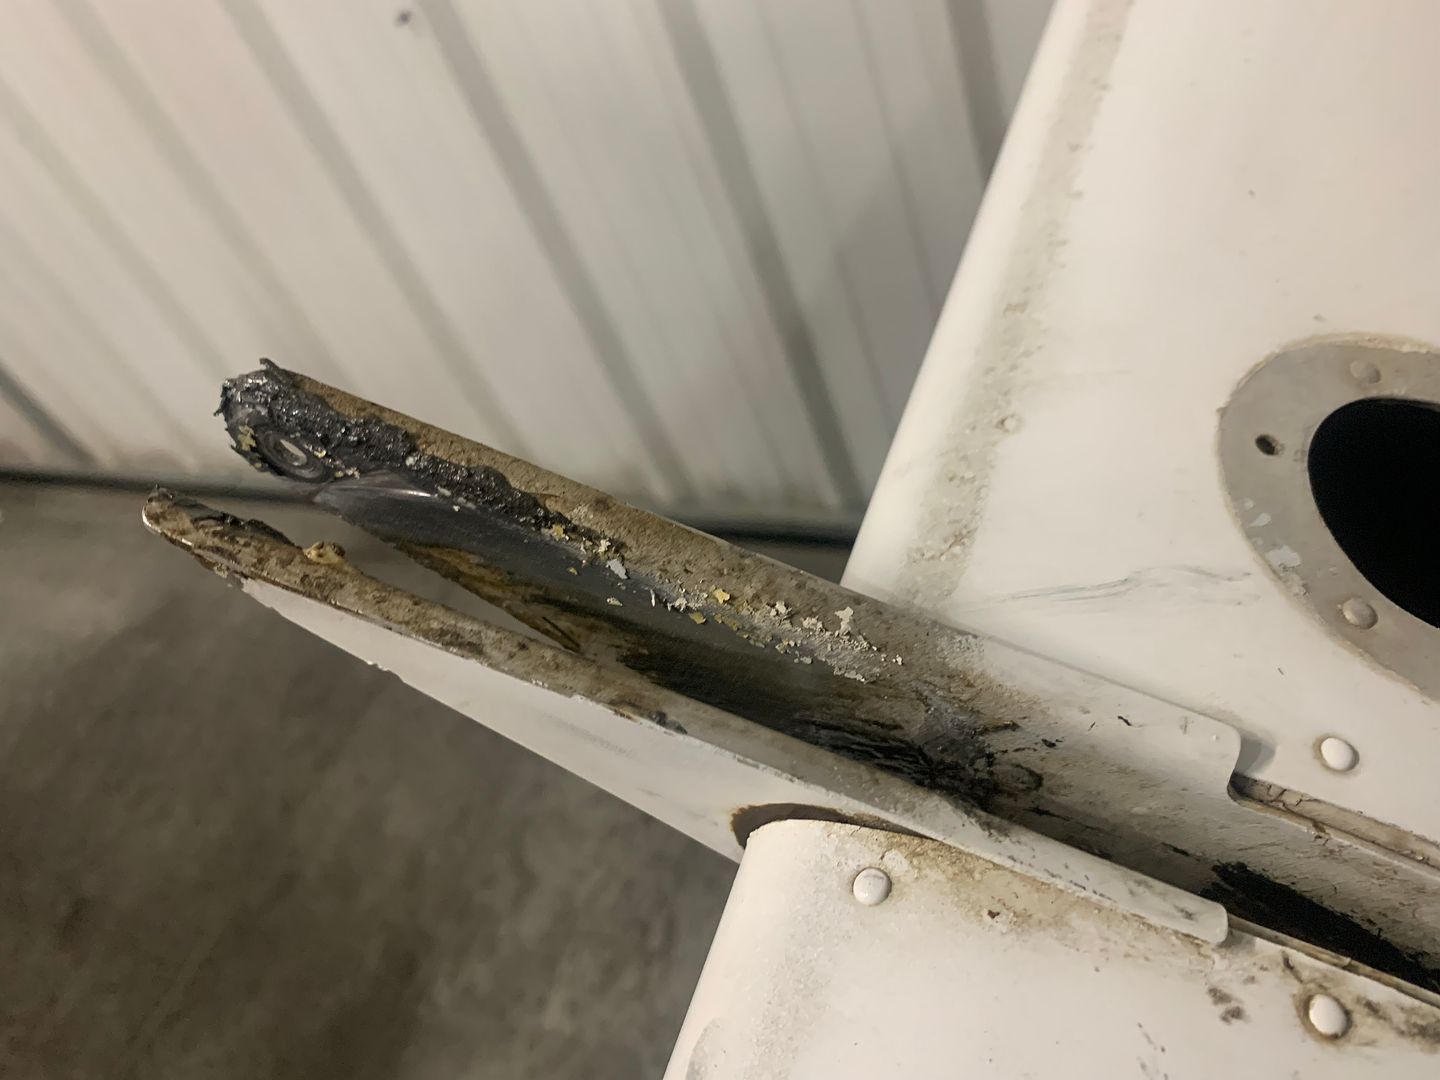
I found some wear on the arms after I cleaned all the grease off. Glad I did this. I may change up the side spacing when I put it back together.
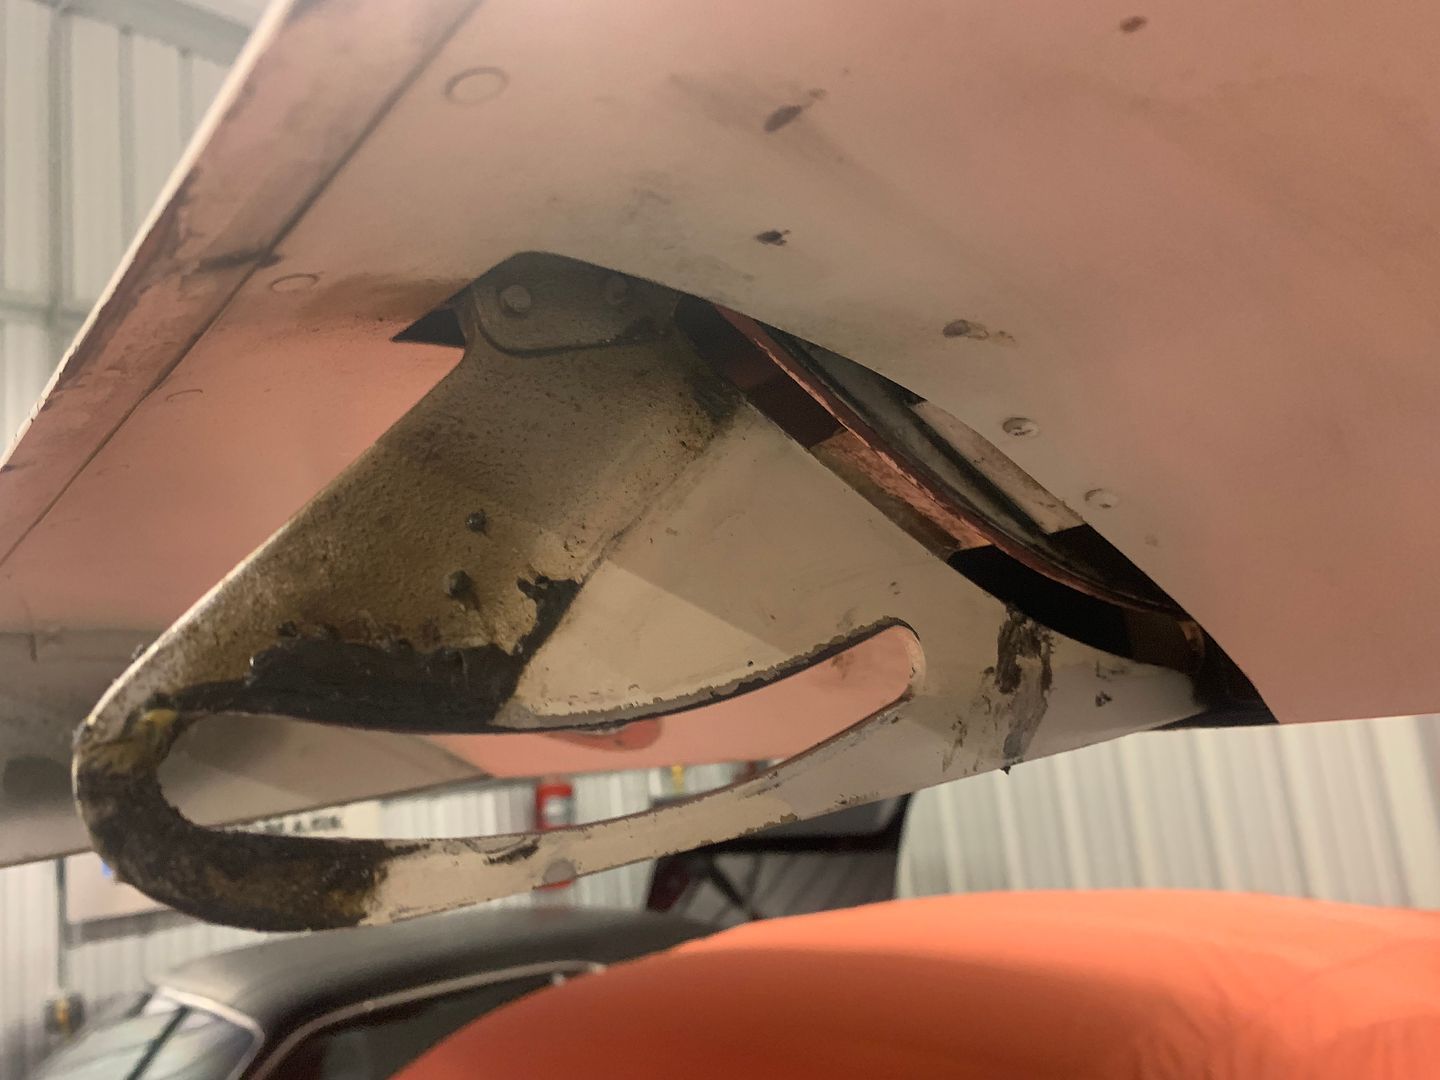
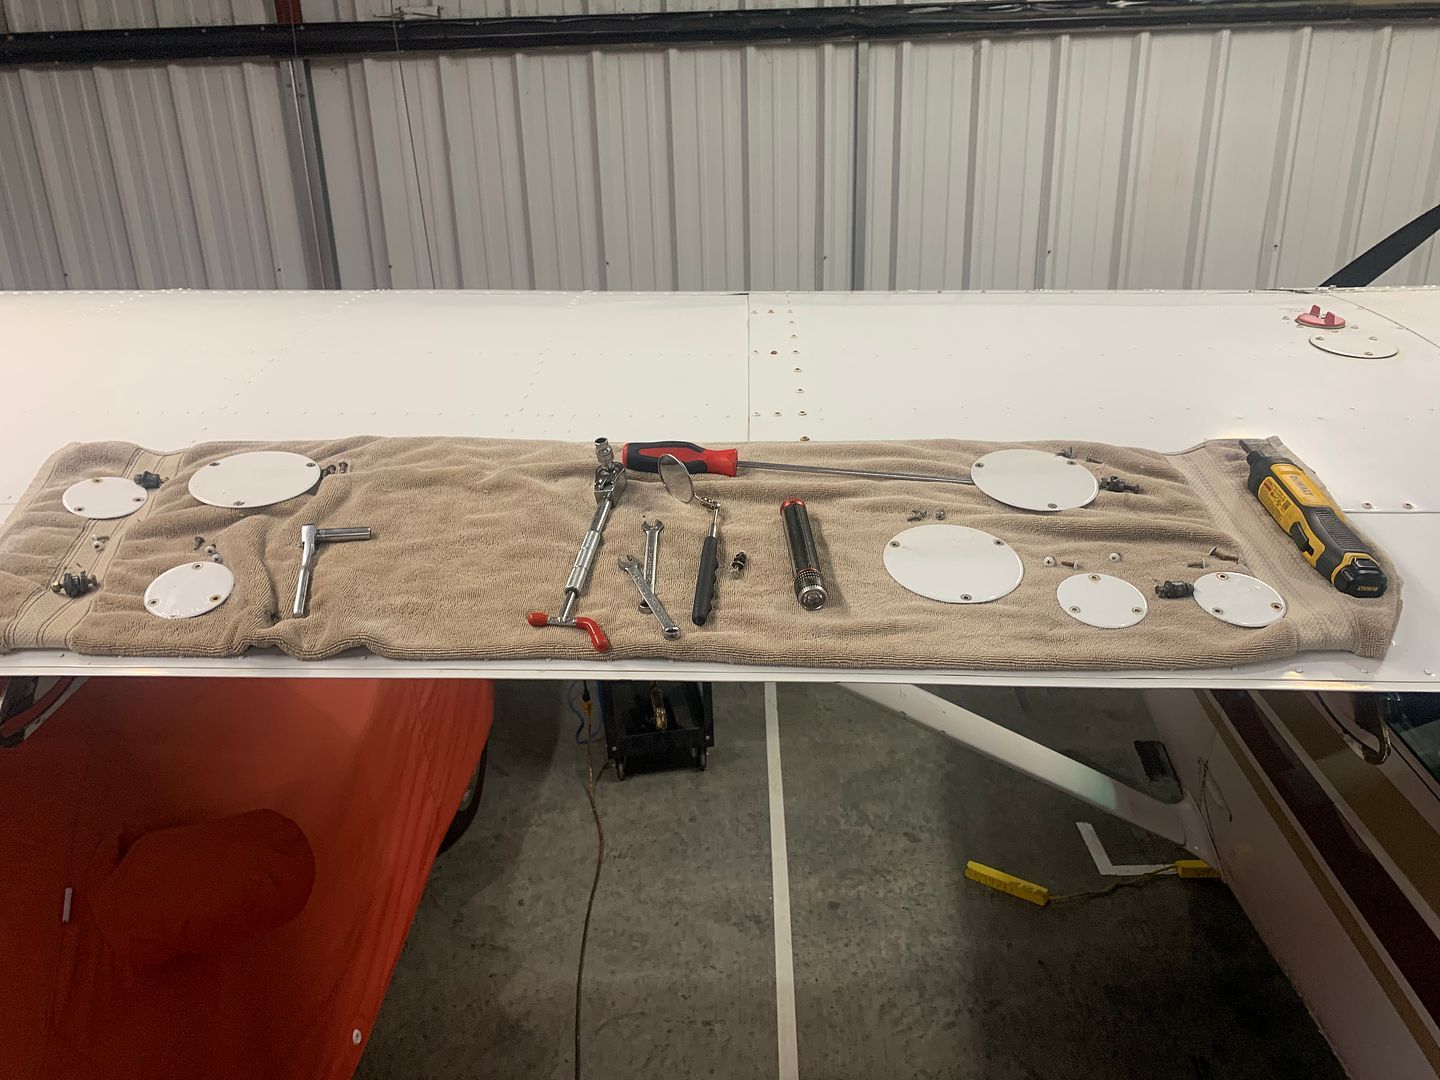
The tracks were still good. They got a good cleaning with mineral spirits to get all the grease off. I spent another 40 minutes cleaning and inspecting. So an hour total. It will take another hour to reassemble.
I did find one small mud dauber nest and this wasp nest inside.
All of it was loaded with old grease.
I found some wear on the arms after I cleaned all the grease off. Glad I did this. I may change up the side spacing when I put it back together.
The tracks were still good. They got a good cleaning with mineral spirits to get all the grease off. I spent another 40 minutes cleaning and inspecting. So an hour total. It will take another hour to reassemble.
Last edited:
"It will take another hour to reassemble."
Understatement of the year. It took me a couple hours just looking for dropped washers, very hard to do, get the rollers and washers in there even with help.
2 forward rollers and washers are in, still have the aft ones to go. working solo, it is almost impossible.
Stupid thing is that my AP was here for 1.5 this morning. We talked for 1.4 and I didn't want to work and talk. Should have asked him to help me to begin with. He saw the ladder and thought he has this covered. Not so much.
My wife and close hangar neighbors are all out of town. Dumb time for me to do it except the weather has been crap for over a week now.
Hated to use grease, but I had to use just dab to help hold those fricken washers in place and get the bolt in. Even then the grease did not help that much. Crazy hard.
Last edited:
texasclouds
En-Route
Well good news is you will be a pro next time. Bad news is you’ll forget it all by the time you have to do it again. 
Brian Sparks
Filing Flight Plan
- Joined
- Aug 27, 2019
- Messages
- 1
- Display Name
Display name:
Flybrian1950
Getting ready to tackle this with an A&P as part of an extensive annual on a 182D, excellent comments!
I got it back together after work today. The flaps operate correctly and very quiet and smooth. We'll see how long they last before needing some lube?
The aft rollers and washers are a little easier to get lined up and the bolt in. Tough as hell tightening the nut while holding a 1/4" rachet in my other hand backing up the bolt head. I did it solo again tonight. You know, if there is a will...
Extra set of hands would be less stressful.
All 4 forward rollers got stainless washers on the sides to protect the arms of the flap. The side washers bolt in solid with the inner race of the bearing so the only thing that turns is the roller outer race. SEB95-3
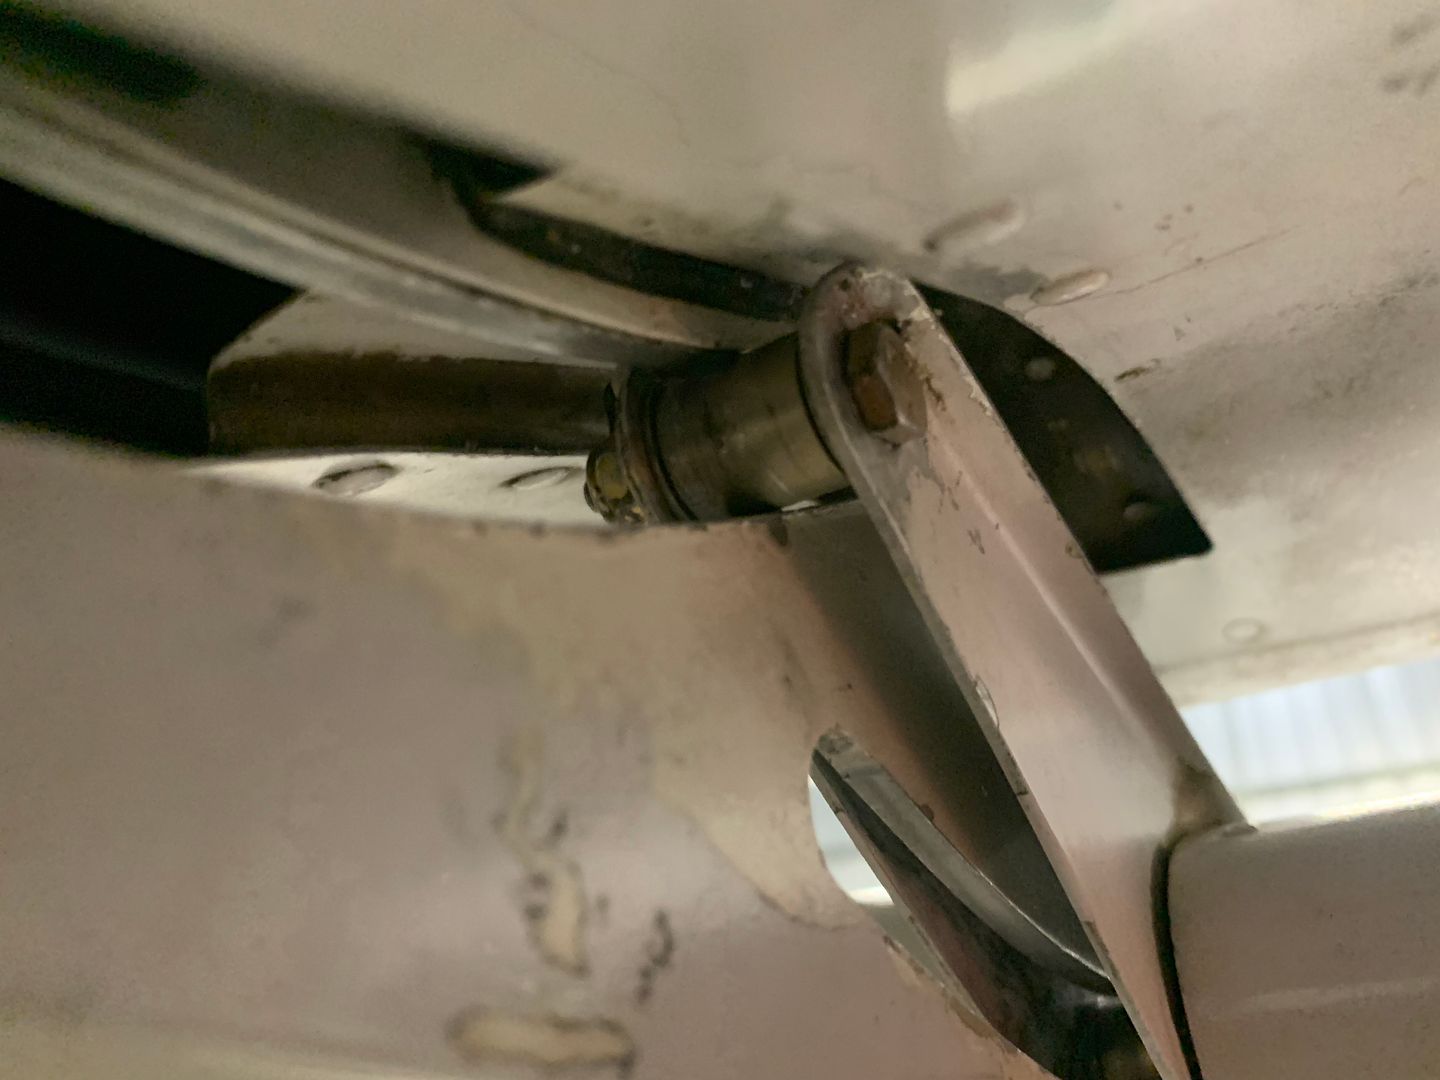
Only the inner aft rollers used a mcfarlane STC that has side washers build into the original width and they also bolt in tight with the inner race of the roller. Should eliminate any wear on the flap and arms and hopefully the tracks which was the most important thing to me. Cause replacing those are not easy or fun.
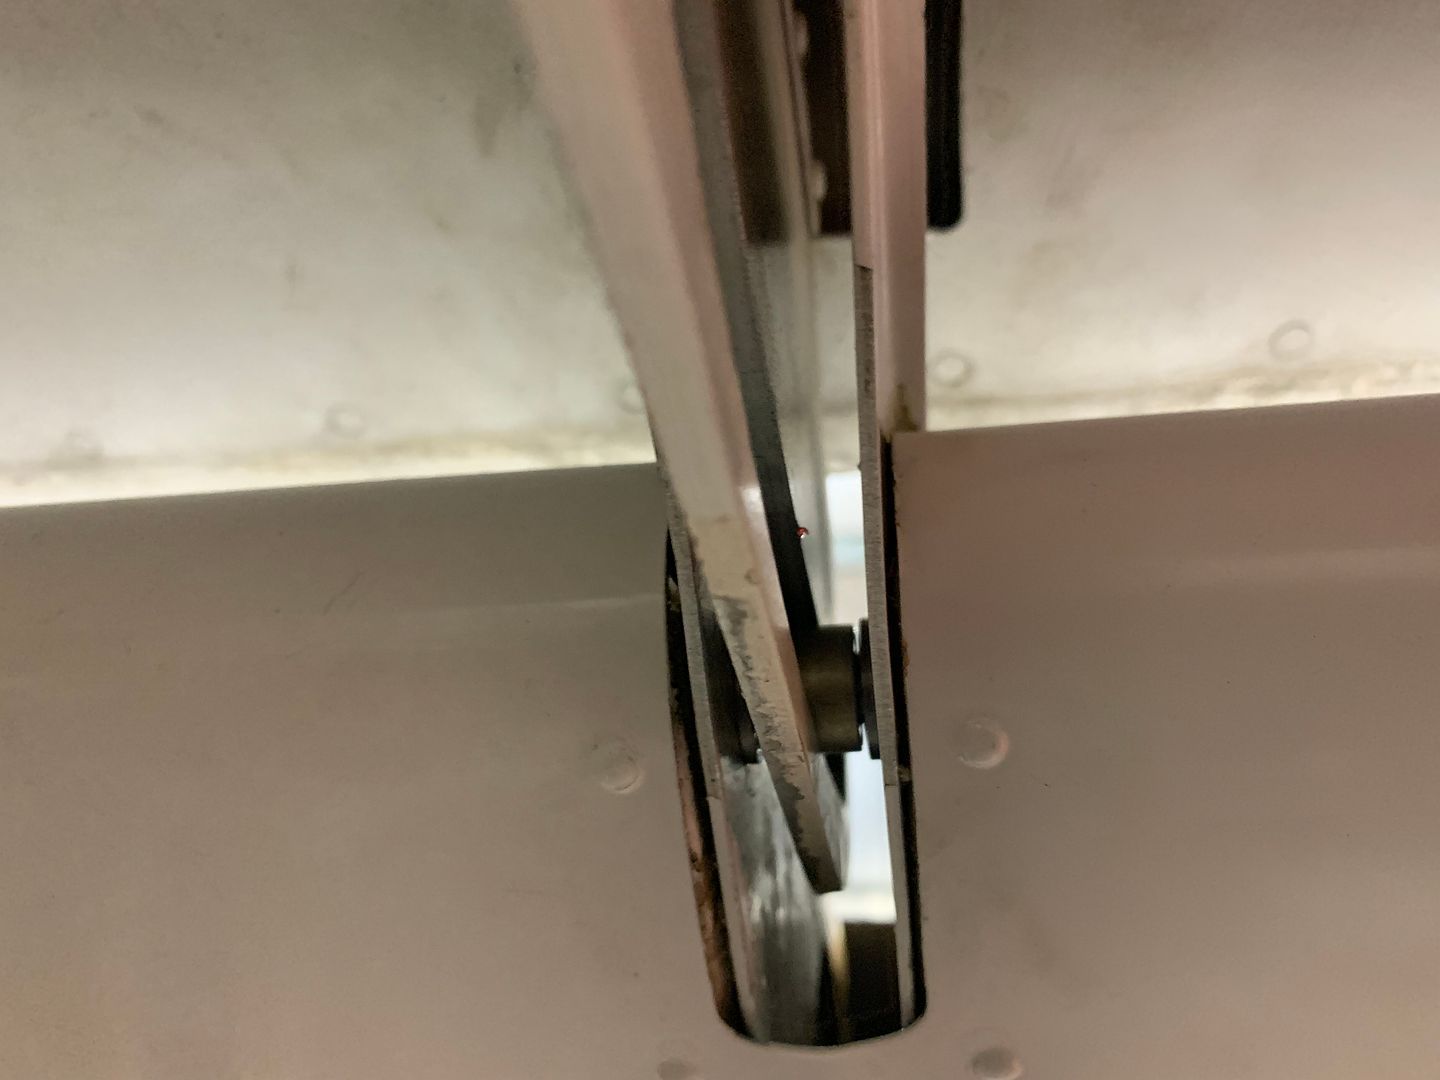
The outer aft rollers were not modified, got new roller bearings with the same combo of original spacer and new stainless washers that was on the original roller. It sets the side play.
Now lets get back to flying when the weather gets better. Thanks for every ones help.
The aft rollers and washers are a little easier to get lined up and the bolt in. Tough as hell tightening the nut while holding a 1/4" rachet in my other hand backing up the bolt head. I did it solo again tonight. You know, if there is a will...
Extra set of hands would be less stressful.
All 4 forward rollers got stainless washers on the sides to protect the arms of the flap. The side washers bolt in solid with the inner race of the bearing so the only thing that turns is the roller outer race. SEB95-3
Only the inner aft rollers used a mcfarlane STC that has side washers build into the original width and they also bolt in tight with the inner race of the roller. Should eliminate any wear on the flap and arms and hopefully the tracks which was the most important thing to me. Cause replacing those are not easy or fun.
The outer aft rollers were not modified, got new roller bearings with the same combo of original spacer and new stainless washers that was on the original roller. It sets the side play.
Now lets get back to flying when the weather gets better. Thanks for every ones help.
Last edited:
Dan Thomas
Touchdown! Greaser!
- Joined
- Jun 16, 2008
- Messages
- 10,769
- Display Name
Display name:
Dan Thomas
Once you've done a handful of these jobs single-handed, you get it figured out. But yes, the washers falling off the aft rollers while you line up the flap, roller assembly and bolt while the roller tries to roll forward in that track and drop its washers....lots of fun. I seem to remember using a small pair of vise grips to clamp a scrap of aluminum sheet, bent into a tight U, to the track to keep the roller from going forward.
It was quite the emotional roller coaster ride for 36 hours. Thinking of who I could get to lend a hand.
I hate when it is apart, bugs me bad. At least the weather was bad so I didn’t miss any good flying weather.
I used all kinds of do dads supporting it and lots of crawling around looking for dropped washers. For the money McFarland charges they don’t include any spare washers for the forward rollers which I found to be the toughest to get in. Luckily I am a big guy and was able to use my knees on a ladder, my shoulders, a ladder, drill bits, McFarlane tool and others to get it done.
Pretty sure it was the toughest job yet on my 172.
Definitely would need help on a 210 or 208 or something with 3 stations.
Thanks for the help. Could not do it without your assistance.
3393RP
En-Route
- Joined
- Oct 8, 2012
- Messages
- 4,061
- Display Name
Display name:
3393RP
I got it back together after work today. The flaps operate correctly and very quiet and smooth. We'll see how long they last before needing some lube?
The aft rollers and washers are a little easier to get lined up and the bolt in. Tough as hell tightening the nut while holding a 1/4" rachet in my other hand backing up the bolt head. I did it solo again tonight. You know, if there is a will...
Extra set of hands would be less stressful.
All 4 forward rollers got stainless washers on the sides to protect the arms of the flap. The side washers bolt in solid with the inner race of the bearing so the only thing that turns is the roller outer race. SEB95-3
Only the inner aft rollers used a mcfarlane STC that has side washers build into the original width and they also bolt in tight with the inner race of the roller. Should eliminate any wear on the flap and arms and hopefully the tracks which was the most important thing to me. Cause replacing those are not easy or fun.
The outer aft rollers were not modified, got new roller bearings with the same combo of original spacer and new stainless washers that was on the original roller. It sets the side play.
Now lets get back to flying when the weather gets better. Thanks for every ones help.
Your posts and photos have been informative and entertaining. Thanks for sharing.
Thank you.Your posts and photos have been informative and entertaining. Thanks for sharing.
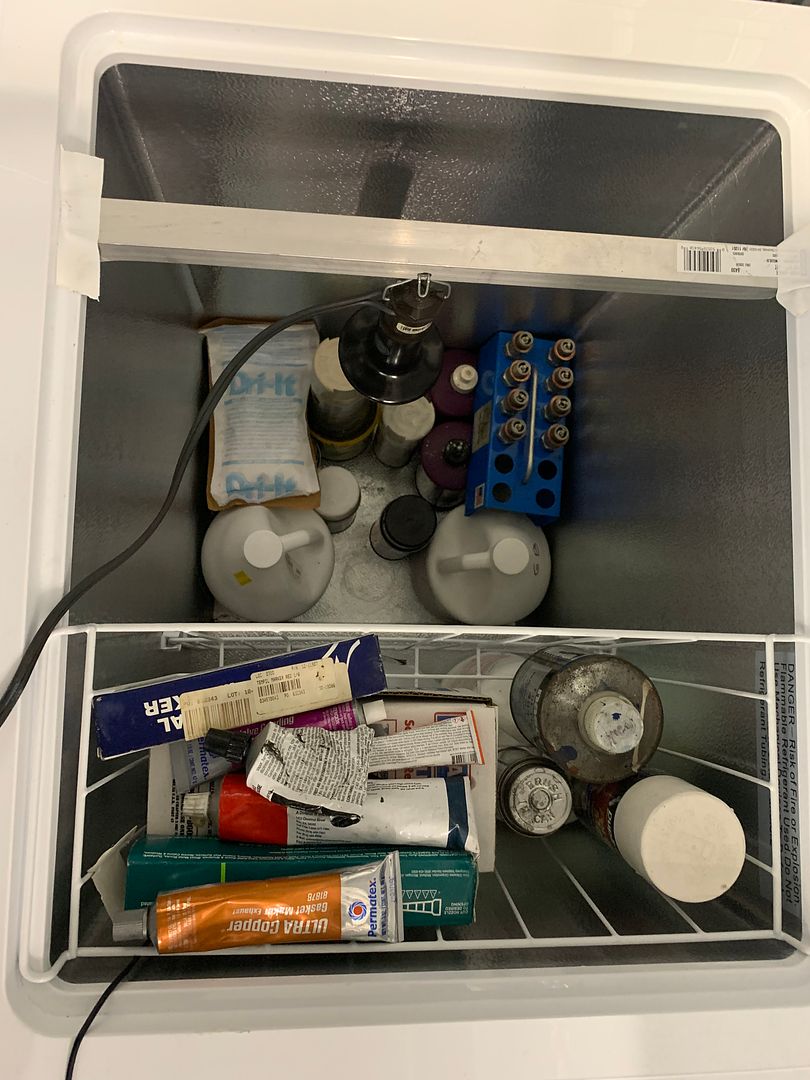
Another often forgotten item on these flaps are these cessna flap buttons. I had replaced a few of these years ago, the ones that were missing.
The old ones I picked out were brittle and flat not doing much good.
New ones are pricey at a quarter a piece. But what isn't on a aircraft?
My mechanic said he ran across a plane owner who filled his empty holes with rivets!
These are a mix of old and new. I put new in on both flaps, 14 per.
If you see rub marks on the flaps try some new buttons.
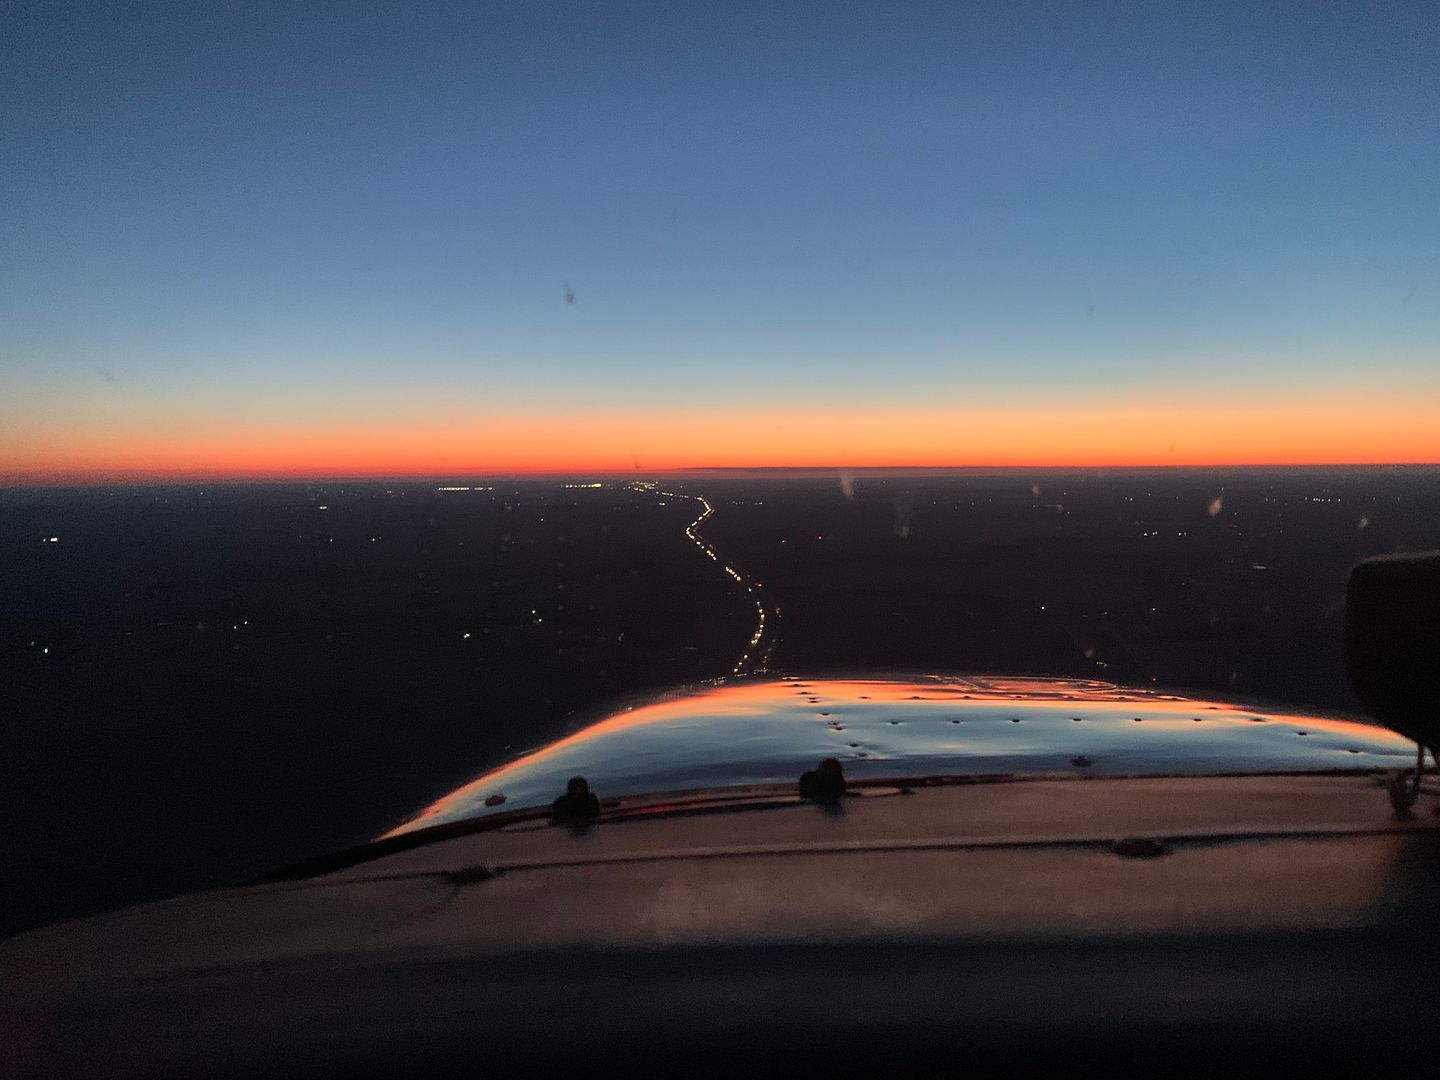
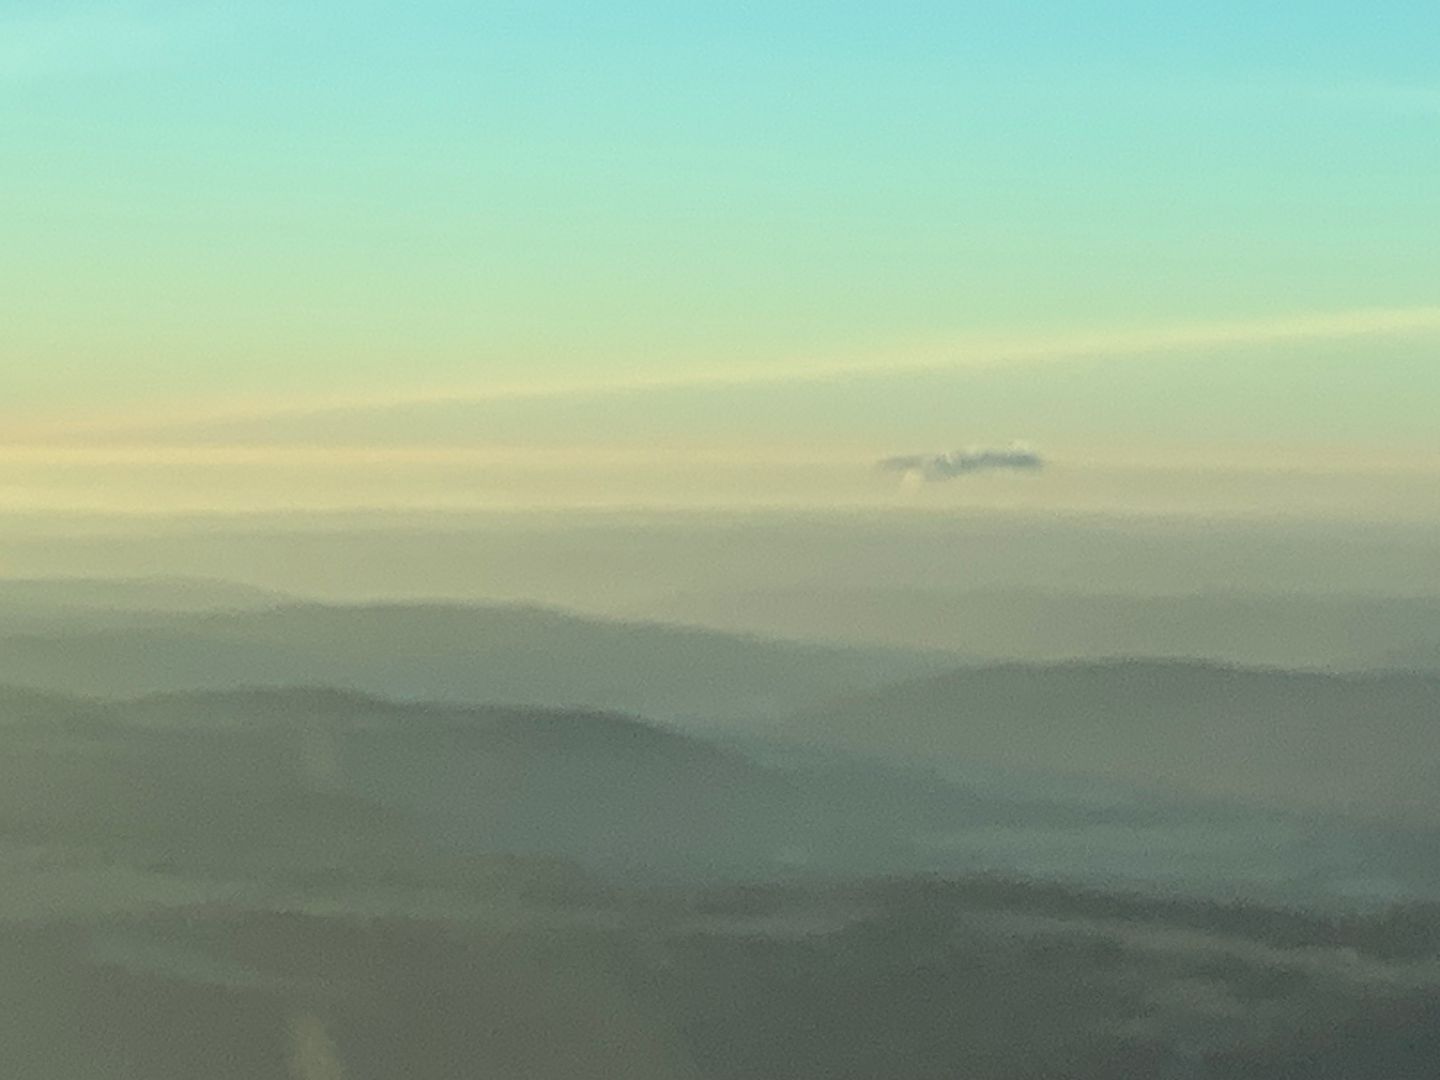
The weather finally cleared up after a 2 week stretch of low clouds. I have been lucky enough to fly the last 3 nights. When I am going no where I usually fly into the wind going out and enjoy the tailwind coming home. Last night the wind was out of the east and was I basically tracking the highway watching traffic.
When I turned around to head home this what I saw. How lucky are we to be able to do this?
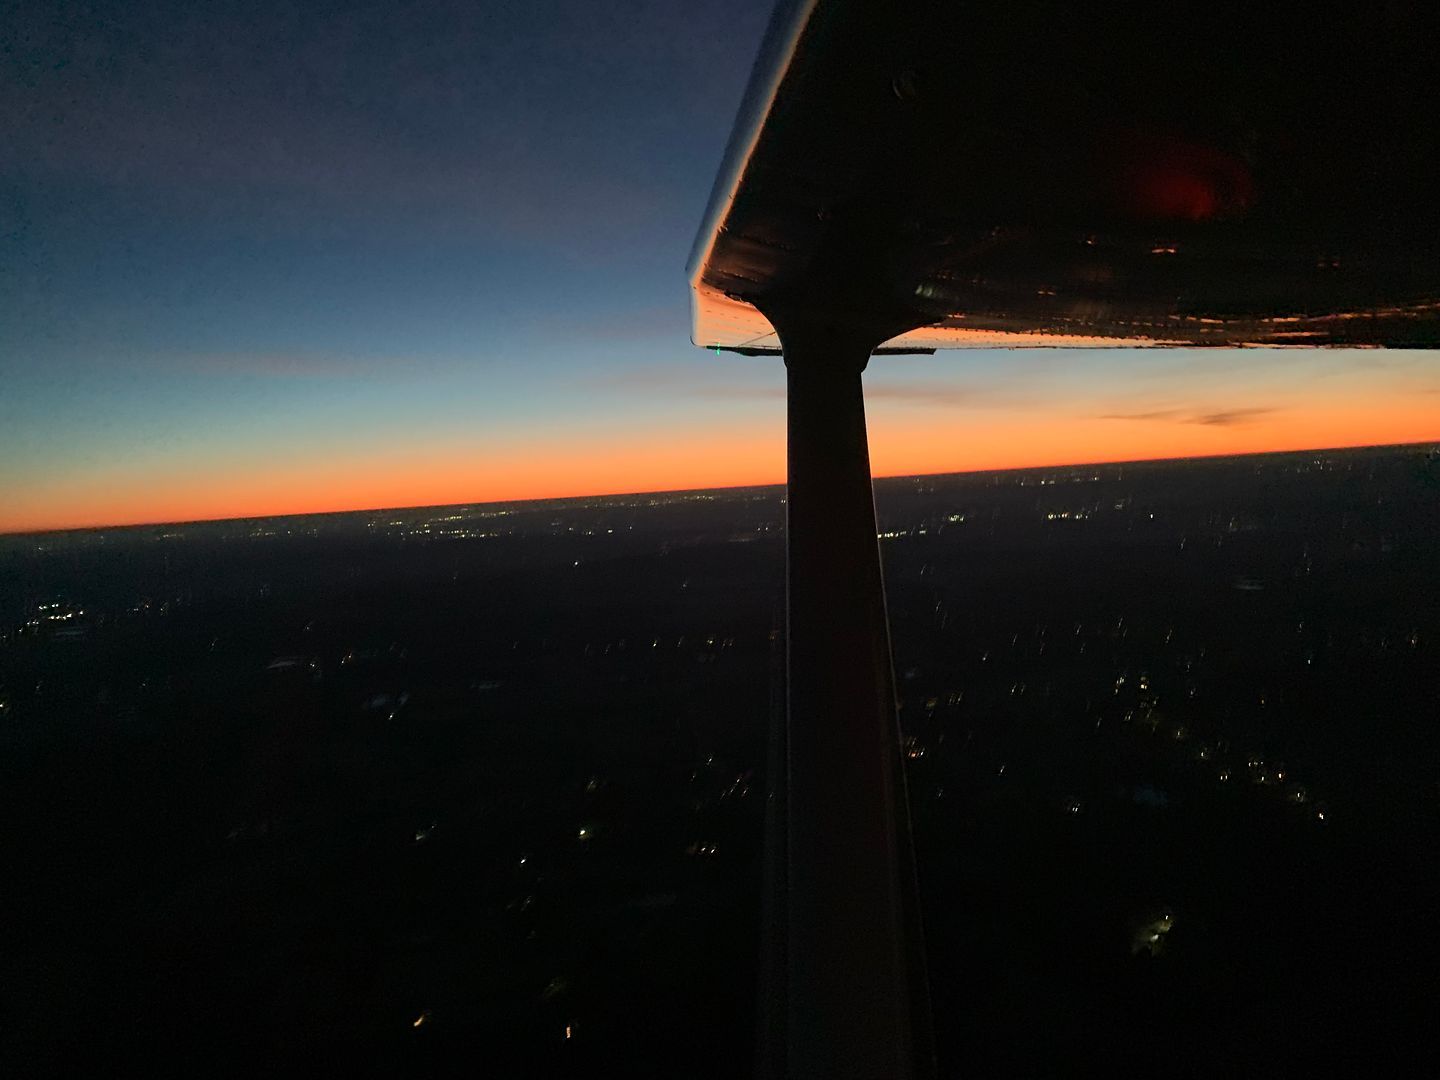
It was pretty dark and I didn't expect to see the sun light still. In the picture it looks like the sky is blue when it looked mostly black in person. Nice night to fly. I did 3 night take offs and landings when I got home. Yea I should probably try washing my window?
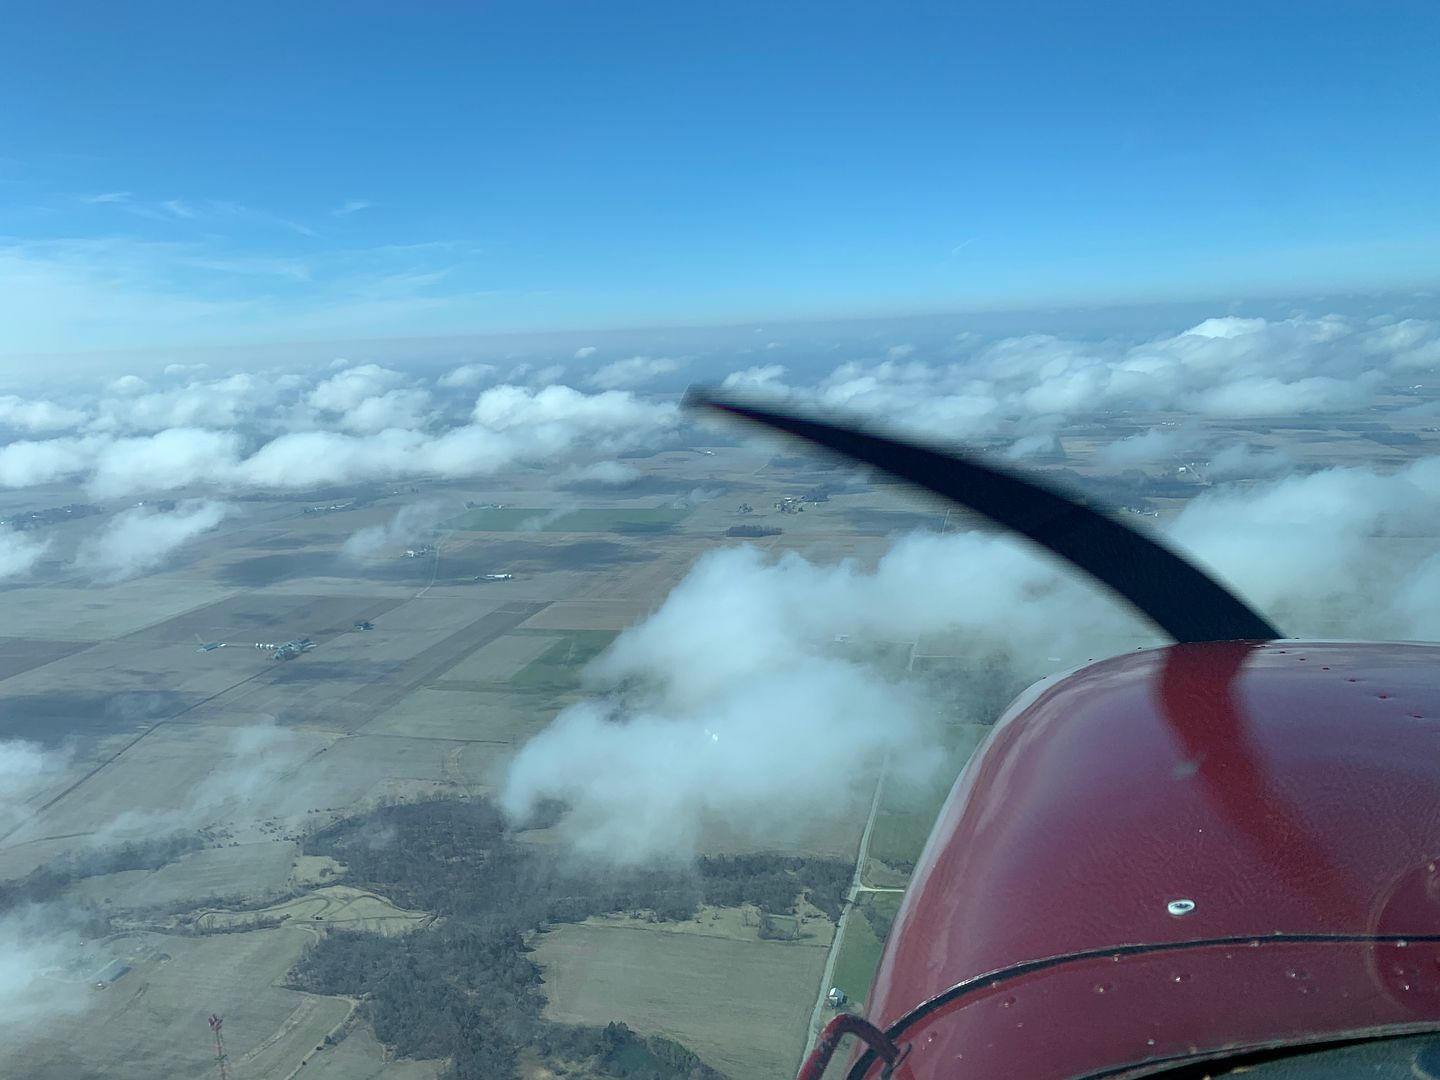
I am in the middle of 8 consecutive days of flying so far. The weather has turned for the best and I am taking advantage of that everyday after work and early Sunday morning before sunrise. Saturday afternoon late it was nuts on the radio as every airport had folks in the pattern practicing. The radio was a non stop squeal, misable to listen to.
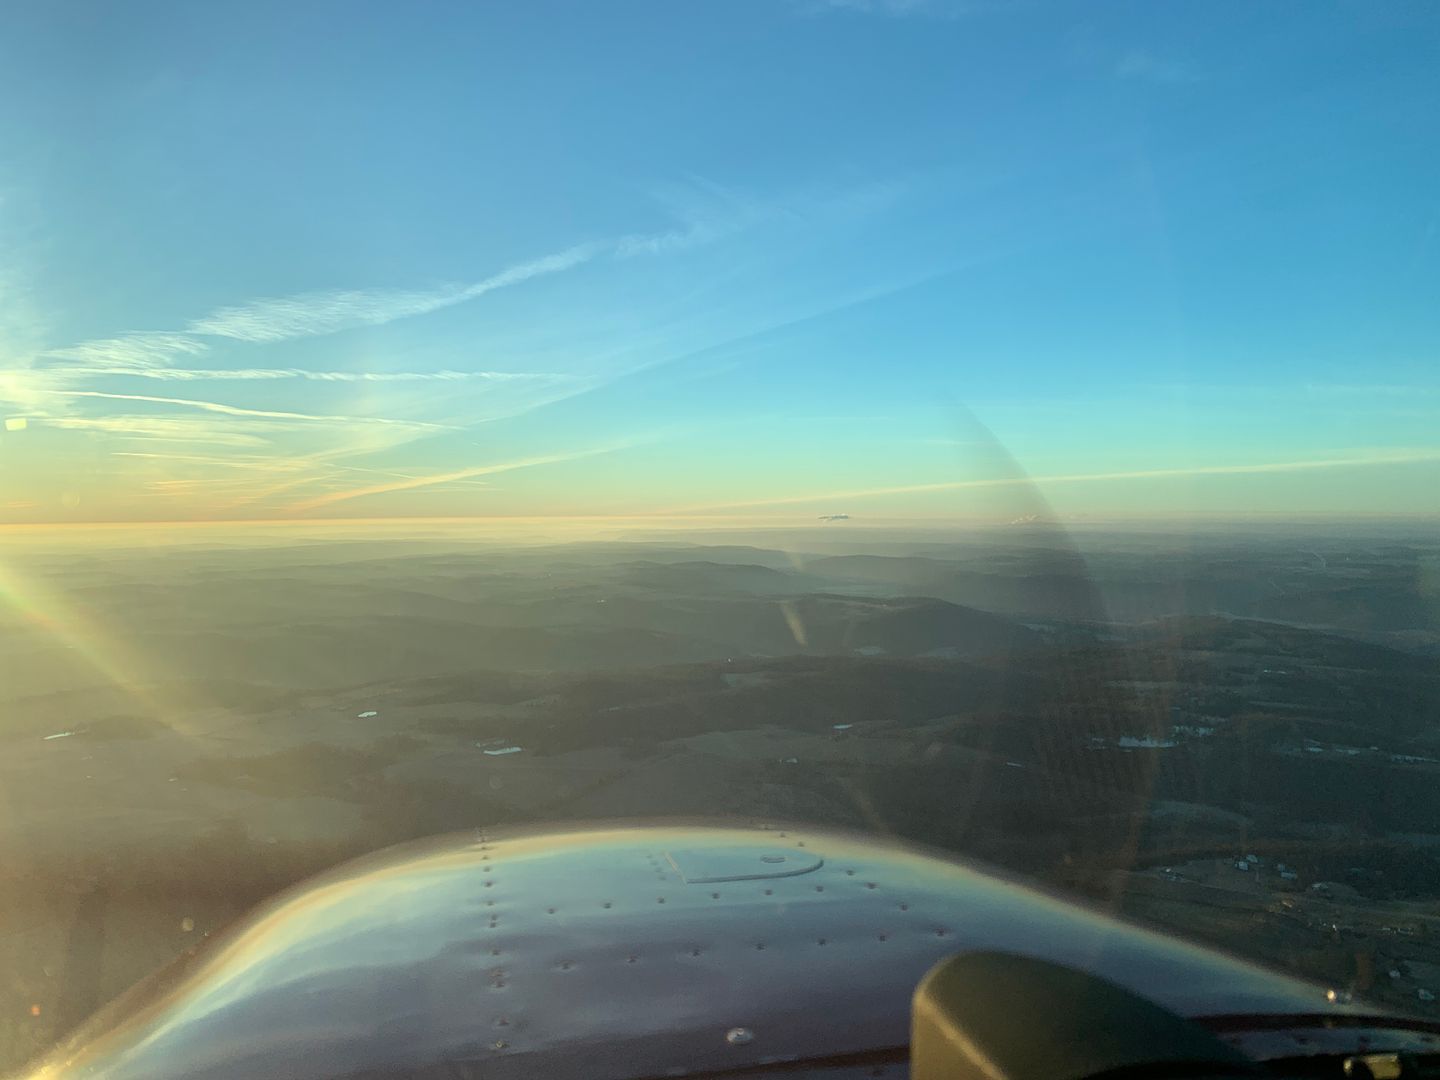
Sunday morning 12 hours later before sunrise I had the radio and air space to myself and it was cool and super smooth. Just a great time to fly. Don't know why more don't fly early on days like Sat and Sundays?
Sunday morning, there was nobody out there. Not even commercial jets at this monument.
Once the sun starts to rise the frost burns off it gives off a nice mist for an hour or so until it is clear again.
Can't wait to get off work again today and go fly!
Last edited:
Guess what is next...

This mornings flight.
This mornings flight.
Dan Thomas
Touchdown! Greaser!
- Joined
- Jun 16, 2008
- Messages
- 10,769
- Display Name
Display name:
Dan Thomas
Well, now. I see a gear strut fairing, fiberglass, to replace the cracked plastic one. I see two new ground straps, for the battery and engine. I see a McFarlane nosegear torque link bushing kit.Guess what is next...
Now, that torque link stuff needs to be done right. The whole idea of the steel spacer bushing inside the torque link bushings is the same as the inside bushing in your flap roller bearings: It is supposed to be clamped between the aluminum ears of the nosewheel fork and steering collar. The maintenance manuals do not talk about this, and mechanics tend to think that the whole affair pivots on the bolt itself. They don't torque that bolt up to pull the ears in a tiny bit to grab the spacer, and so steering and shimmy forces on the bolts wallow out the bolt holes in the aluminum ears, and the ends of the spacer pound and dig recesses in the ears. If it's bad enough you need new aluminum parts. Very expensive. I have carefully made little thin shims from AN960-3L washers, lapping them down with a finger holding them against 220 grit waterproof sandpaper, and putting them between the end of the spacer and the ear. Sometimes have to reduce their diameter, too. Those larger brass washers are to take up excess slop between the torque link and ear, which should be minimal anyway. Shouldn't really need them.
Getting the old bushings out of the torque links is fun. Use a fine-thread tap of the right size (which I can't remember; maybe 7/16" NF). Run the tap into the old bushing a few threads, then stick a bolt or something into the other end and press the old bushing out.
Last edited:
Thank you for the expertise that you share. It does help a lot. I may have to read it several times until the bulb comes on bright but I eventually get it. Thanks again.
I am slowly moving equipment from my work shop to the hangar, moved my press yesterday. Soon to be a one stop shop for 172s.
Really only got 2 things on my mind, front strut torque link and that fairing. Going to do it in between flights as usual.
I side shimmed that torque link years ago to snug it up. It is time to do the bushings now and get it tight again. The installation of the bushings was too much for me to figure out and keep the plane flying back then. So this time I have to get out of my comfort zone a little and do it.
My best bud in his arrow. I need to get a few more hours in it for insurance then he has offered it to me to fly and use on trips. He is gone working/flying so often he needs me to fly it.
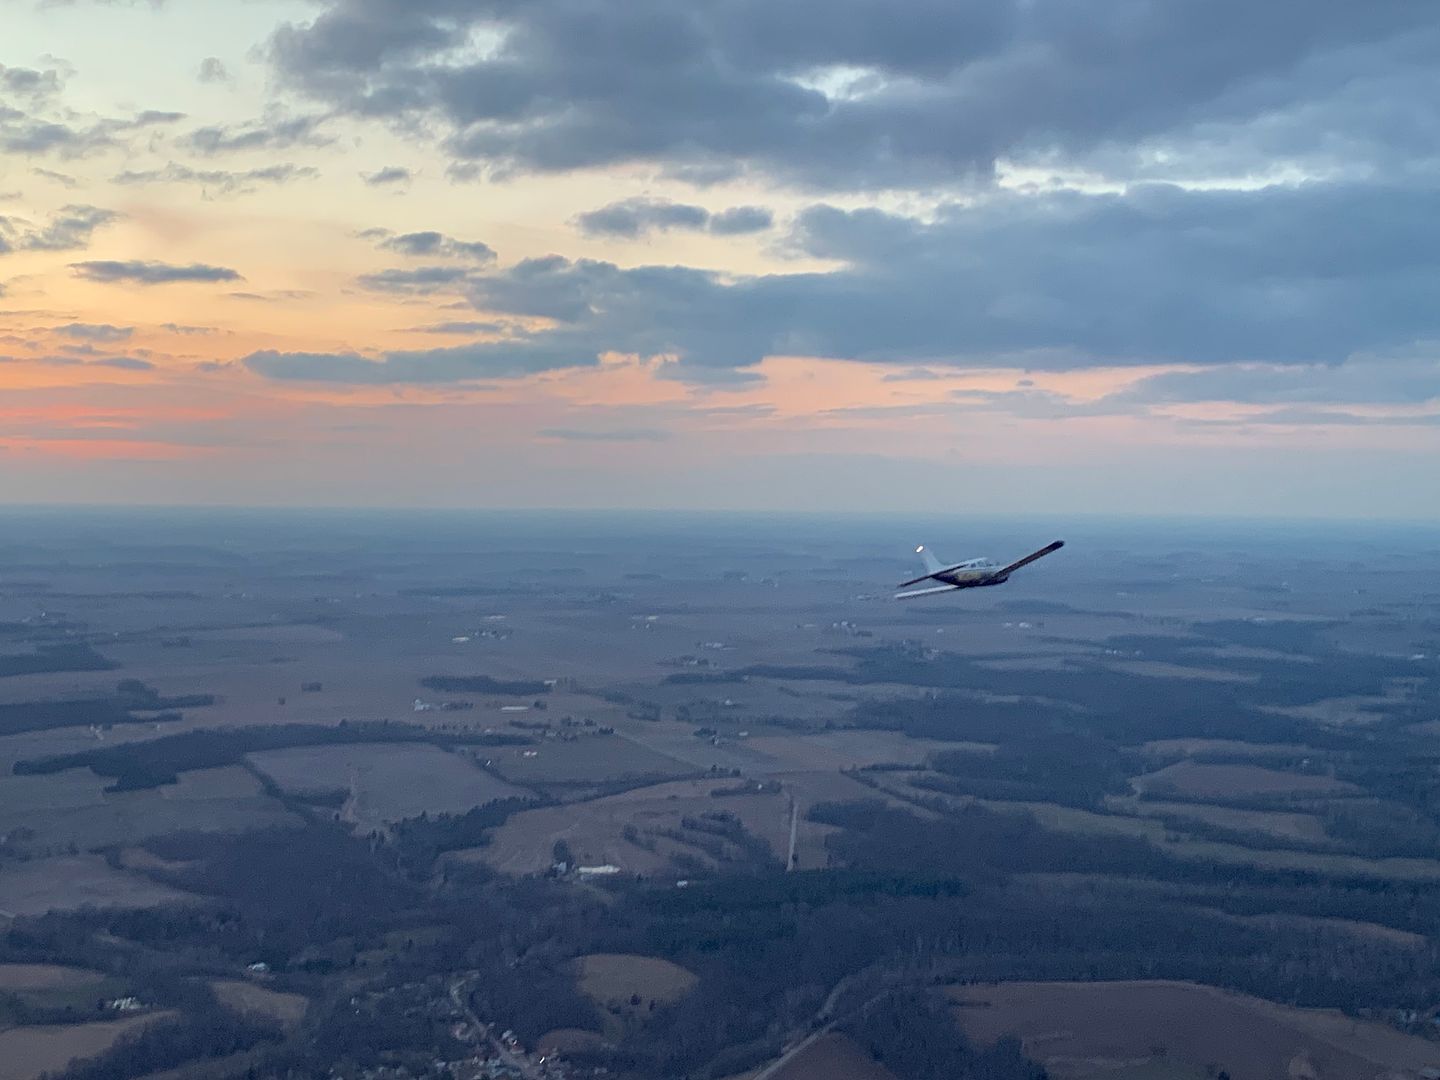
So no big hurry to replace my 172. I will keep refining it. Last week one night.
I am slowly moving equipment from my work shop to the hangar, moved my press yesterday. Soon to be a one stop shop for 172s.
Really only got 2 things on my mind, front strut torque link and that fairing. Going to do it in between flights as usual.
I side shimmed that torque link years ago to snug it up. It is time to do the bushings now and get it tight again. The installation of the bushings was too much for me to figure out and keep the plane flying back then. So this time I have to get out of my comfort zone a little and do it.
My best bud in his arrow. I need to get a few more hours in it for insurance then he has offered it to me to fly and use on trips. He is gone working/flying so often he needs me to fly it.
So no big hurry to replace my 172. I will keep refining it. Last week one night.
Larry Korona
Pre-takeoff checklist
- Joined
- Aug 10, 2017
- Messages
- 130
- Display Name
Display name:
Larry
Gary - thanks for all the posts sharing your experiences with doing items that need attention but generally don't. I'm curious about the process of removing the bushings from the torque links please post descriptions of the process when you start!
455 Bravo Uniform
Final Approach
Looking forward to the upcoming torque-link episode this month on POA.
Dan Thomas
Touchdown! Greaser!
- Joined
- Jun 16, 2008
- Messages
- 10,769
- Display Name
Display name:
Dan Thomas
Now, another question arises: are the torque links being rebuilt because the nosewheel shimmies?
One can spend a lot of money and time chasing nosewheel shimmy. Torque links, shimmy damper rebuilds, static balance of the nosewheel assembly. As I have been preaching here for many years, the root cause is dynamic imbalance of the nosewheel. Yes, one can mask the shimmy by fooling with all the other stuff, but it's treating symptoms instead of the disease. If one leaves the wheel imbalanced, it just beats up the new parts and the shimmy returns.
See this old post:
https://www.pilotsofamerica.com/com...-missing-from-many-c182s.123329/#post-2847848
Totally agree with Dan^^^^Now, another question arises: are the torque links being rebuilt because the nosewheel shimmies?
One can spend a lot of money and time chasing nosewheel shimmy. Torque links, shimmy damper rebuilds, static balance of the nosewheel assembly. As I have been preaching here for many years, the root cause is dynamic imbalance of the nosewheel. Yes, one can mask the shimmy by fooling with all the other stuff, but it's treating symptoms instead of the disease. If one leaves the wheel imbalanced, it just beats up the new parts and the shimmy returns.
See this old post:
https://www.pilotsofamerica.com/com...-missing-from-many-c182s.123329/#post-2847848
I already had the bushings and hardware from years ago and always felt guilty not getting them put in. So no money spent now so far.
As you have seen from past posts that I have spent a lot of time balancing tires, but not aircraft tires.
So I know how important it is.
I do have a static balancer from mcfarlane that I have used with limited success.
I have belt sanded my old tire to true it and it helped.
Then I bought a new tire and tube and it fixed it for a few hundred hours then it comes back after I beat up my front tire.
Currently the front tire is Ok I think? and can take some pretty hard stops and not shimmy. But if I have more weight in it then it is more suspectable to shimmy on braking.
Reason this came up is I have been practicing short field landings with lots of brake.
And I am not afraid to use the brakes so the front tire gets more wear and tear than the plane that coasts all the way to the end not using brake.
Then I have been monitoring the slop and it has increased.
I will check the static balance of the front tire and rim when I take it off the fork.
Before that I will check the tire for out of round before I take it off. If any of that indicates a junk tire it will get replaced. Like you said, don't want to beat up new parts.
Been pretty busy and haven't spent much time at the airport lately and the weather has been terrible for flying.
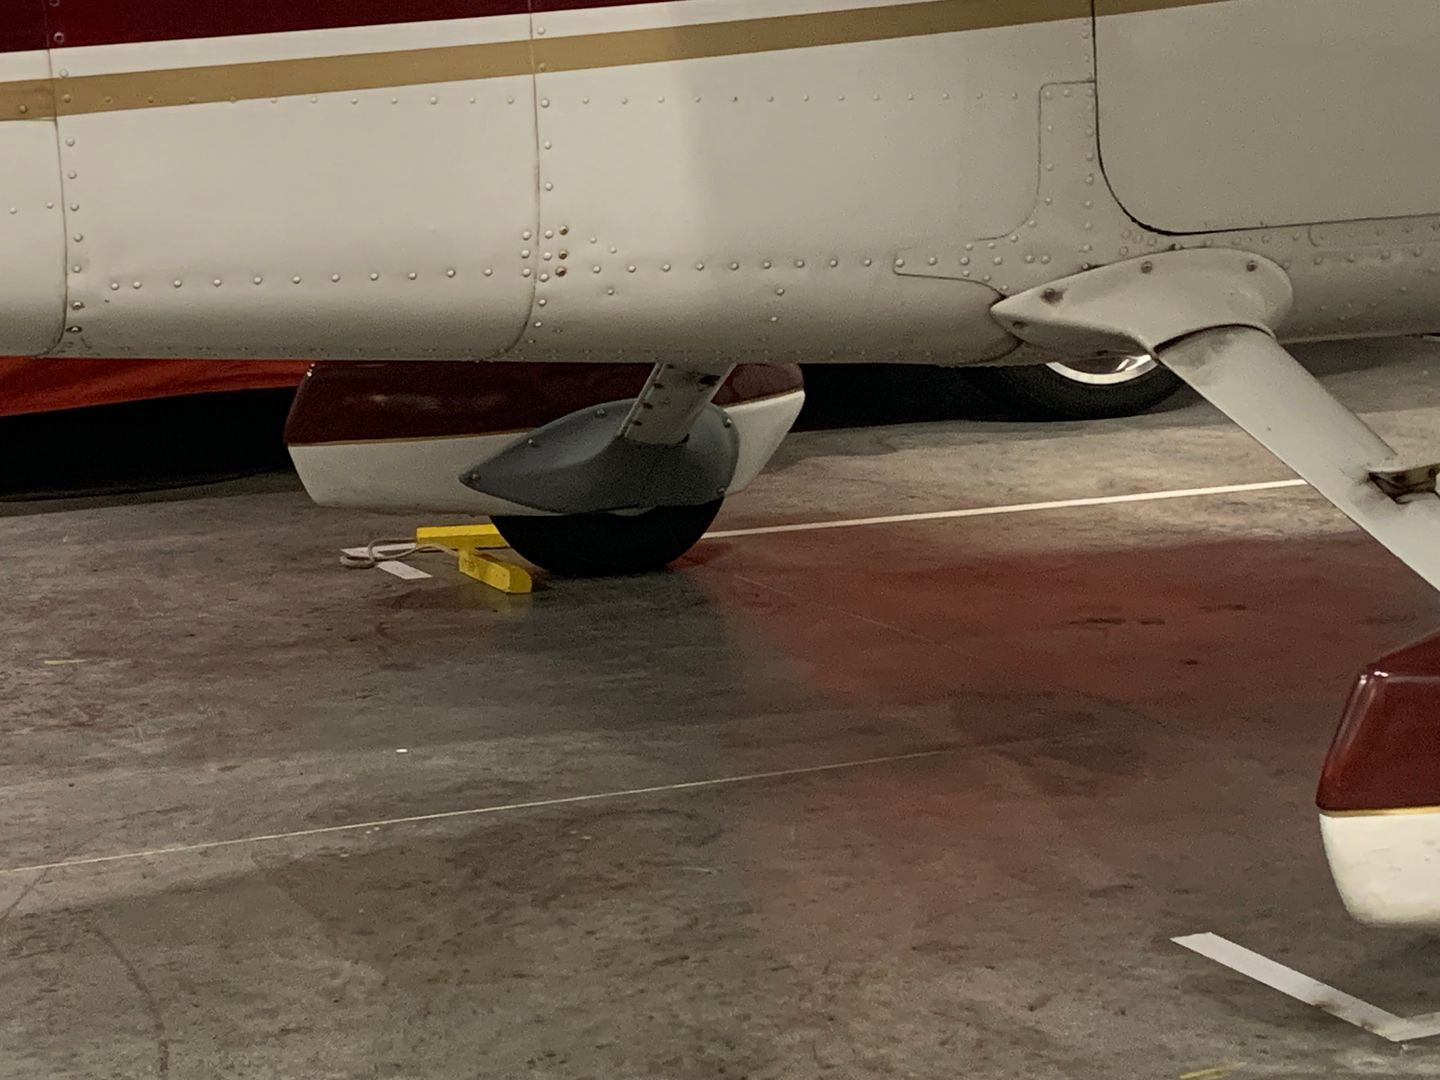
I did spend a couple hours over the weekend and mounted up this fairing. Fit pretty nice. I am going to fly it this afternoon like this. Then I will paint it.
I had to replace one of the nut plates inside the wheel pant. It is a little easier to work with when it is warmed up.
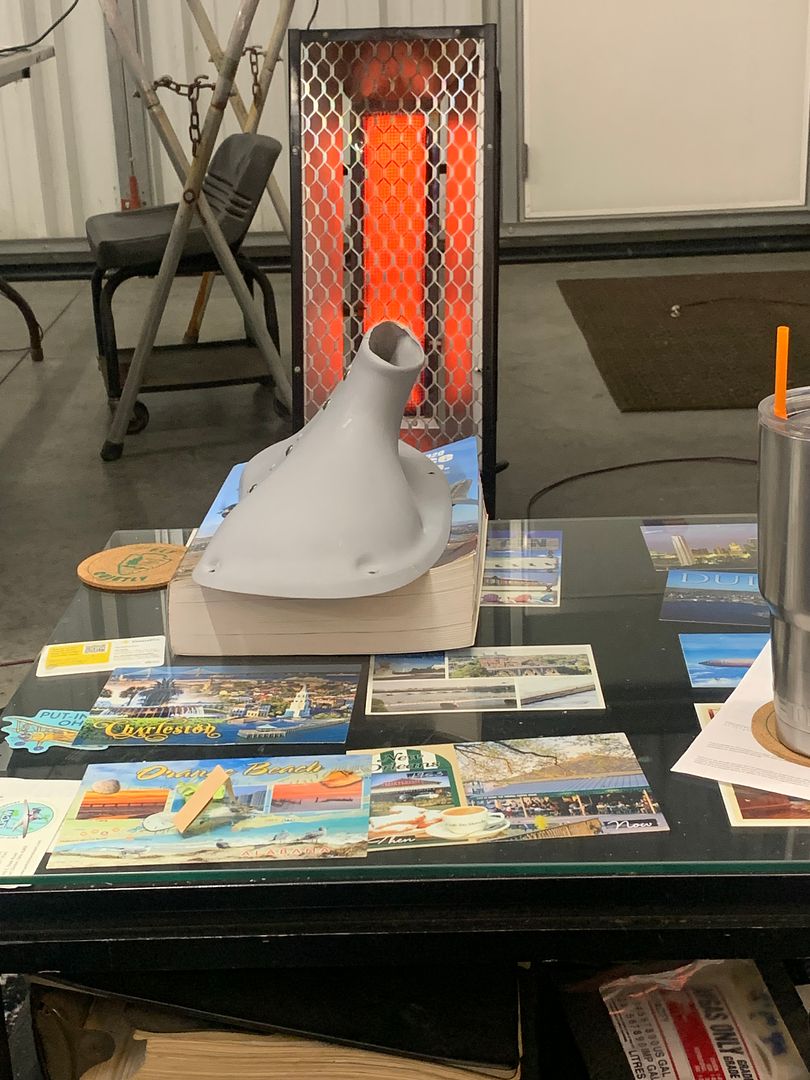
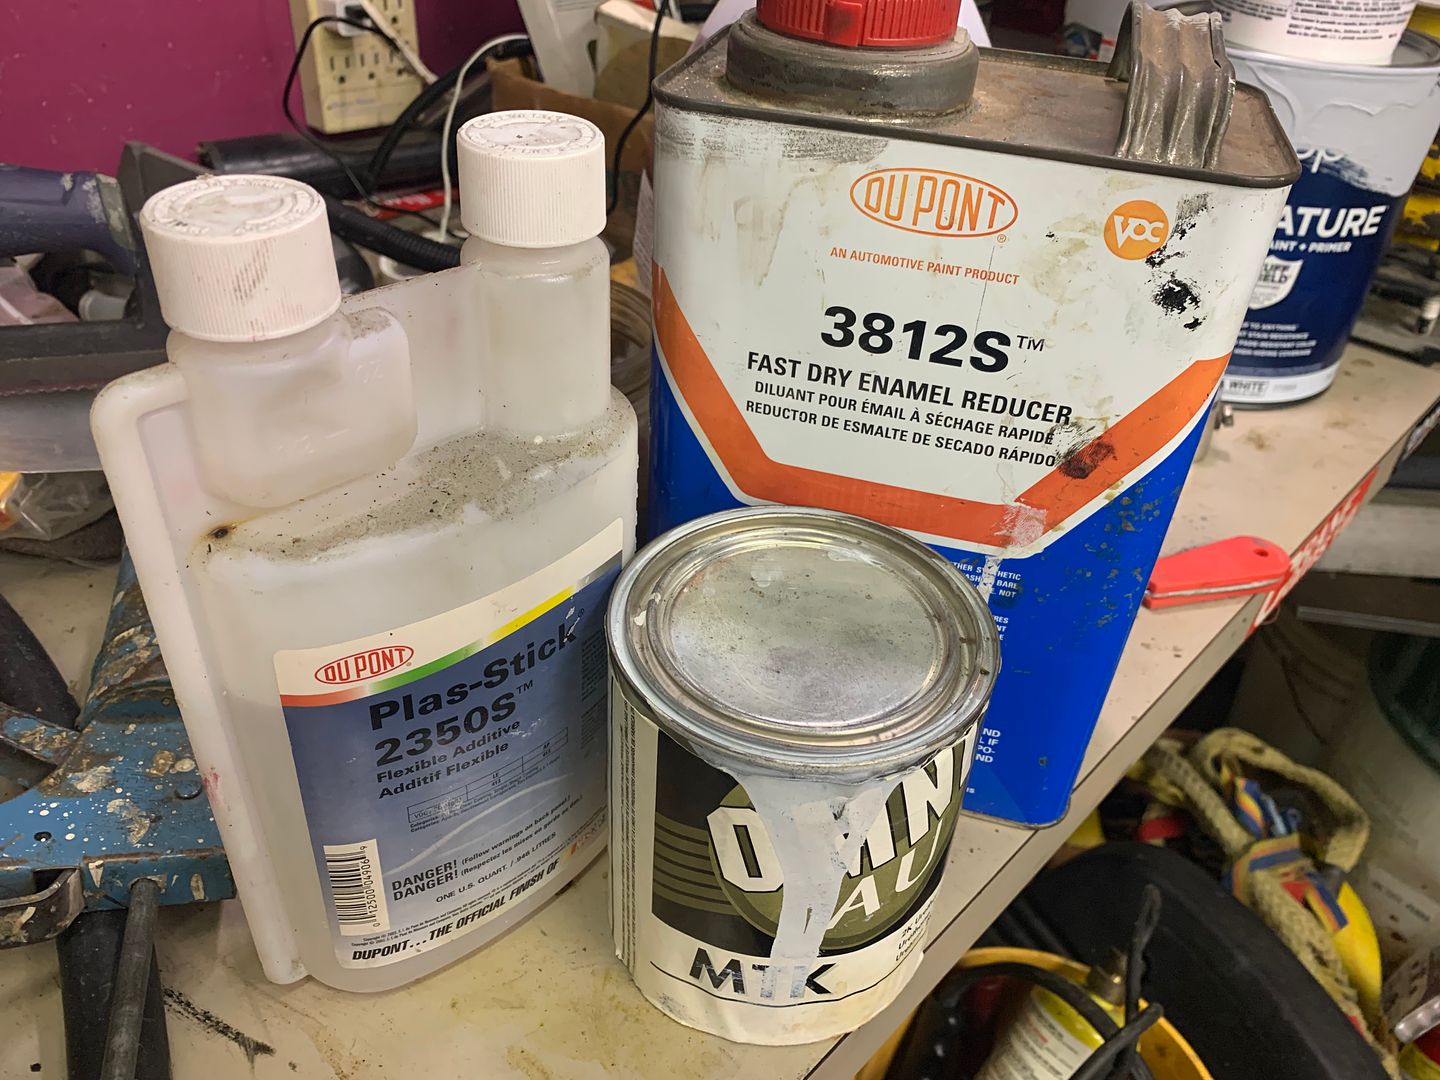
Got the paint materials. Had the paint from other repairs.
I did spend a couple hours over the weekend and mounted up this fairing. Fit pretty nice. I am going to fly it this afternoon like this. Then I will paint it.
I had to replace one of the nut plates inside the wheel pant. It is a little easier to work with when it is warmed up.
Got the paint materials. Had the paint from other repairs.
That is lead I picked out on the glass table top.
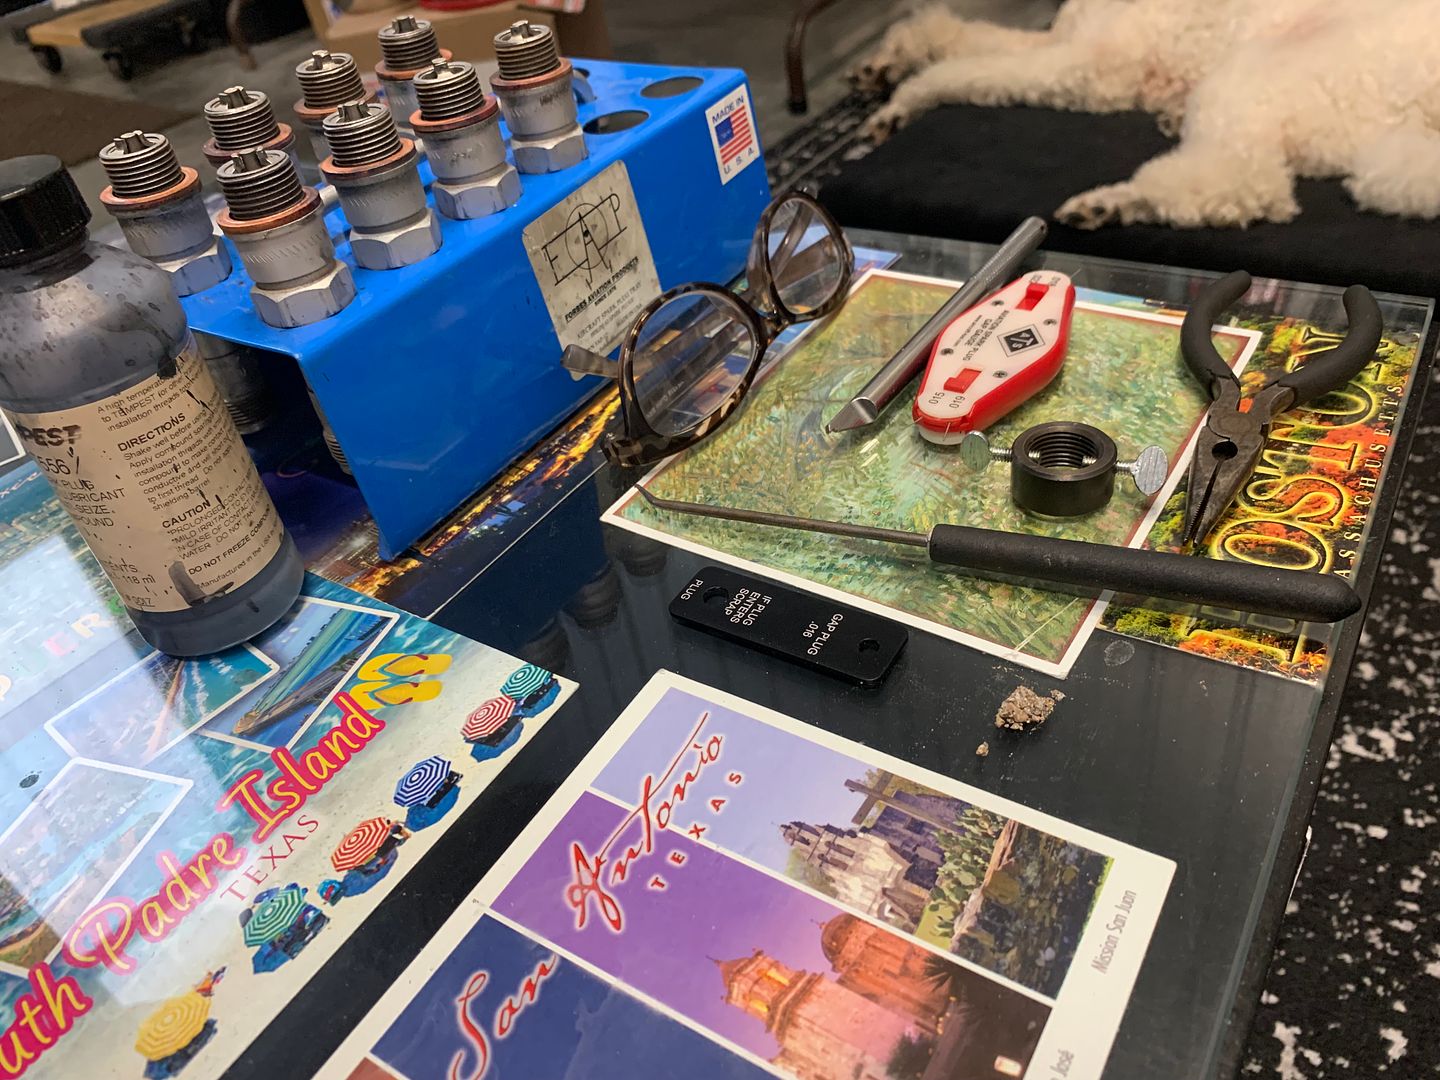
Keep those plug dry and rust free in my freezer converted to a hot box to keep my chemicals from freezing.
Keep those plug dry and rust free in my freezer converted to a hot box to keep my chemicals from freezing.
Dan Thomas
Touchdown! Greaser!
- Joined
- Jun 16, 2008
- Messages
- 10,769
- Display Name
Display name:
Dan Thomas
Try taking it to a motorcycle shop that has a dynamic balancer. Another POAer did that and was happy with the result. But take the seals and bearings out of it first, or they might just mount it with the balancer cones in the seals. That will have the wheel off-center, and the balancing won't turn out well.I will check the static balance of the front tire and rim when I take it off the fork.
Before that I will check the tire for out of round before I take it off. If any of that indicates a junk tire it will get replaced. Like you said, don't want to beat up new parts.
And tell them not to tighten the cones too much, or they might split the seal recesses in the wheel. Pretty thin there. When I built my balancer, I machined aluminum cones to fit into the bearing cups. Bearing cones and seals out altogether. Max accuracy that way.
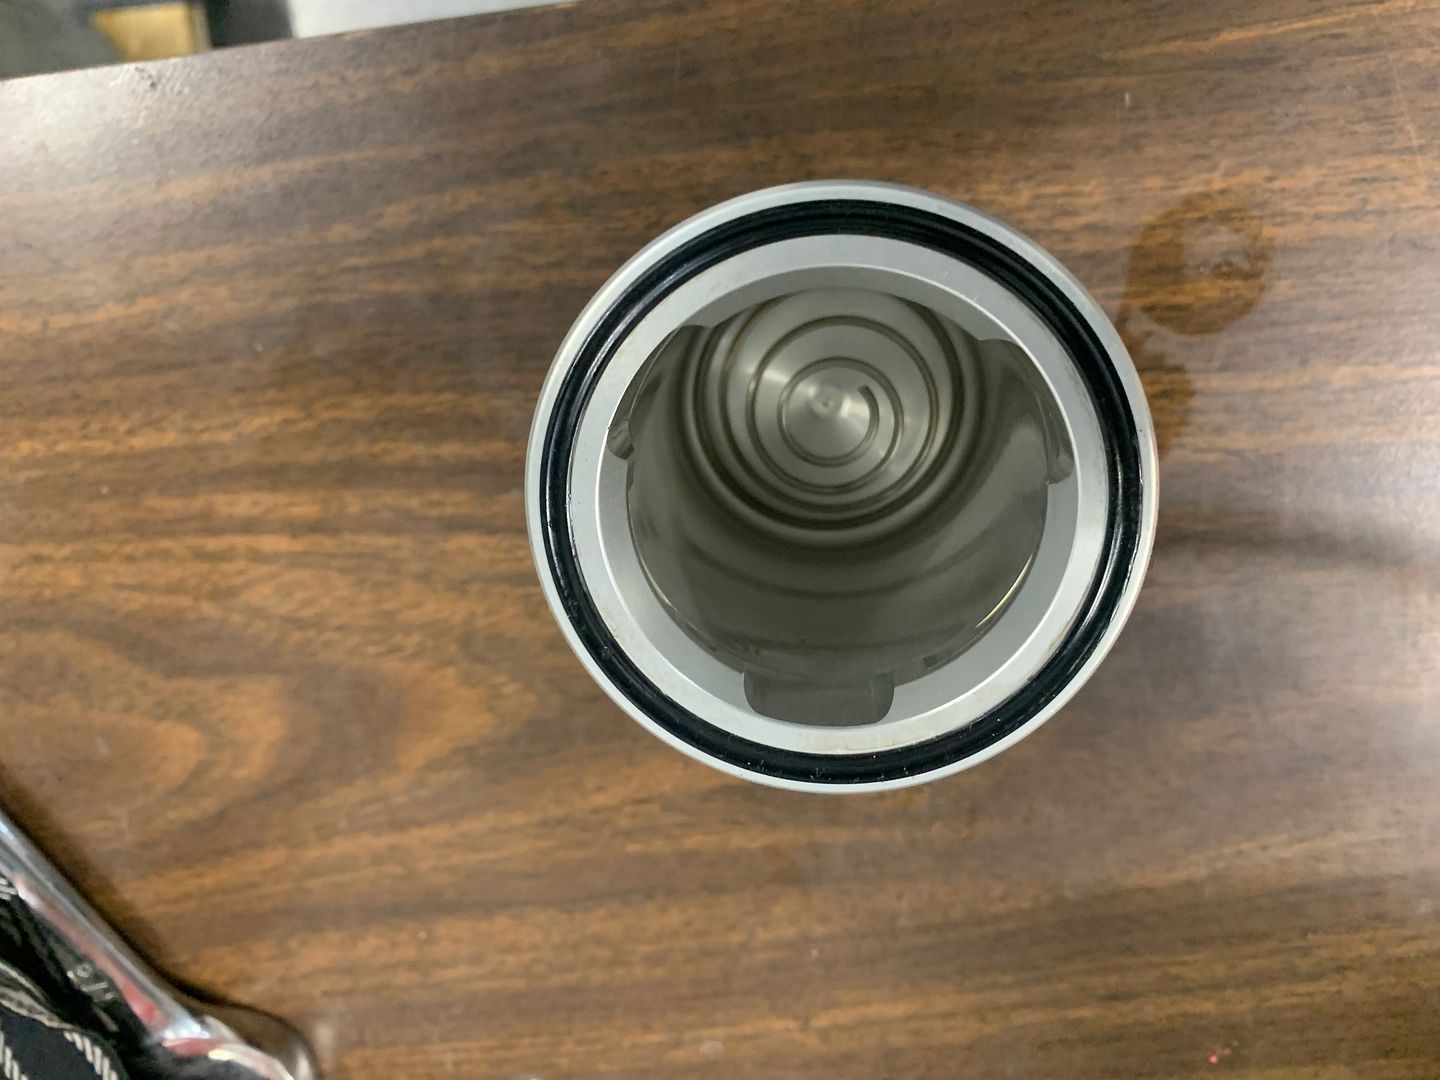
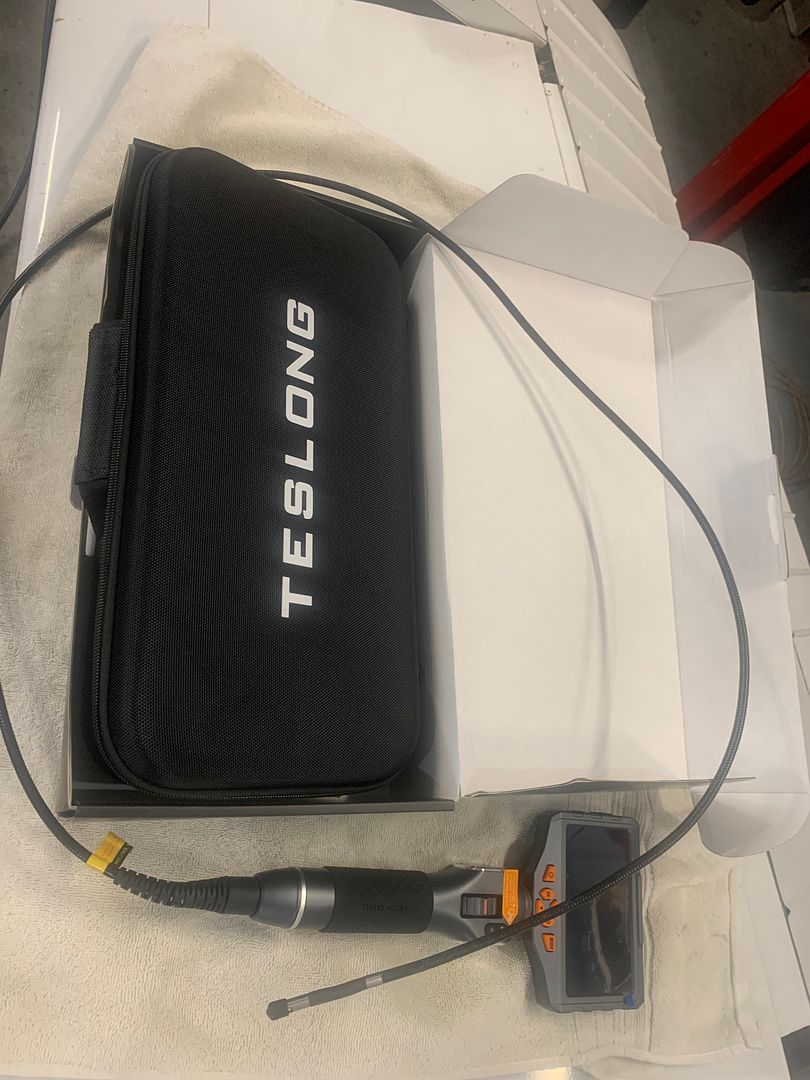
Check out what new tool I bought recently?
This is my lycoming factory rebuilt 0320 H2AD with 650 hrs on it. It runs good and so far I have not had any trouble with it.
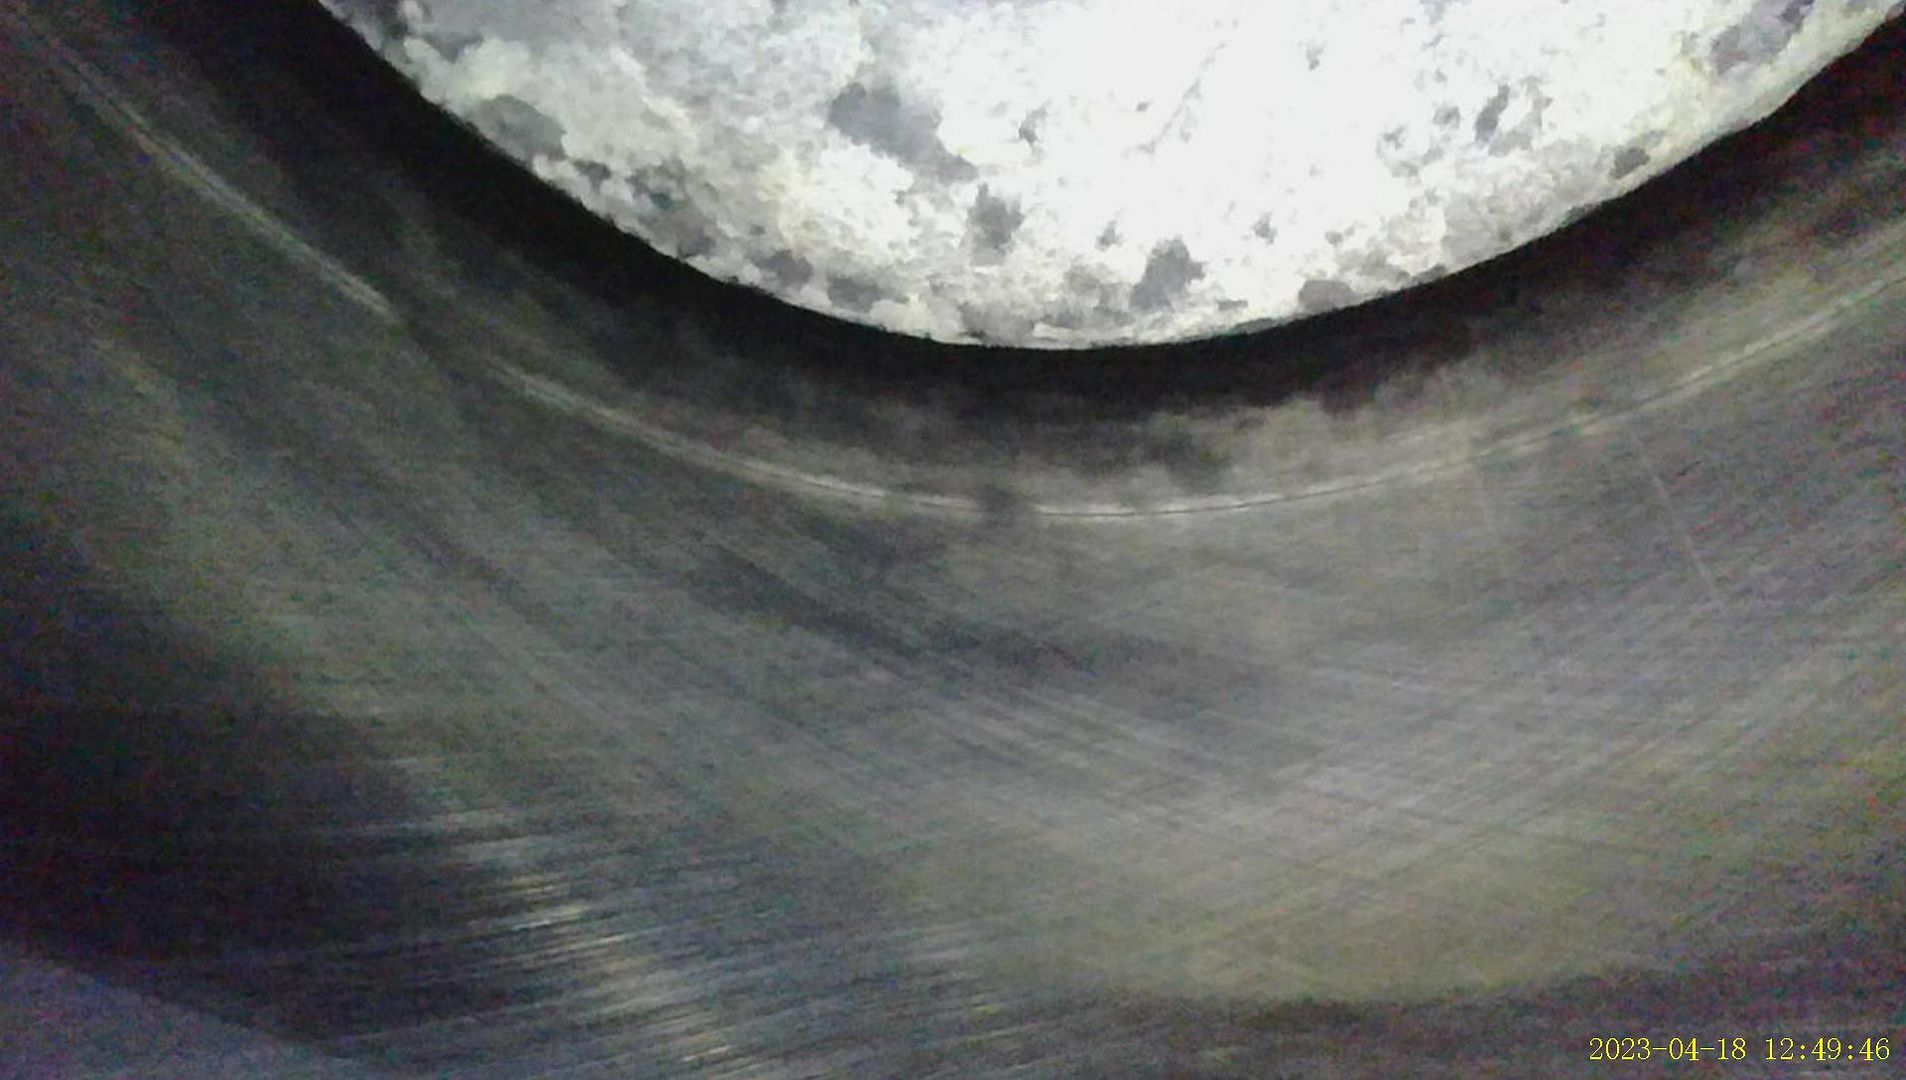
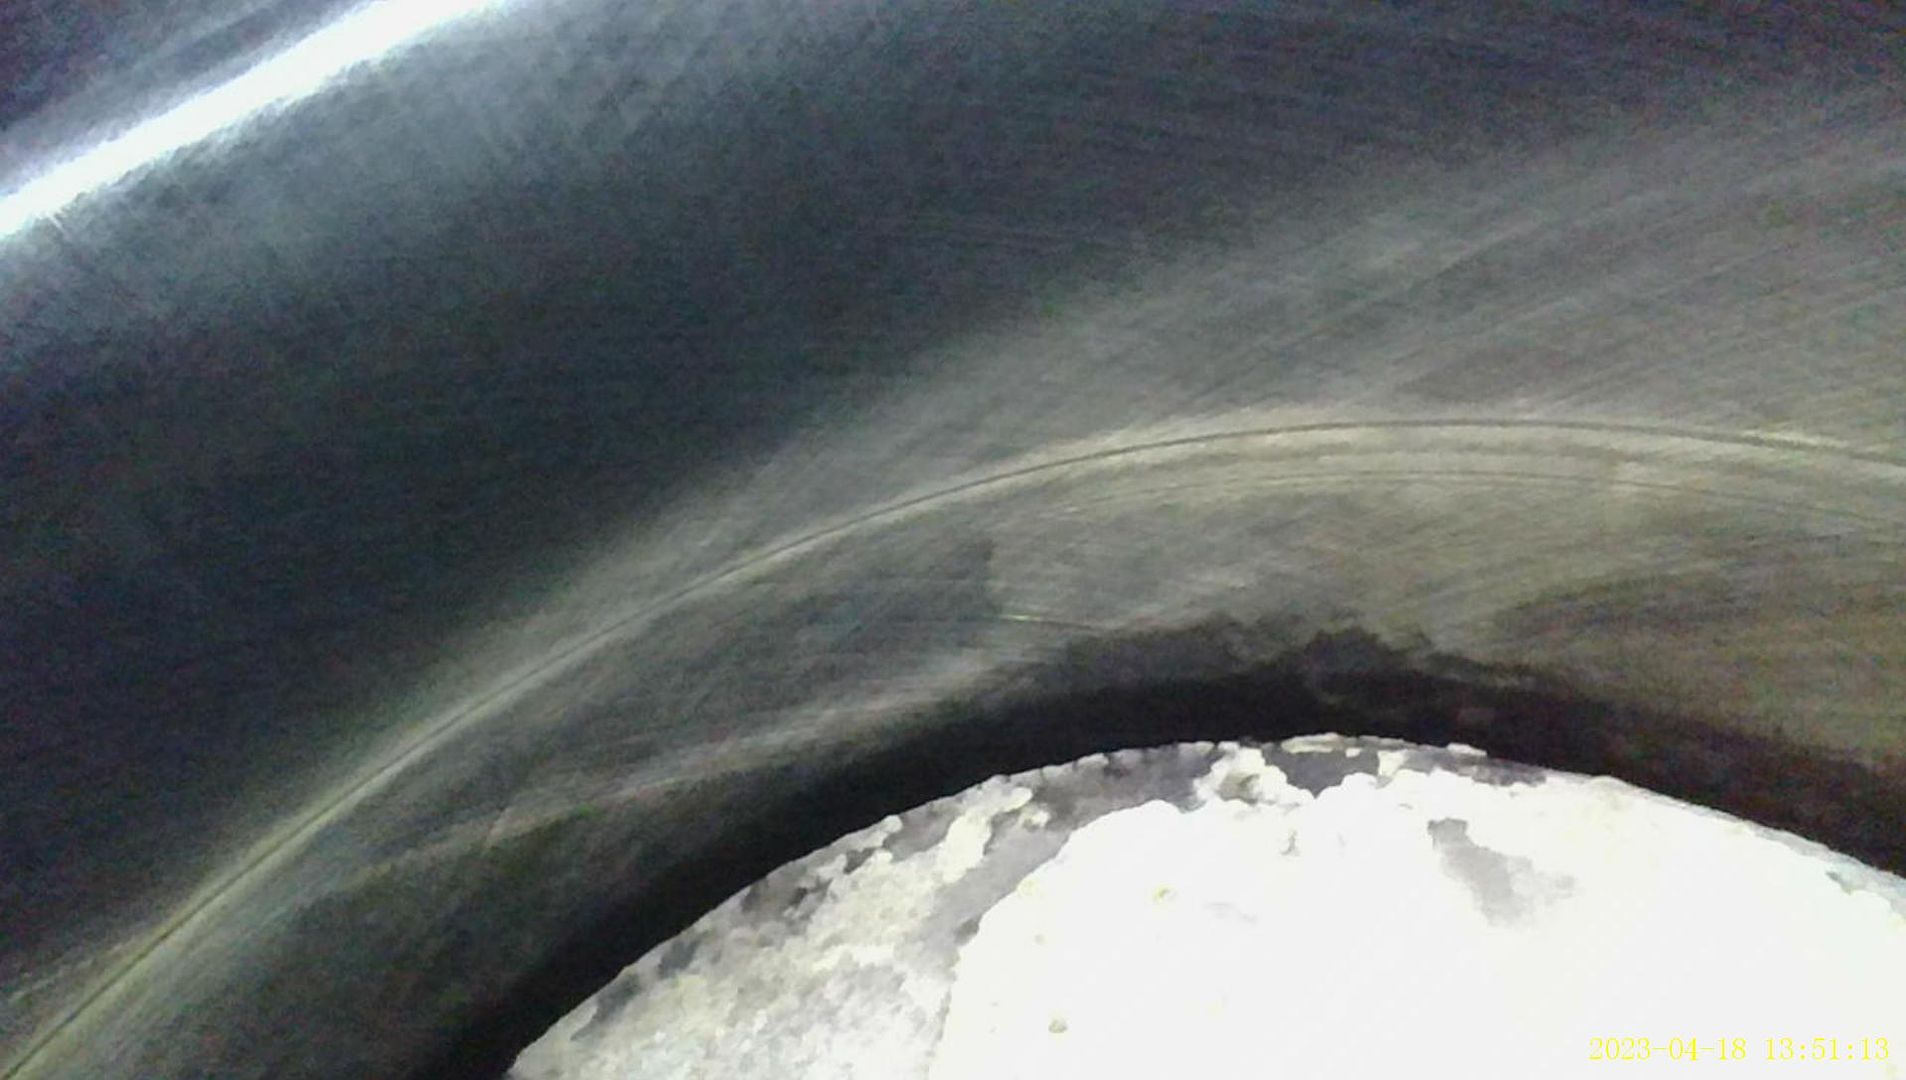
I really don't know what I am looking at or what to watch for but I hope to learn as I use it more. Not easy getting good shots as it is awkward to use.
It has a side camera for side shots and it is articulating.
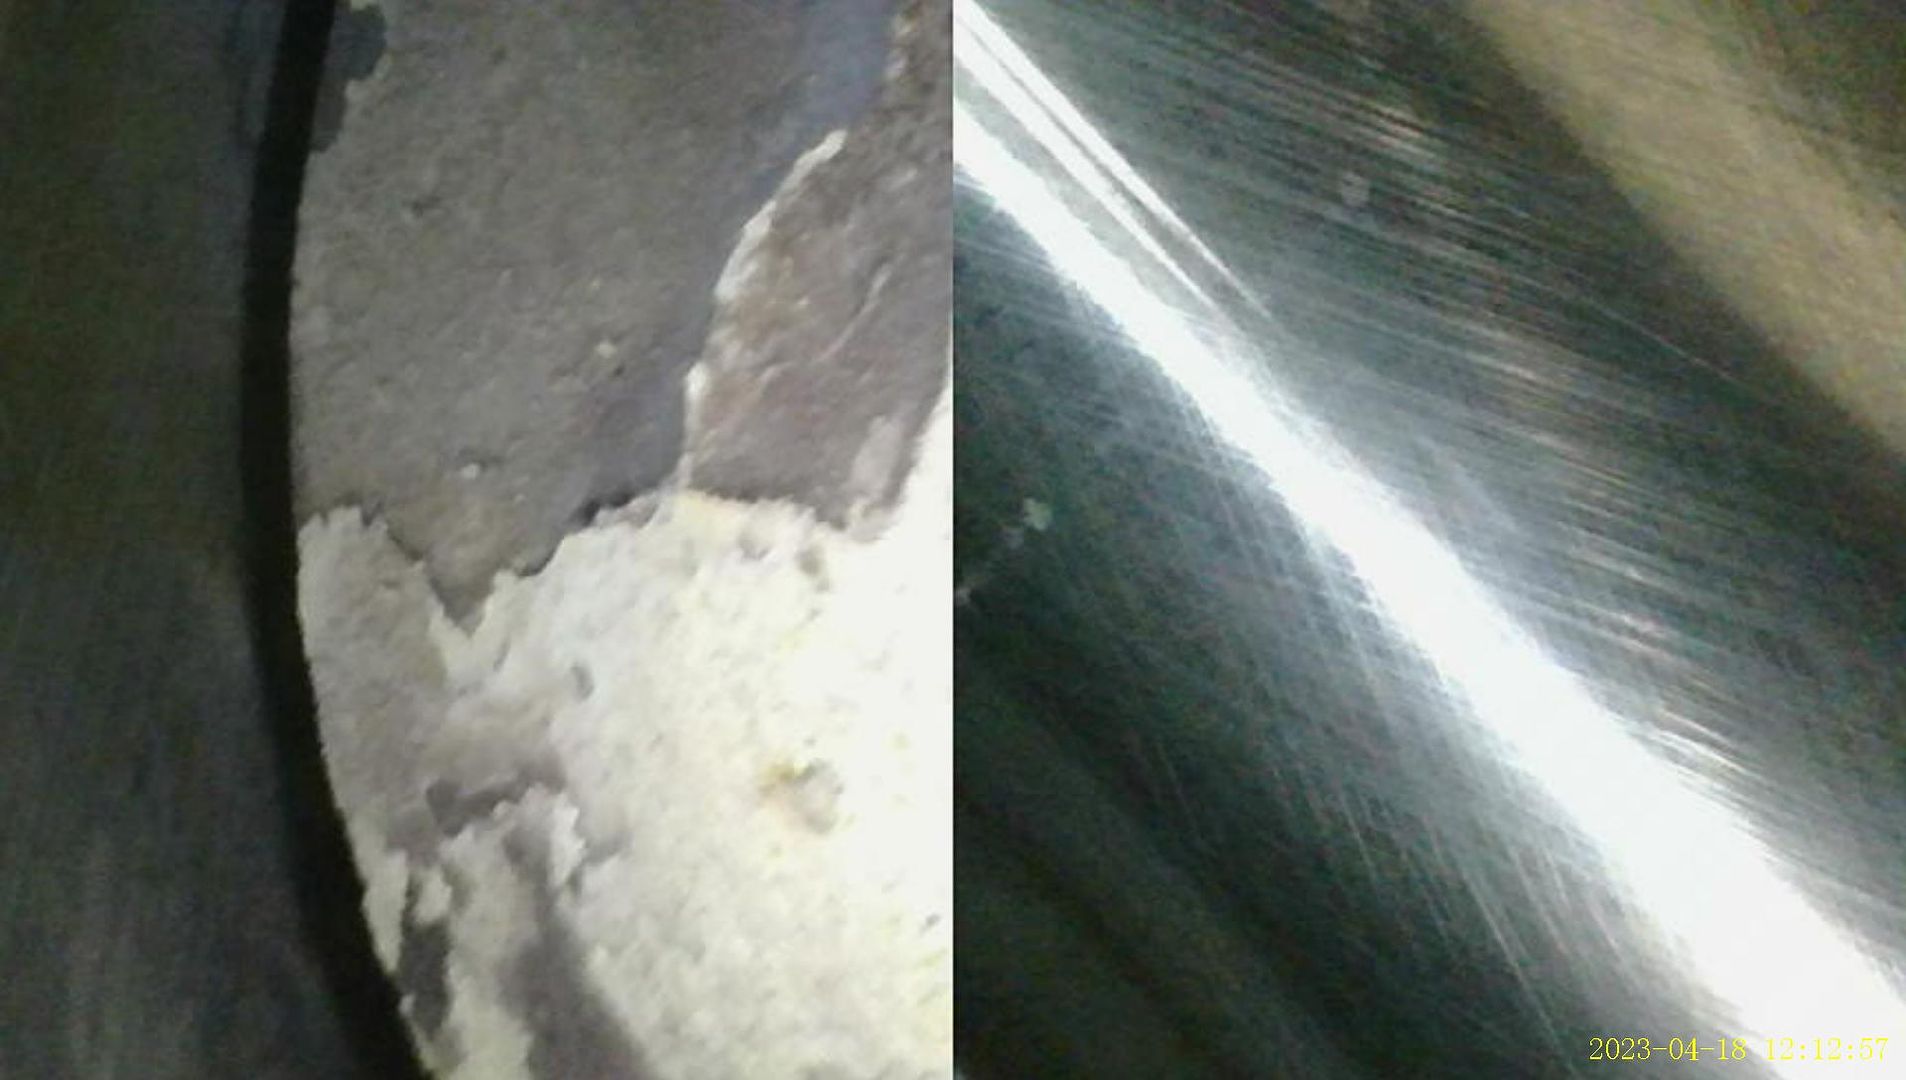
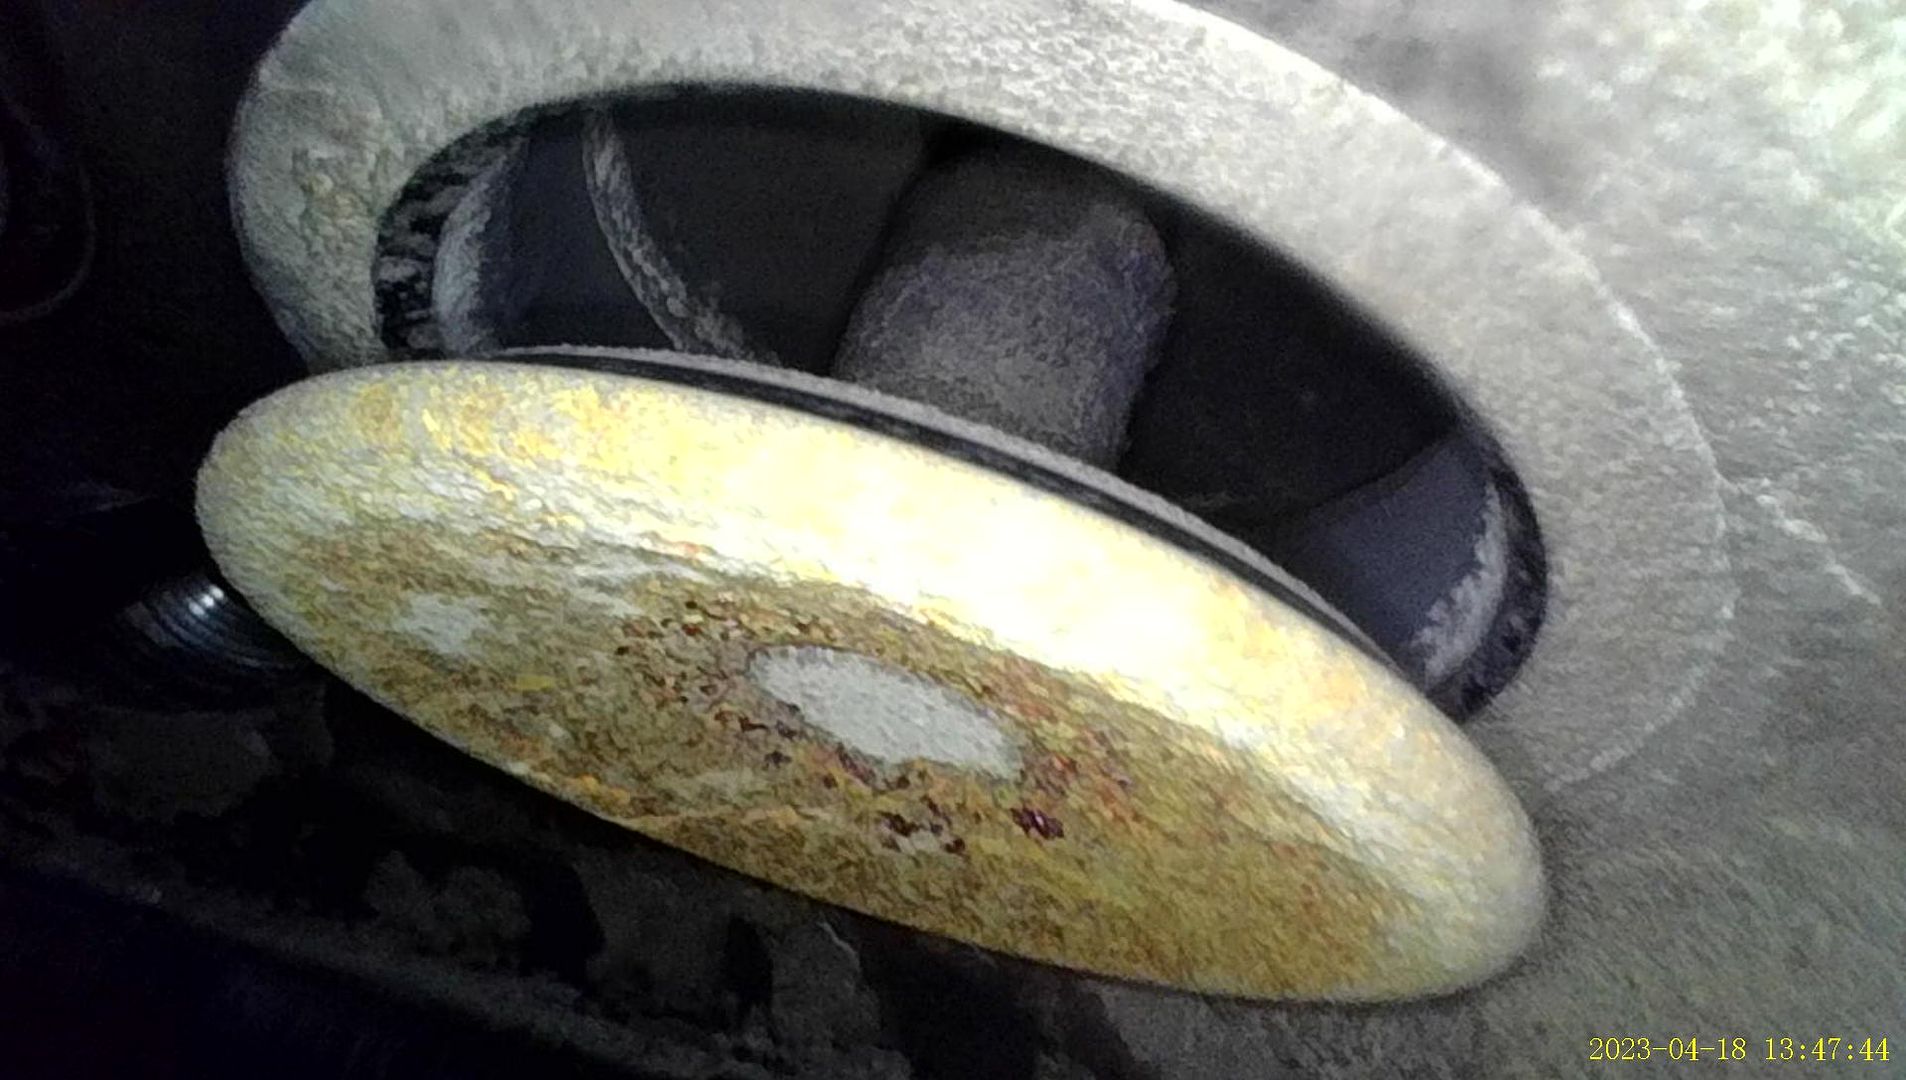
Just noticed the date is wrong, I just used it for the first time last night. I don't even know if that is the intake or exhaust valve?
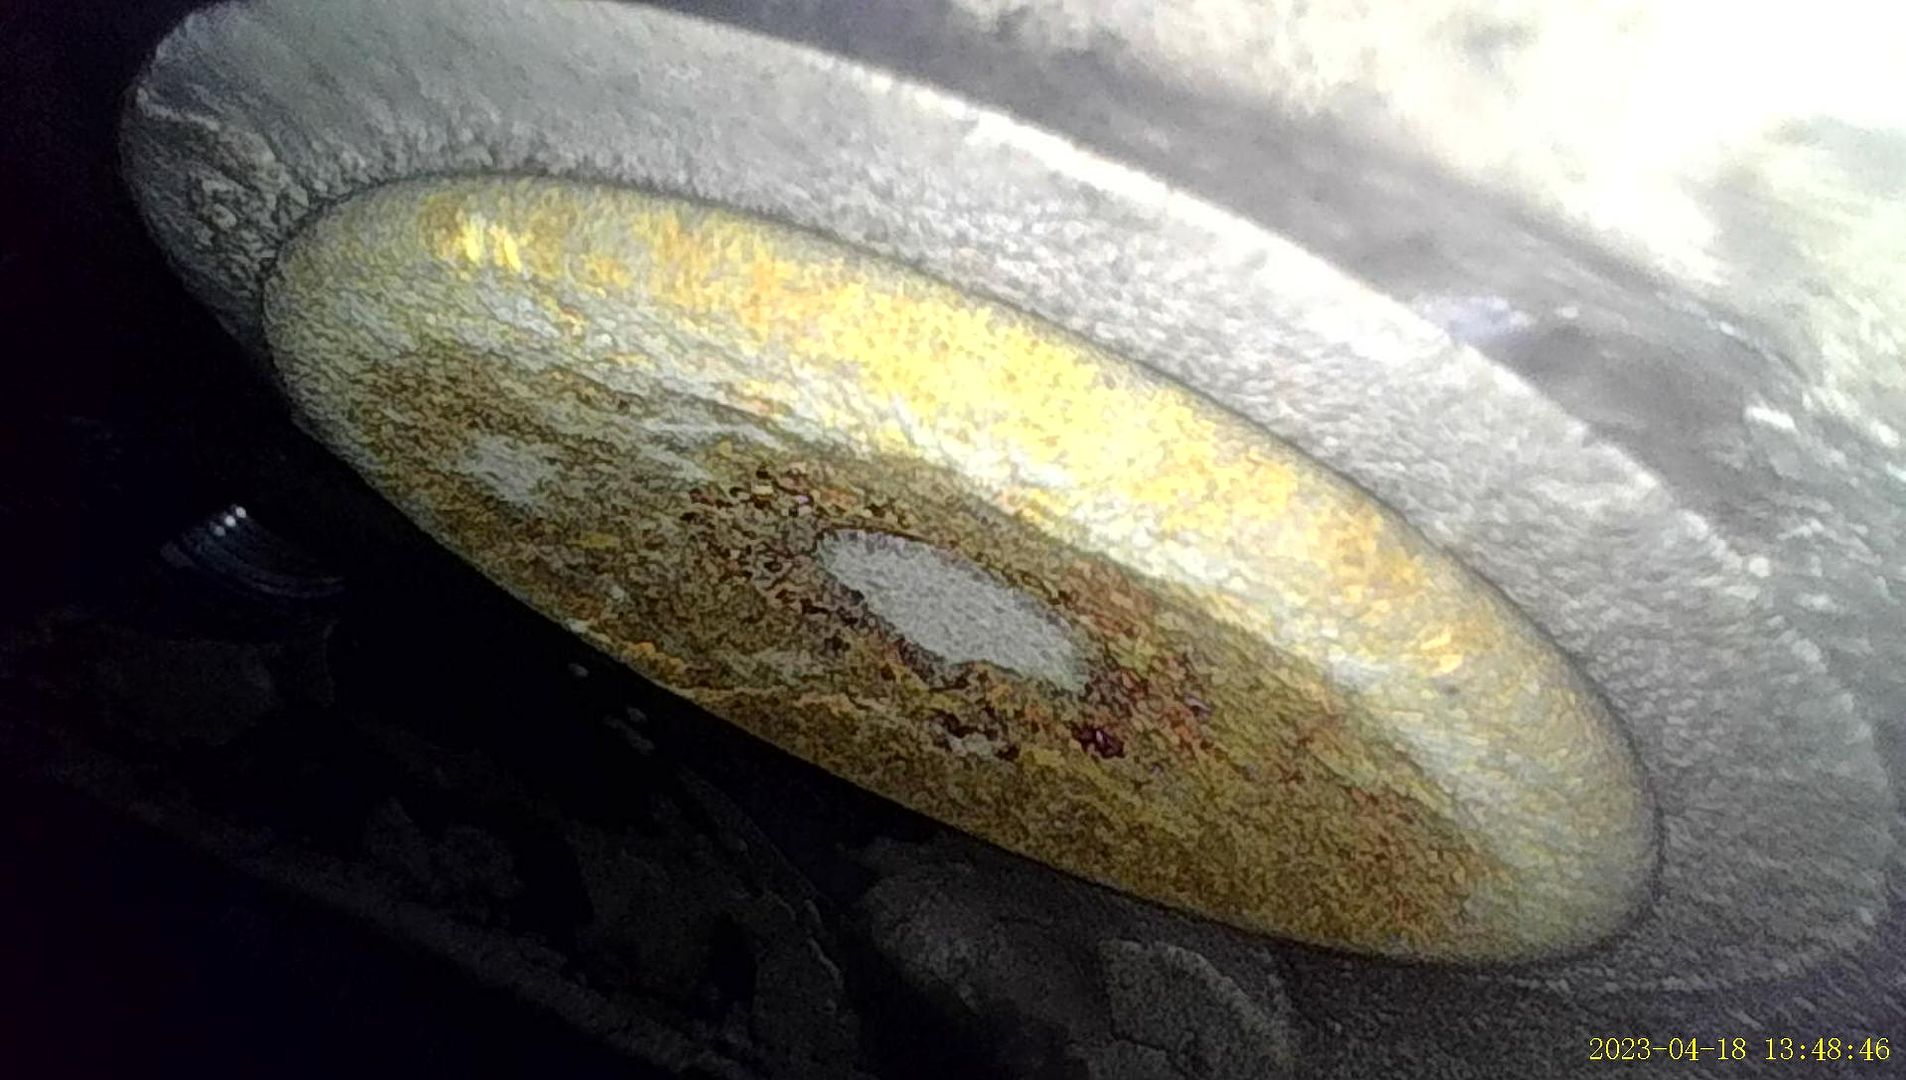
It's this one
This is my lycoming factory rebuilt 0320 H2AD with 650 hrs on it. It runs good and so far I have not had any trouble with it.
I really don't know what I am looking at or what to watch for but I hope to learn as I use it more. Not easy getting good shots as it is awkward to use.
It has a side camera for side shots and it is articulating.
Just noticed the date is wrong, I just used it for the first time last night. I don't even know if that is the intake or exhaust valve?
It's this one
Last edited: