Cessna flap bearings maintenance tips wanted. Other maintenance related pictures.

Monel=steel rivets, right? I drilled them out this morning.
Nope. Wiki:

Monel is a group of alloys of nickel (from 52 to 67%) and copper, with small amounts of iron, manganese, carbon, and silicon.

It's tough stuff, and corrosion-resistant. It won't fatigue in that application like aluminum rivets would.
 
IMG_3701.HEIC
 
Any idea of size on the monel rivets?

I have quite a few “ uncommon “ rivets I want to get rid of.

Many are ex- MIL.
 
Word on the street is that there was a 172 that successfully emergency landed in a field this past Thursday east of Xenia Ohio, news says engine failure. FOB here says they are thinking carburetor ice! It was one of the school planes from our airport that was being rented!
Last week I experienced carb ice 3 times in the first 10 minutes of flying one day with a cold engine. Conditions were right for carb ice.
I am used to it as I run a power flow exhaust that does not have a muffler that normally heats up keeping the carb warm. It has a collector housing/shroud that provides plenty of heat for the cabin and carb heat but radiants less heat to the outside of the carburetor.
Last week I decided I was taking my plane down to update my hot air box. It is important and gets beat to death with heat and vibration.
 
Last edited:
Lycoming only

While in the area:

I had met a 172 that had a jug split open. Oddly; my belief is it saved his life.

It seems the “ Bumper Bracket “ that absorbs air loads on the cowling and transfers them

to the engine was missing. This allowed the cowling to push the airbox back into the muffler.

This in turn punctured the Muffler Pressure Can which would put CO into the cabin heat system

that was being used . And the FBO had taped over the Vent Inlets of the Wing Leading Edge.

i thought there should be CRIMINAL charges for this.


Assure the bracket is in place and a “ cowl mount” is on the lower cowl.
 
Call me a copycat.
IMG_3733.HEIC

IMG_3730.HEIC

IMG_3723.HEIC

I am waiting on my AP for the air door baffle. Hoping to get the baffle material without spending 569. on a new air door from Acorn Welding.
IMG_3732.HEIC
 
I am waiting on my AP for the air door baffle. Hoping to get the baffle material without spending 569. on a new air door from Acorn Welding.
It's just cooling baffle seal material, the woven-reinforced stuff. The aluminum sheets would be 2024 or 5052 of some sort, likely, and the A&P could figure out which just by bending the old stuff.

https://www.aircraftspruce.com/catalog/appages/cowlseal04-02620.php?clickkey=3611

Don't forget to rivet the valve to the shaft before you put the box together. And get the control lever in the right orientation:)

Copycat? Mine was a copy of someone else's idea.
1702848997319.png
 
Do the work or pay the bill$.

Anyone priced air boxes lately?
 
It's just cooling baffle seal material, the woven-reinforced stuff. The aluminum sheets would be 2024 or 5052 of some sort, likely, and the A&P could figure out which just by bending the old stuff.

https://www.aircraftspruce.com/catalog/appages/cowlseal04-02620.php?clickkey=3611

Don't forget to rivet the valve to the shaft before you put the box together. And get the control lever in the right orientation:)
He says Brown Manufacturing makes it, sure he is right.
Think textured is necessary? or smooth silcone would be OK?
300°f is the max heat on the baffle you listed. Is that hot enough as I see others up to 450° even 550°?
How hot does it get, the air box?
 
Cessna flaps, isn't there something that many people lubricate but shouldn't be? Perhaps the flap track?
 
Cessna flaps, isn't there something that many people lubricate but shouldn't be? Perhaps the flap track?
Yes, the tracks should dry and the outside of the roller should be dry, no oil. The roller should roll and not slide so not to wear out the tracks.
IMG_3724.HEIC

IMG_3727.HEIC
 
It might be interesting noting labor hours on some of these projects.

Many folks think the shop is overcharging as they have no idea of the

scope.

“ If I knew it cost that much I would have bought a new one” Is common.

Of course they don’t know new cost either!
 
It might be interesting noting labor hours on some of these projects.

Many folks think the shop is overcharging as they have no idea of the

scope.

“ If I knew it cost that much I would have bought a new one” Is common.

Of course they don’t know new cost either!
Honesty the hours are not that high yet. Already thought I could do the next one much faster with more confidence.
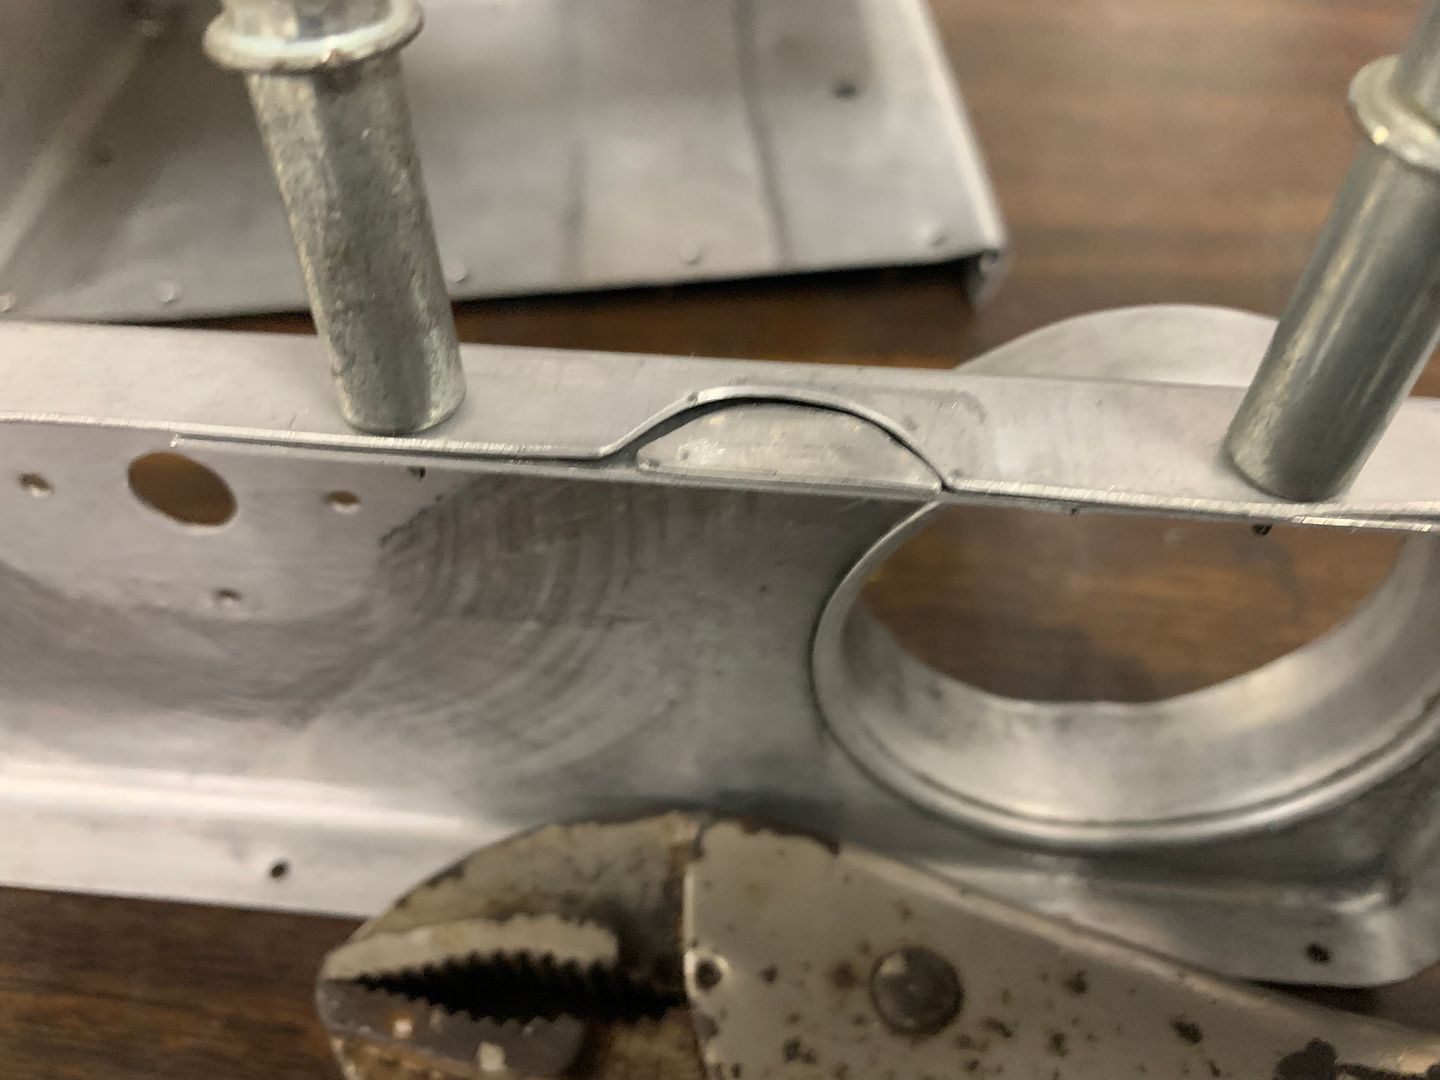
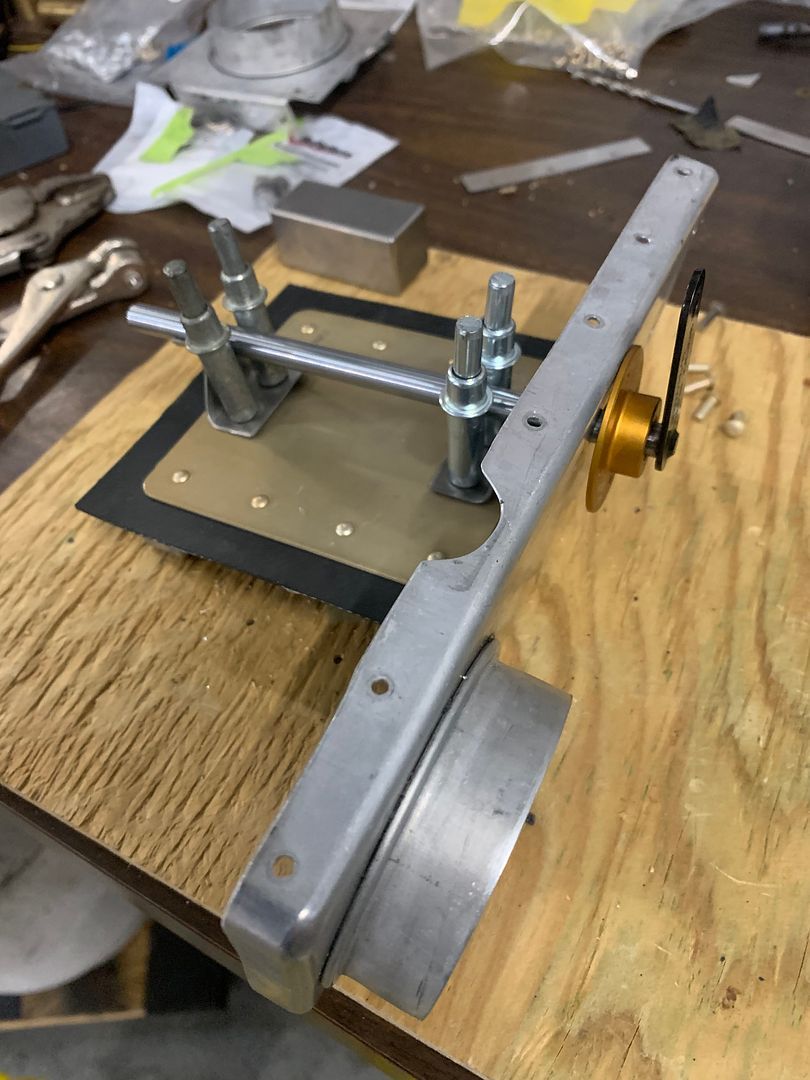
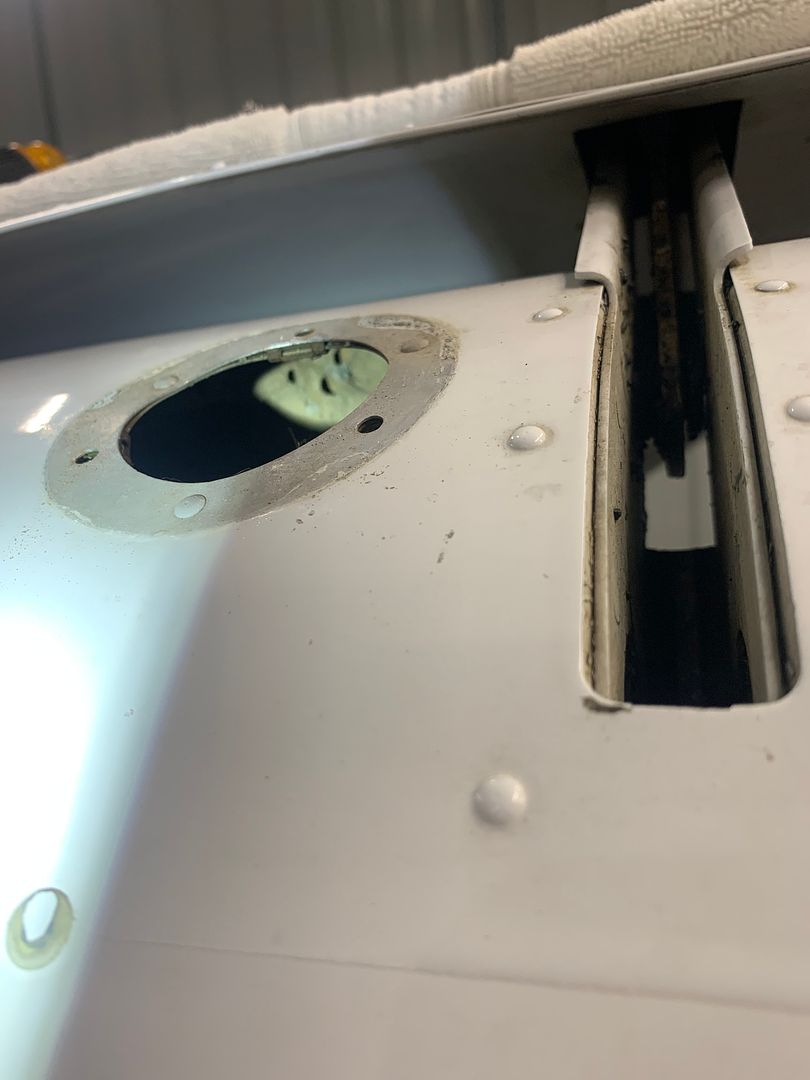
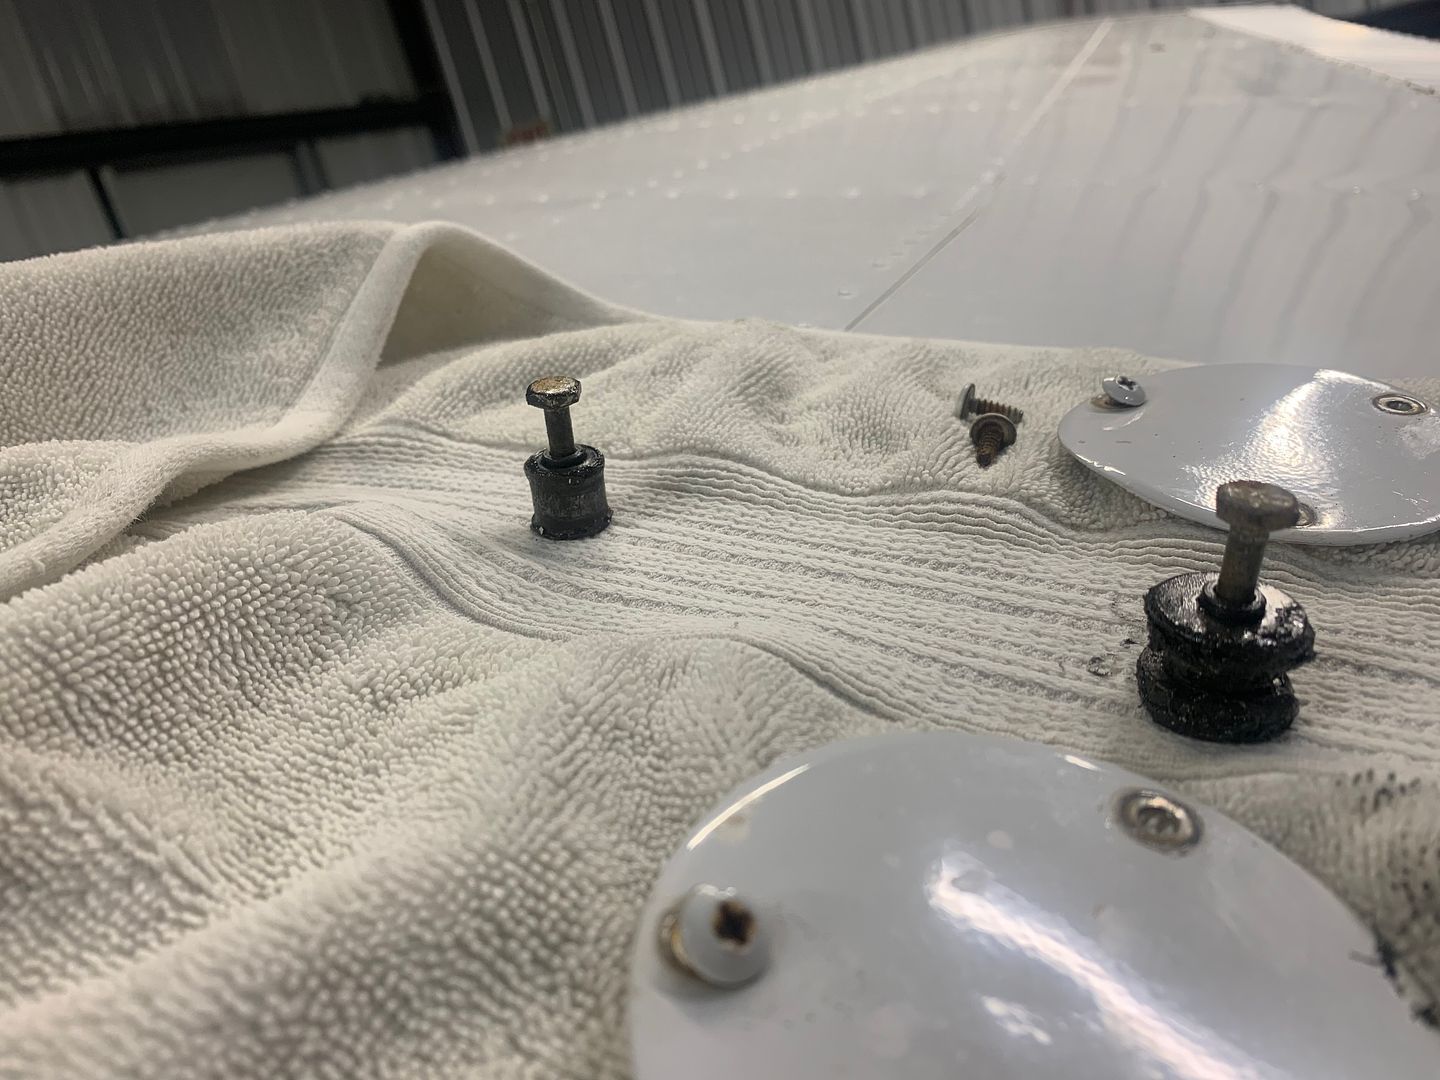
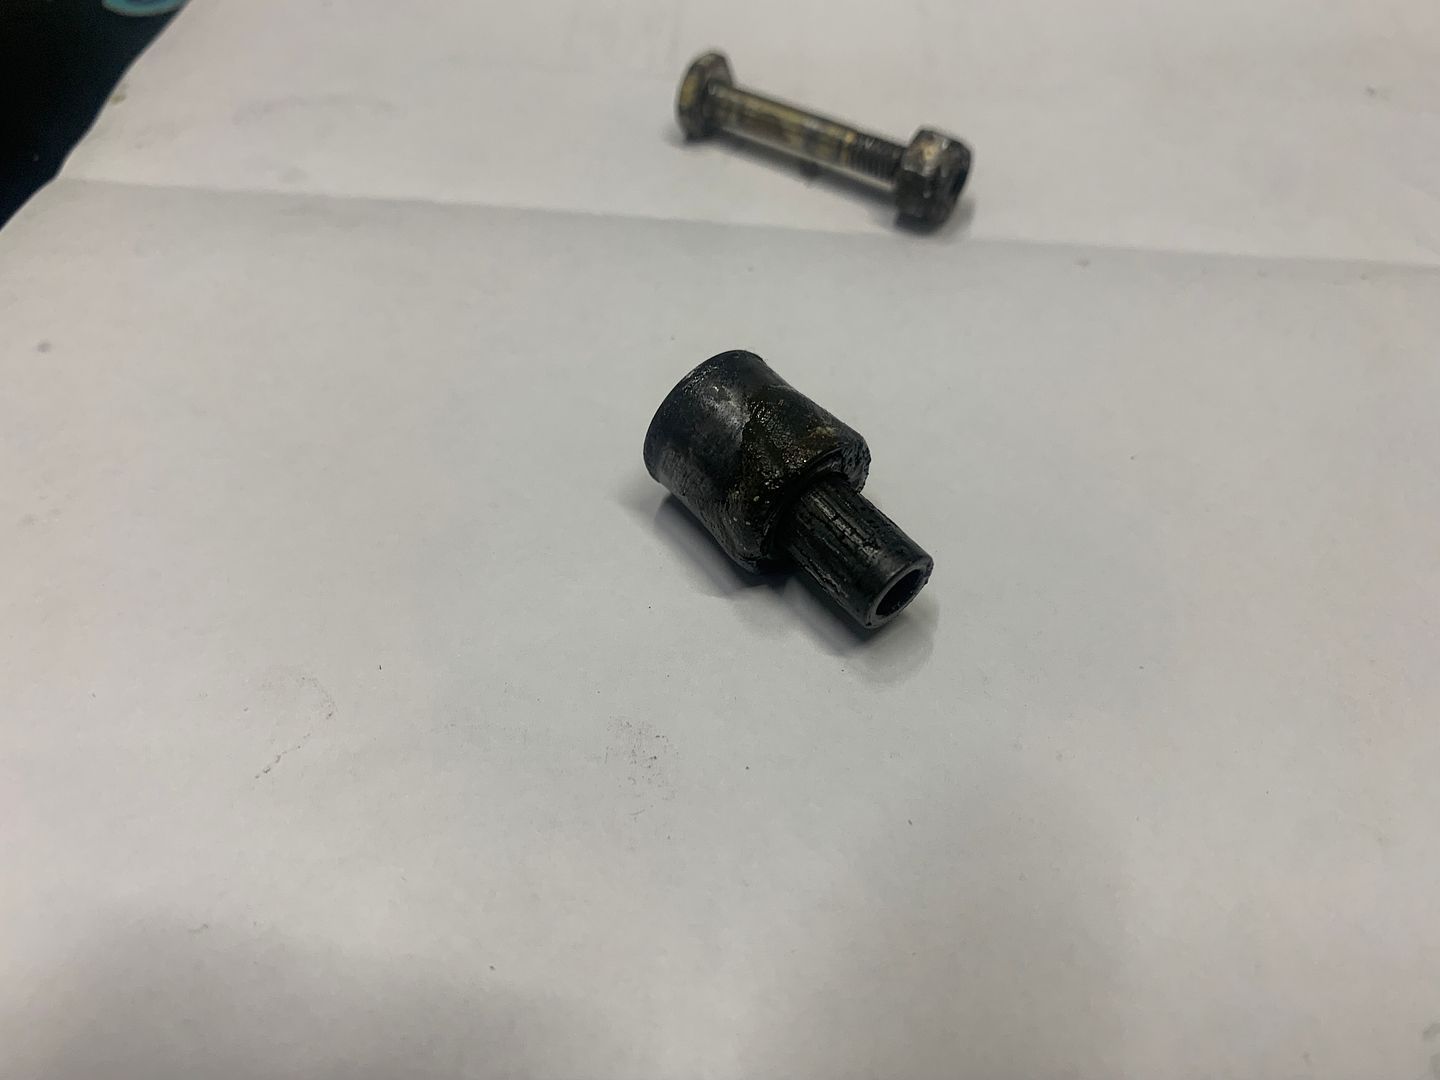
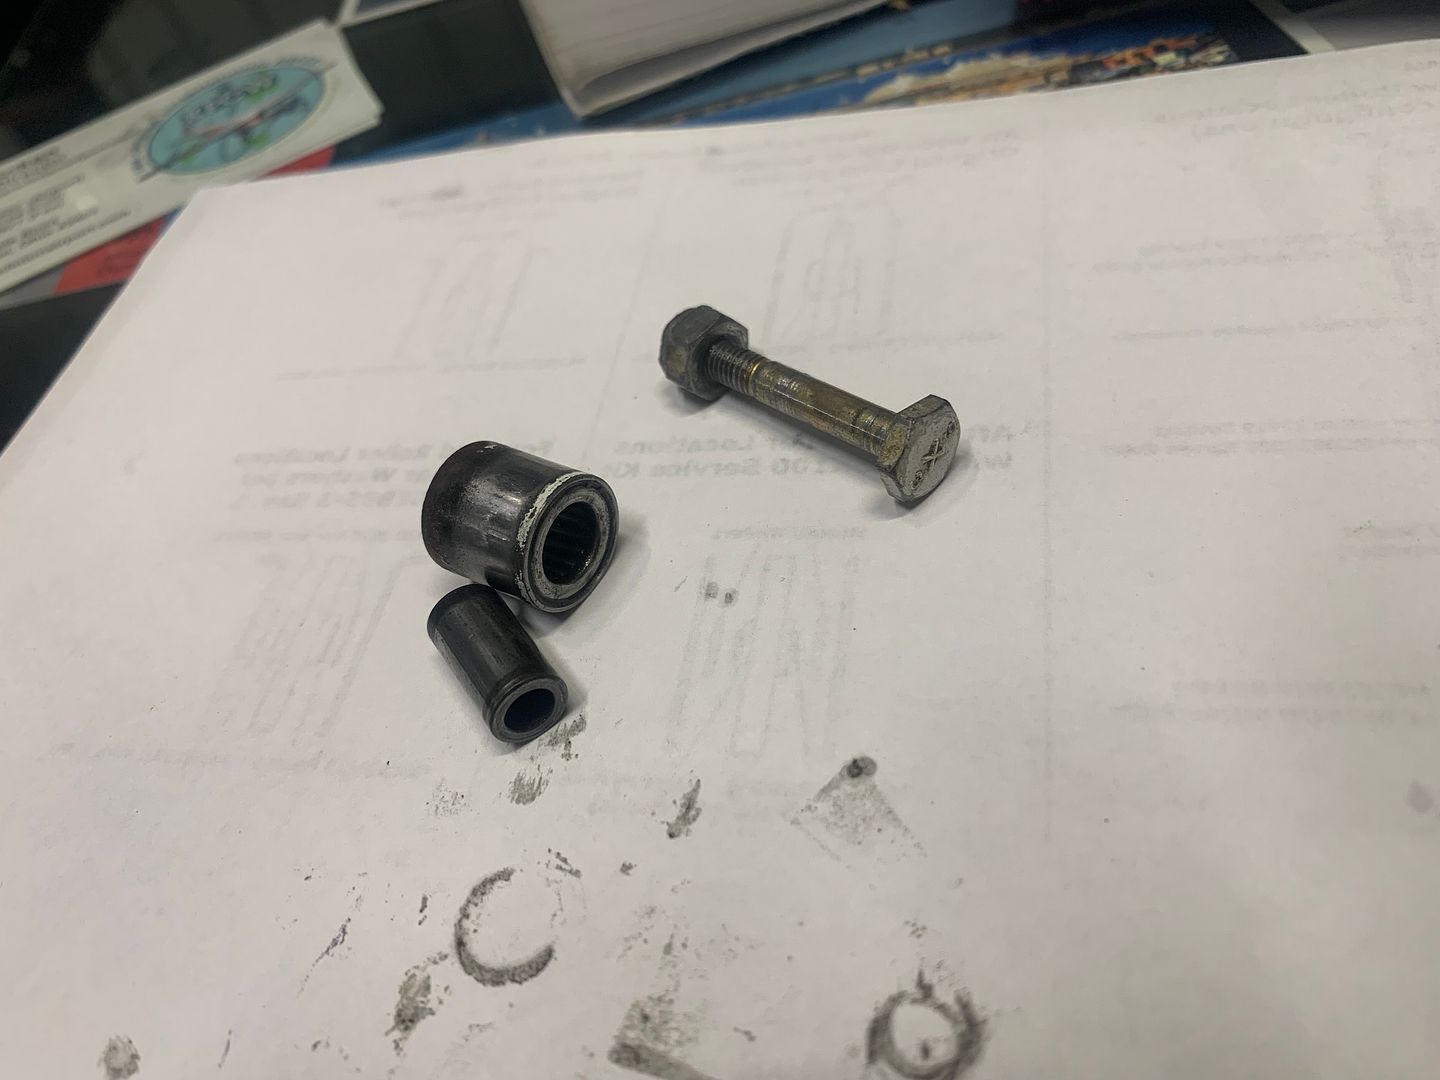
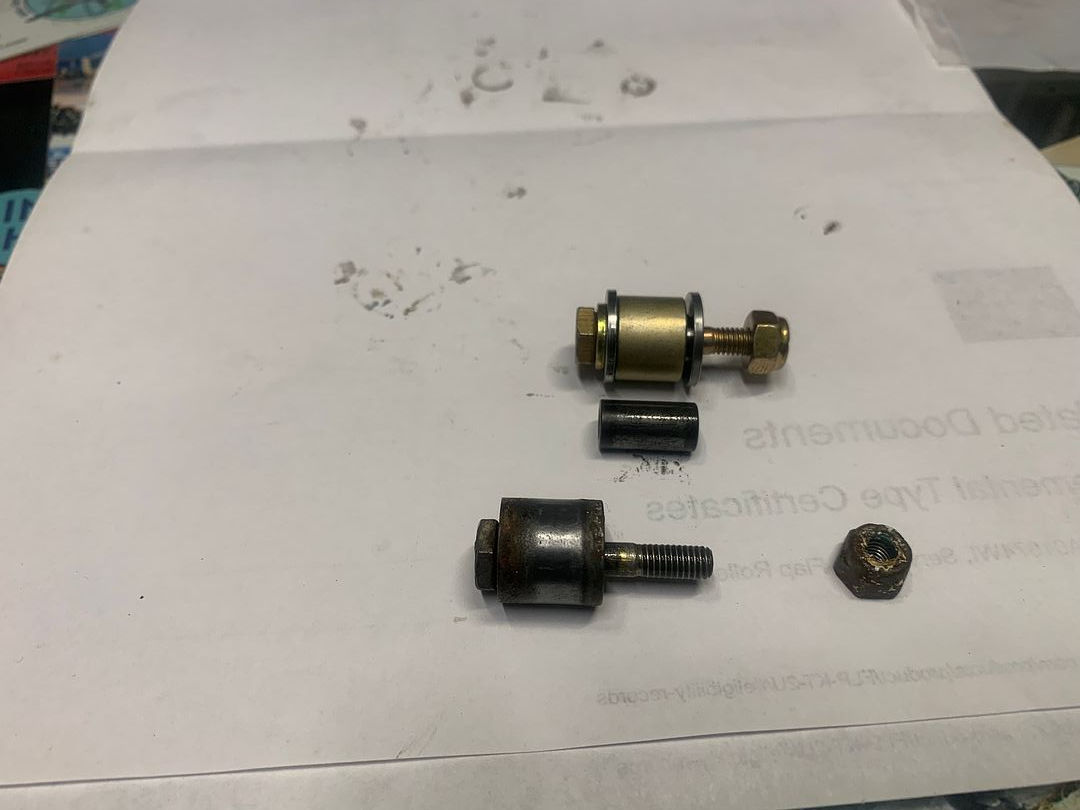
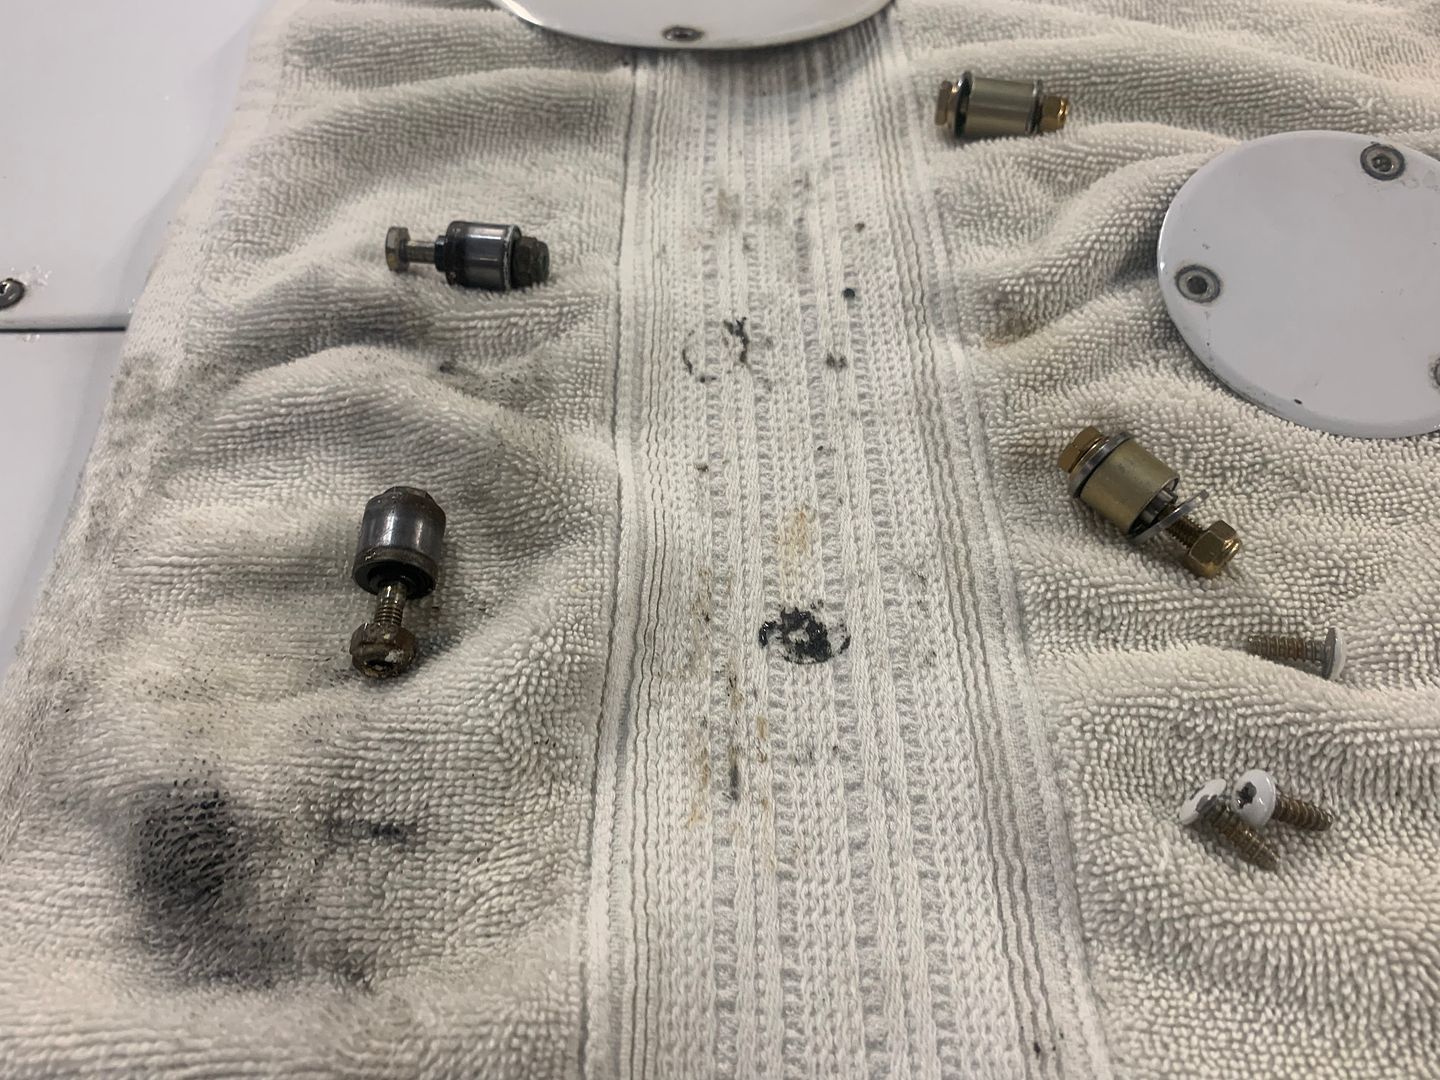
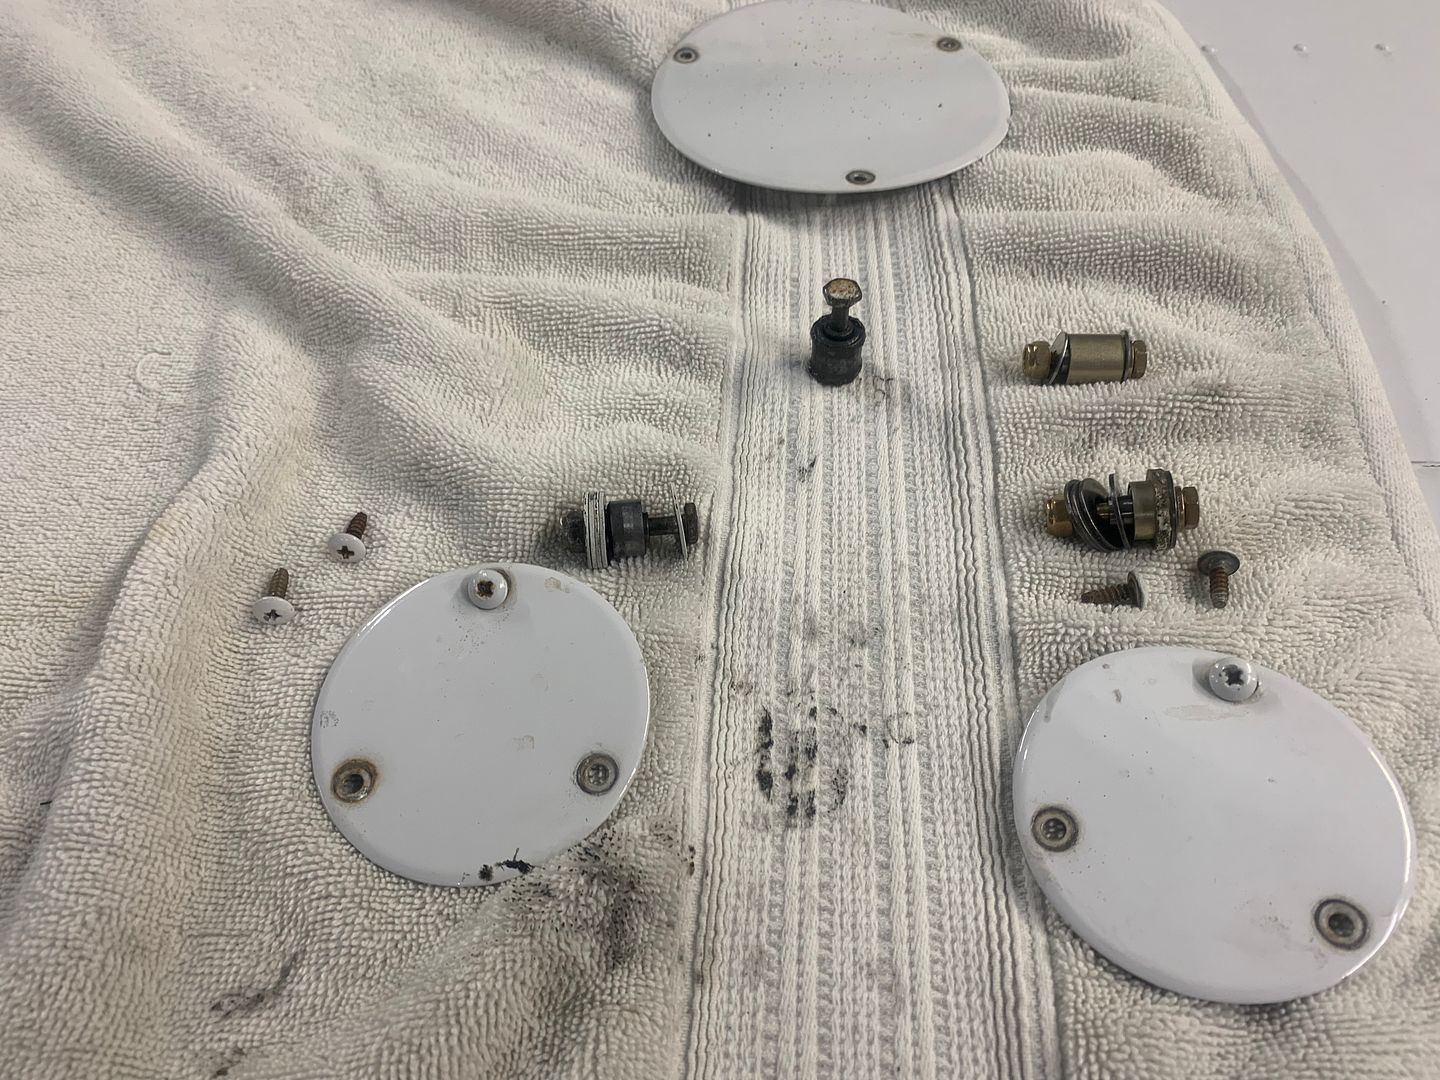
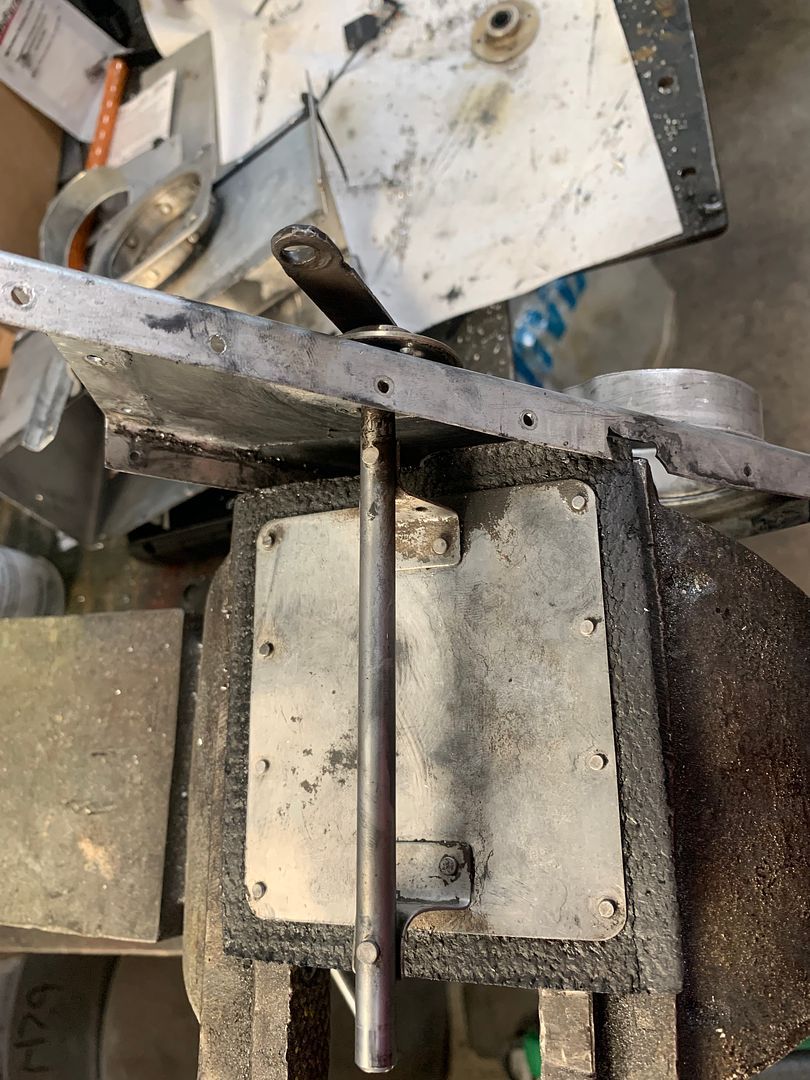
I have an hour drilling it apart in my buddys shop.
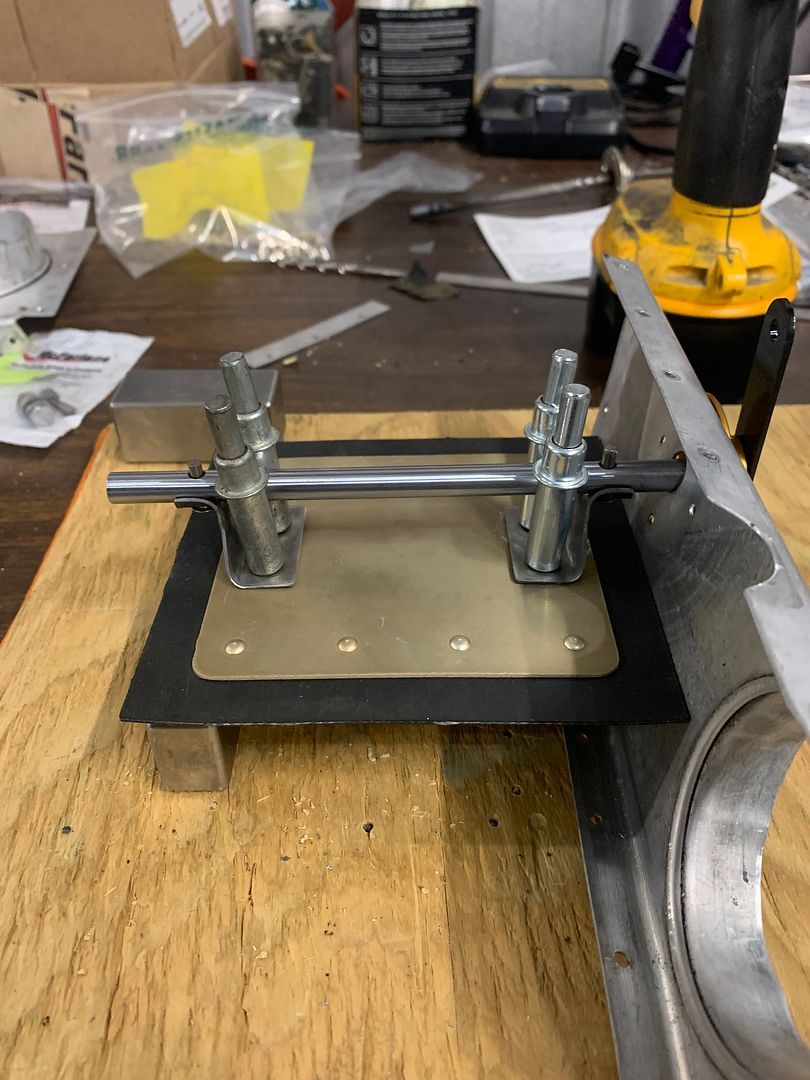
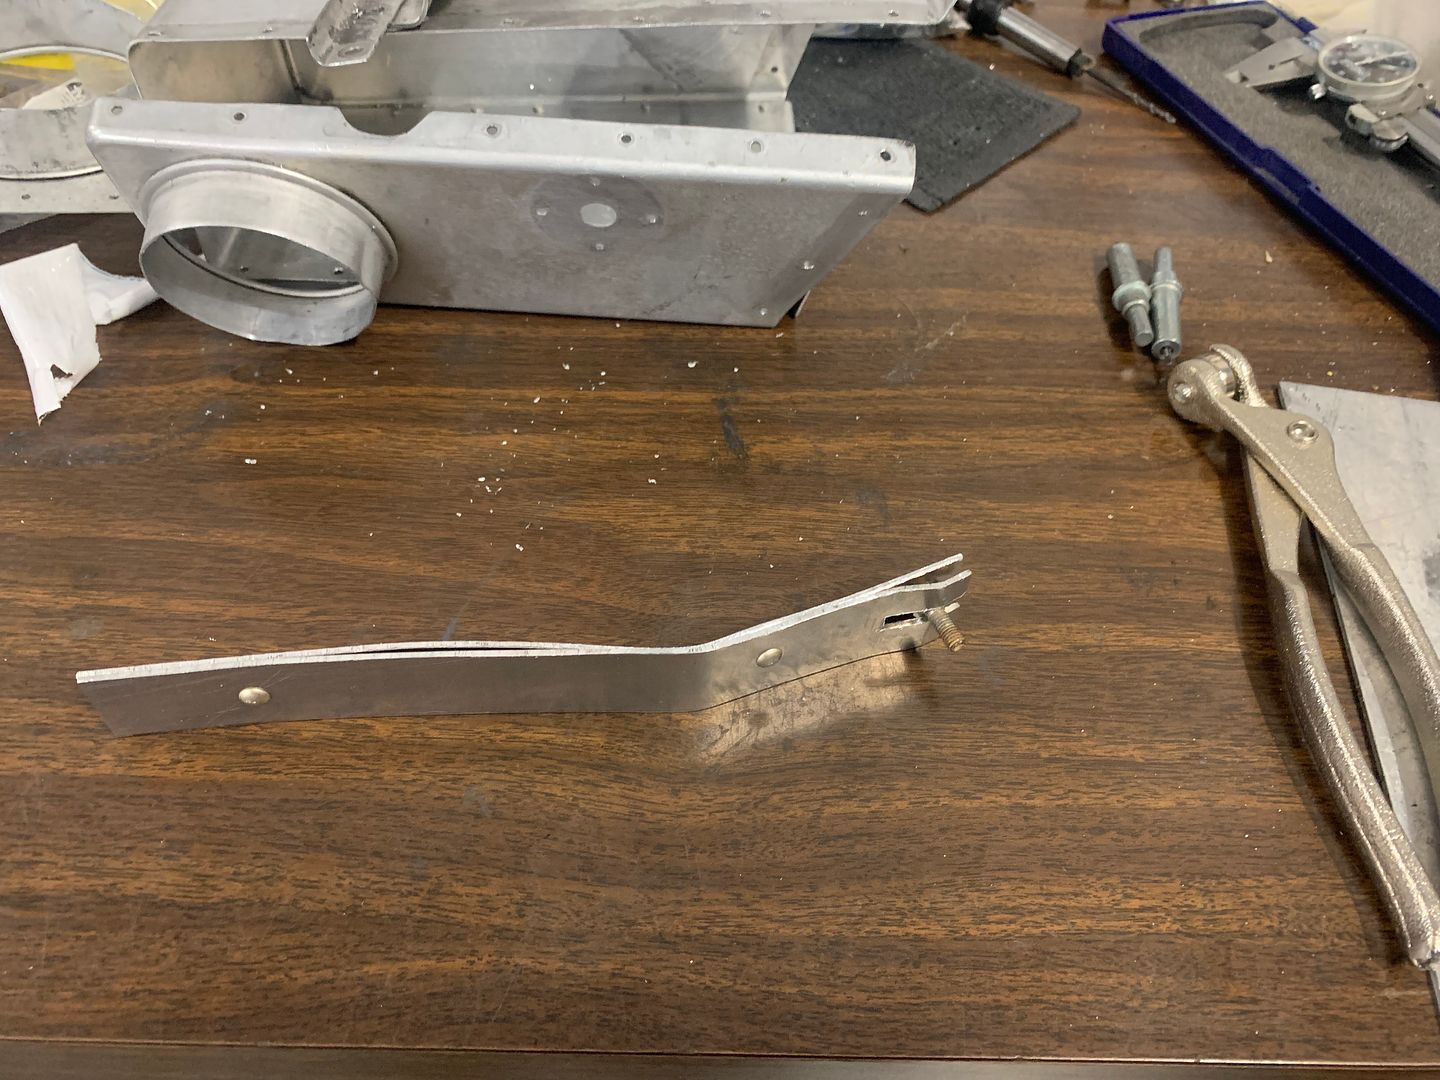
And I have another hour to 1.5 hrs at my shop cleaning it up making a couple simple repair parts.
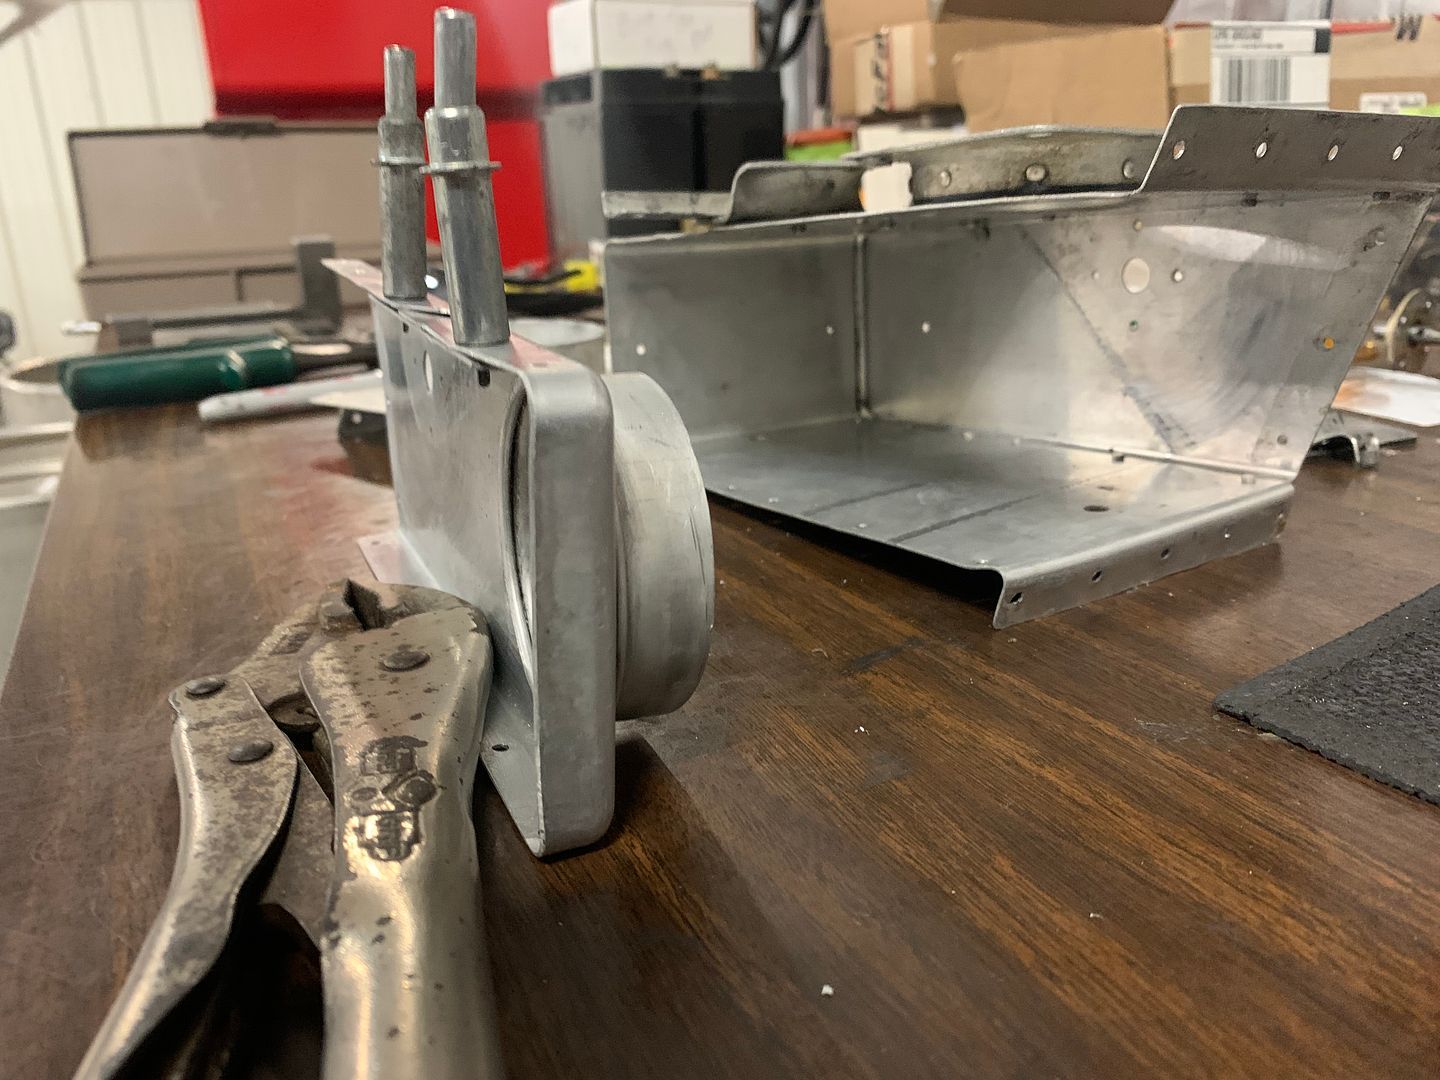
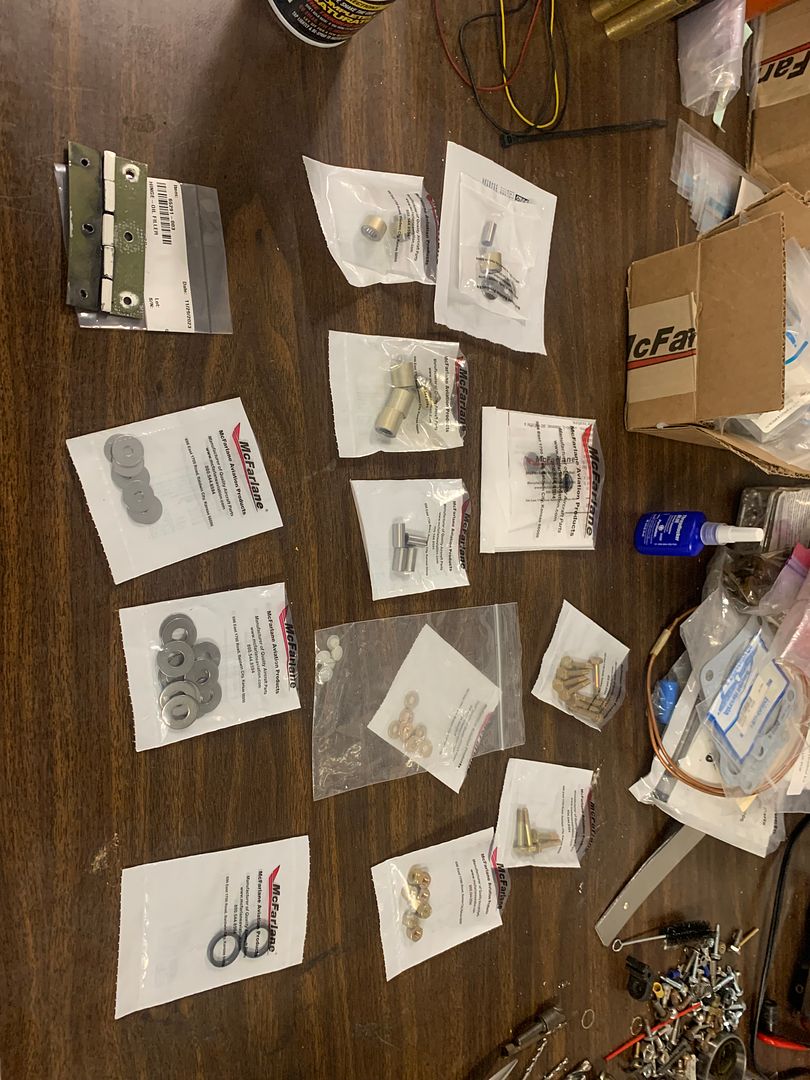
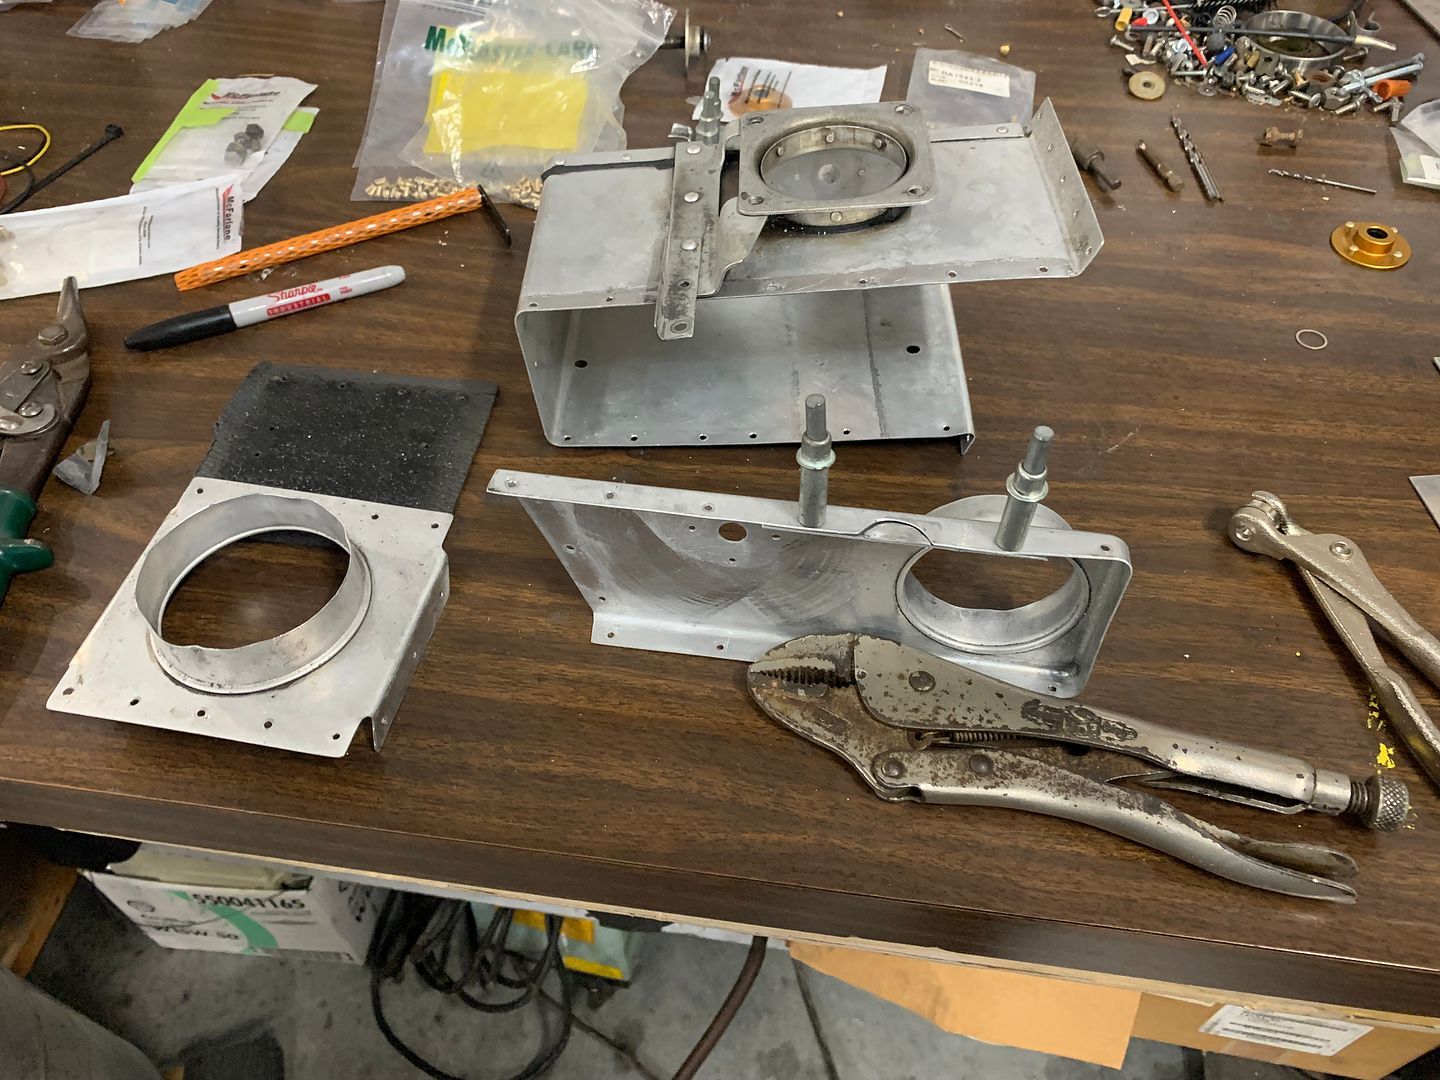
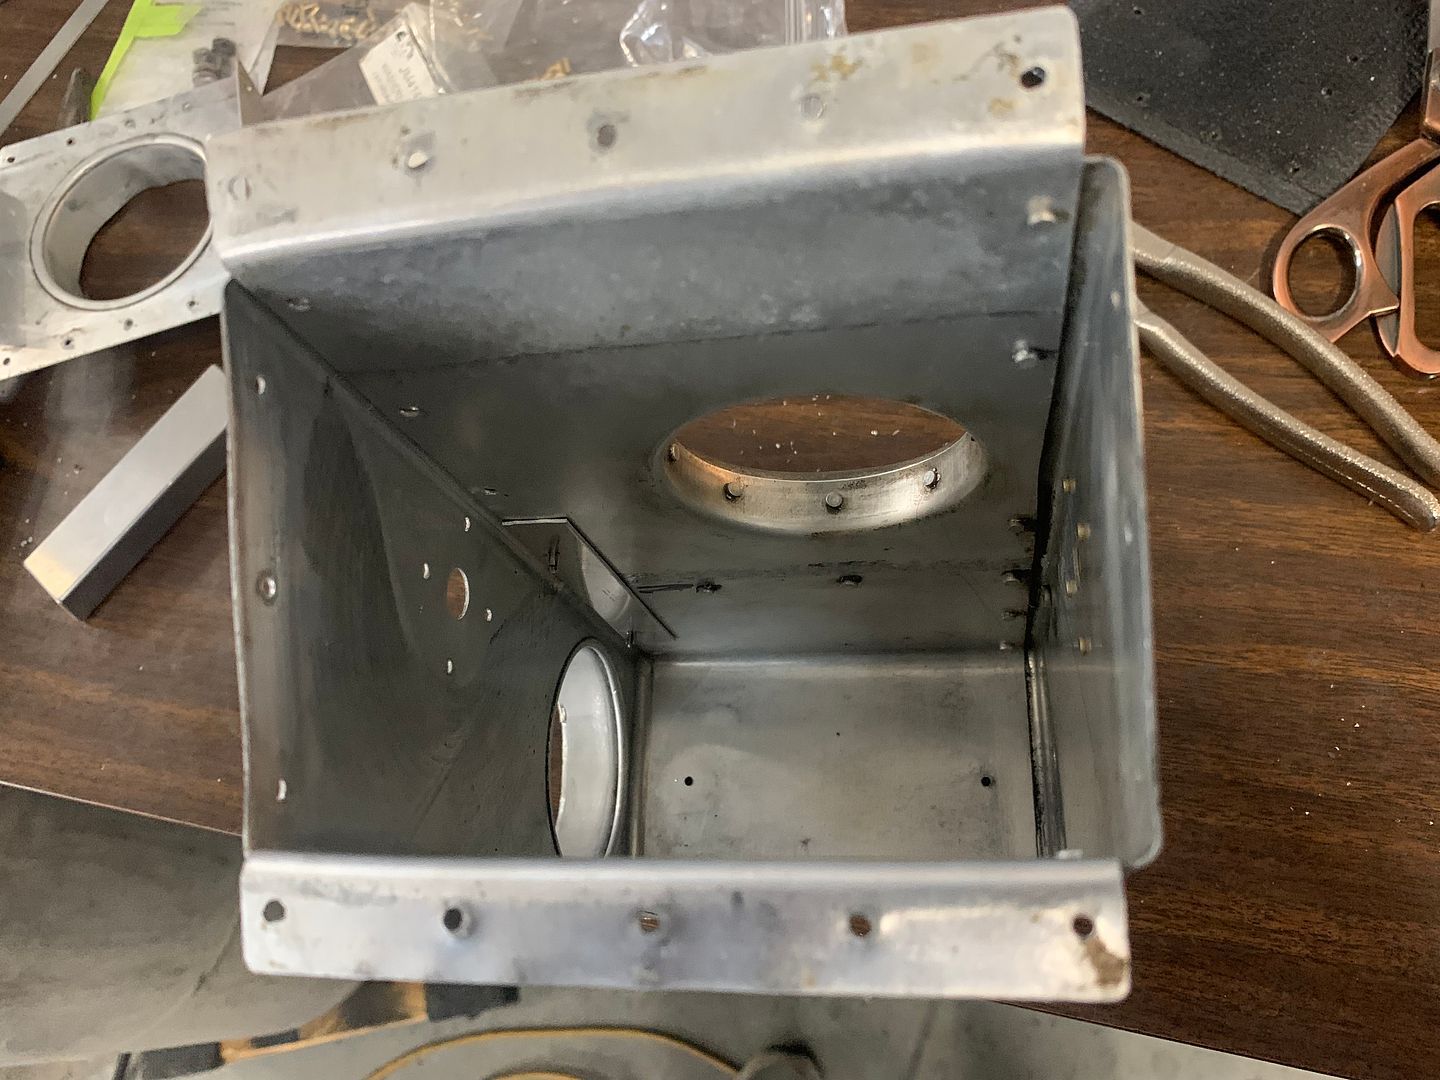
Probably another 1-2 hours putting it back together once I get all the parts together.
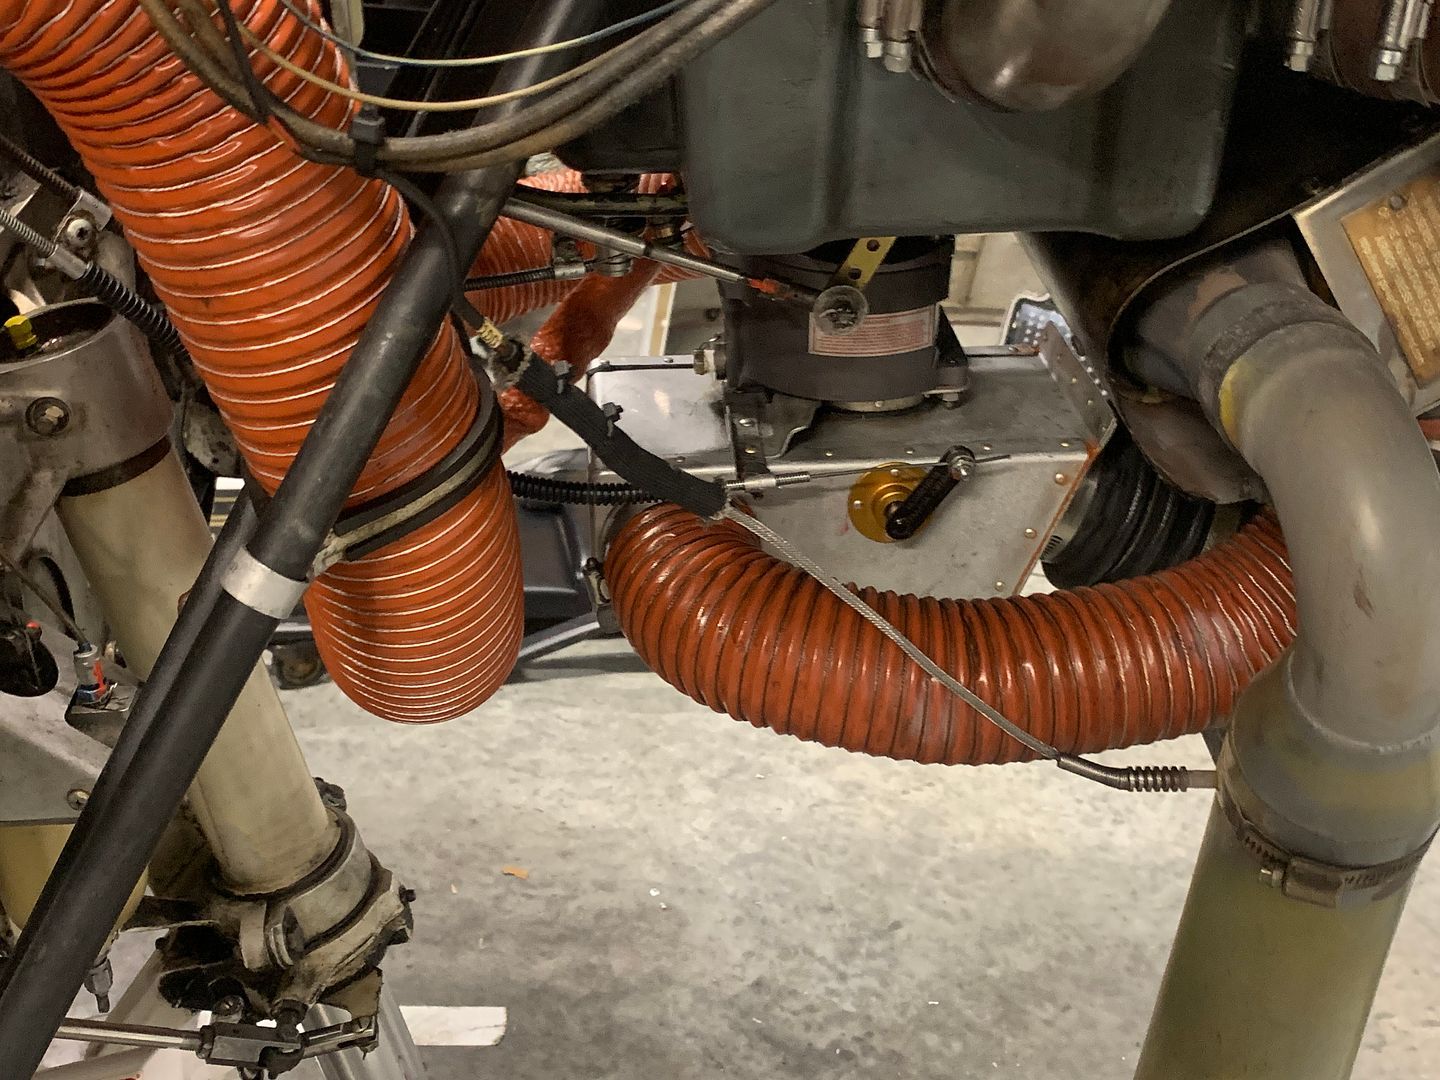
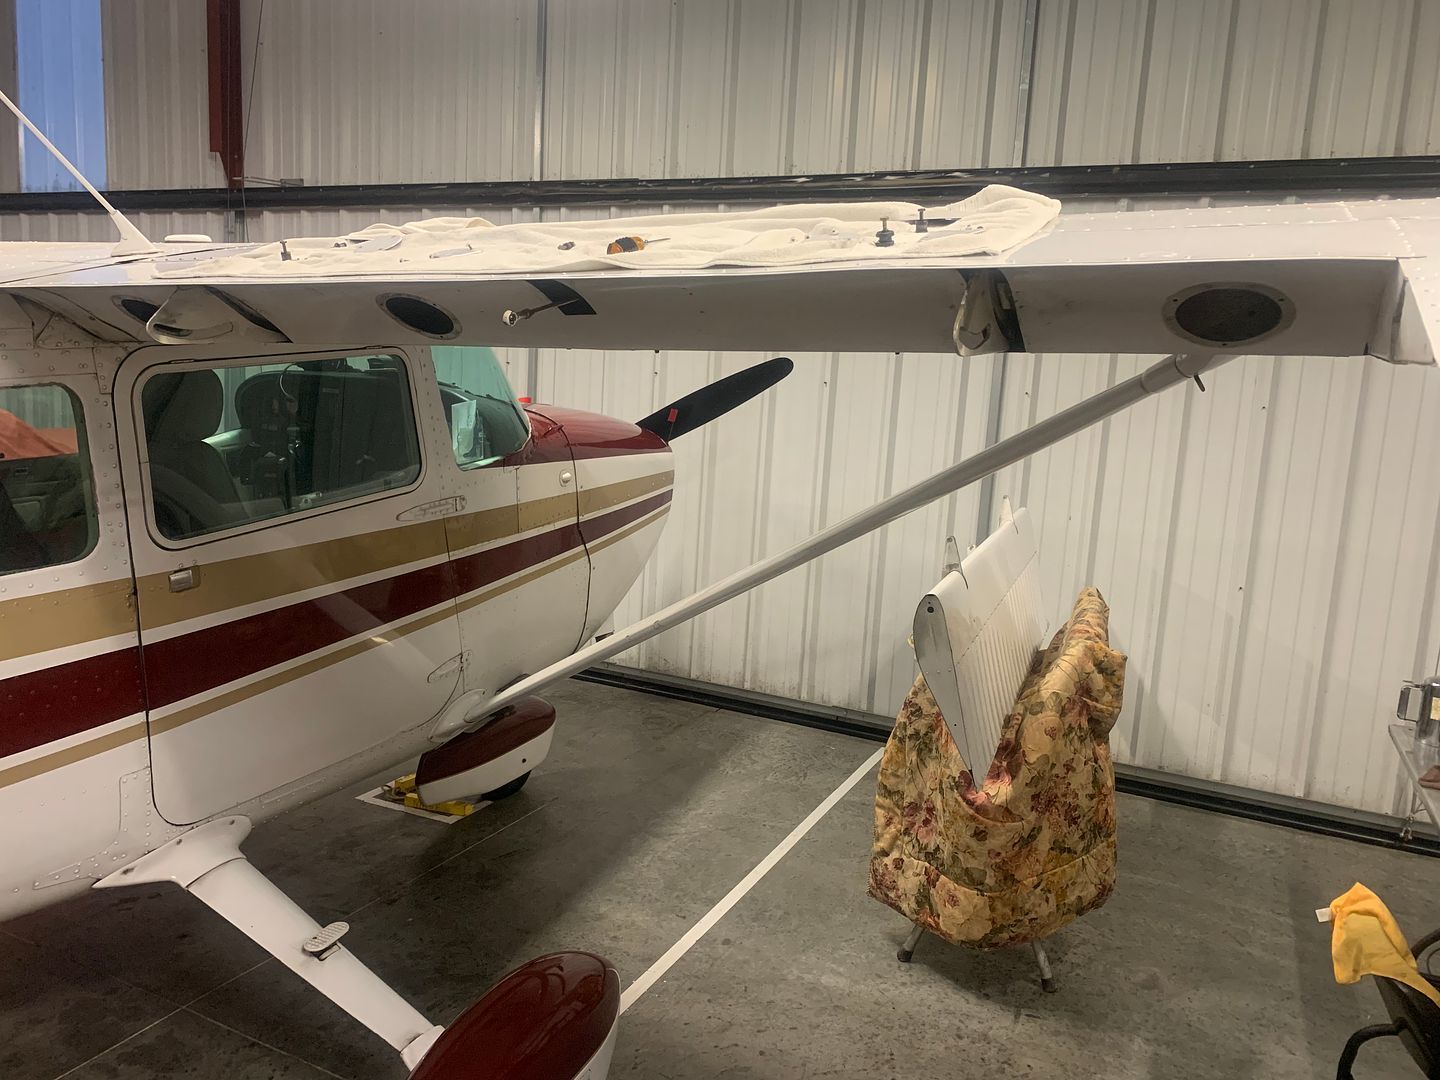
So realistically 4 hours total? Not counting taking it off the plane which took 10 minutes. Another 10 minutes if I have to remove the cowl.
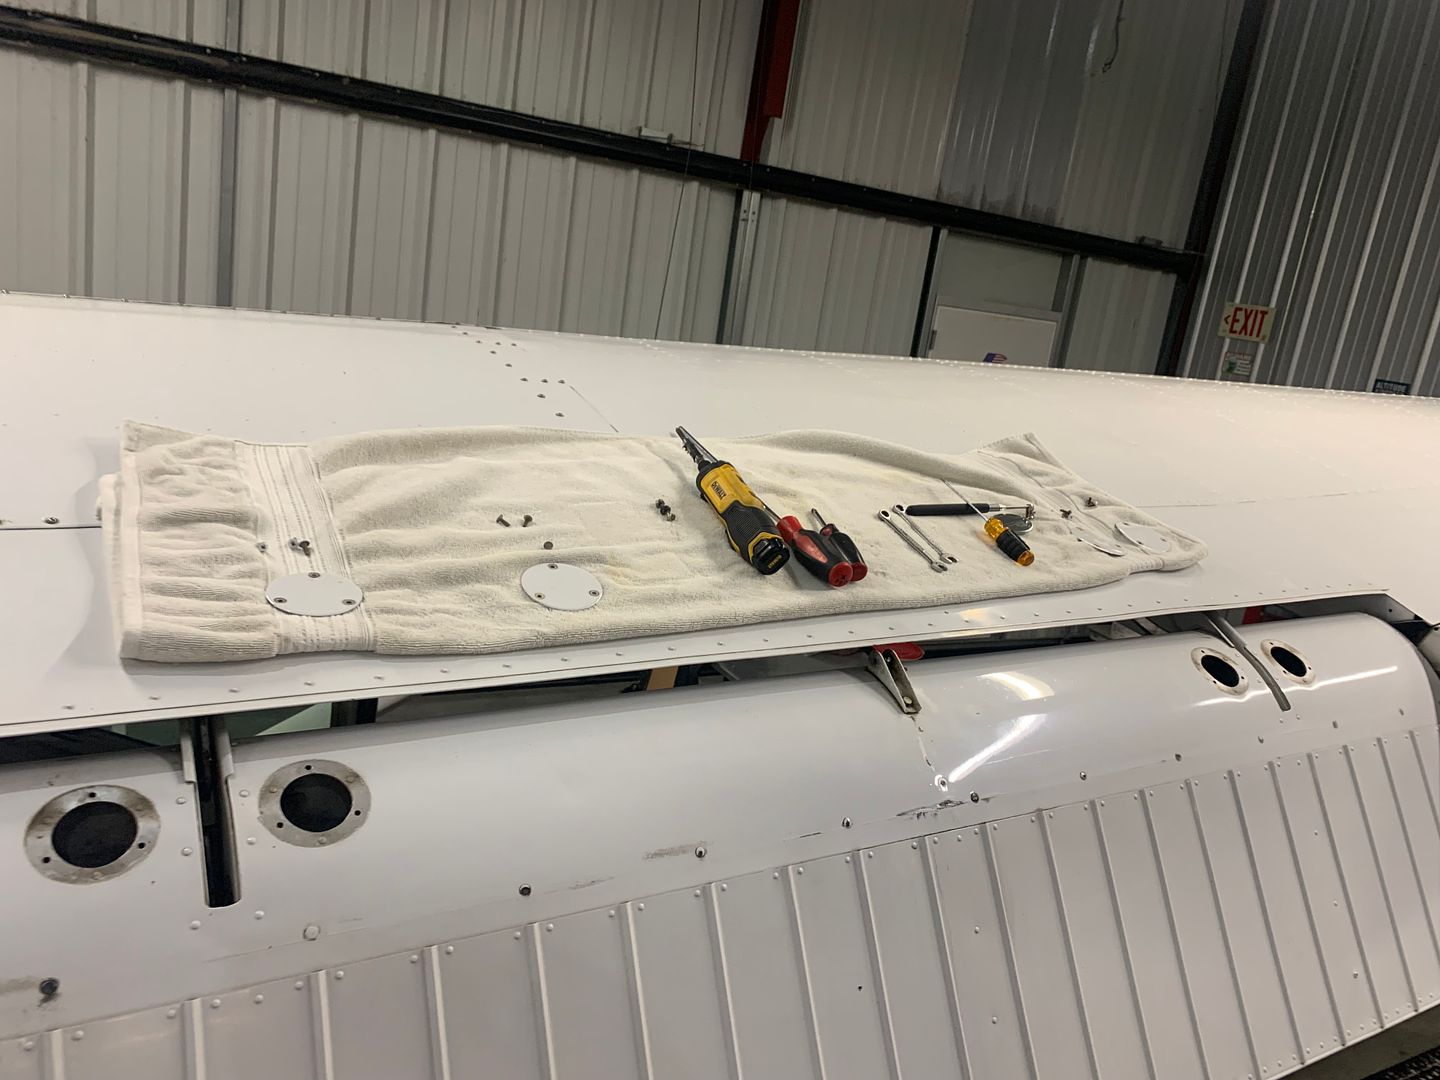
I got 15 minutes into it taking pictures!! lol

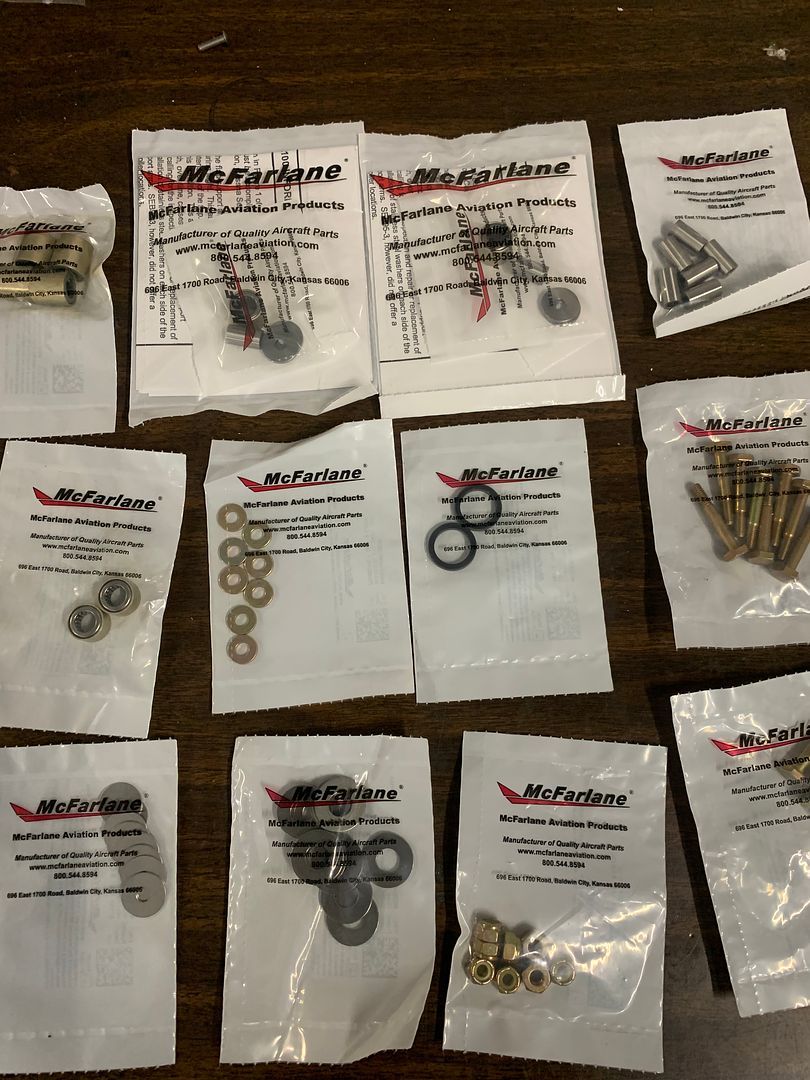
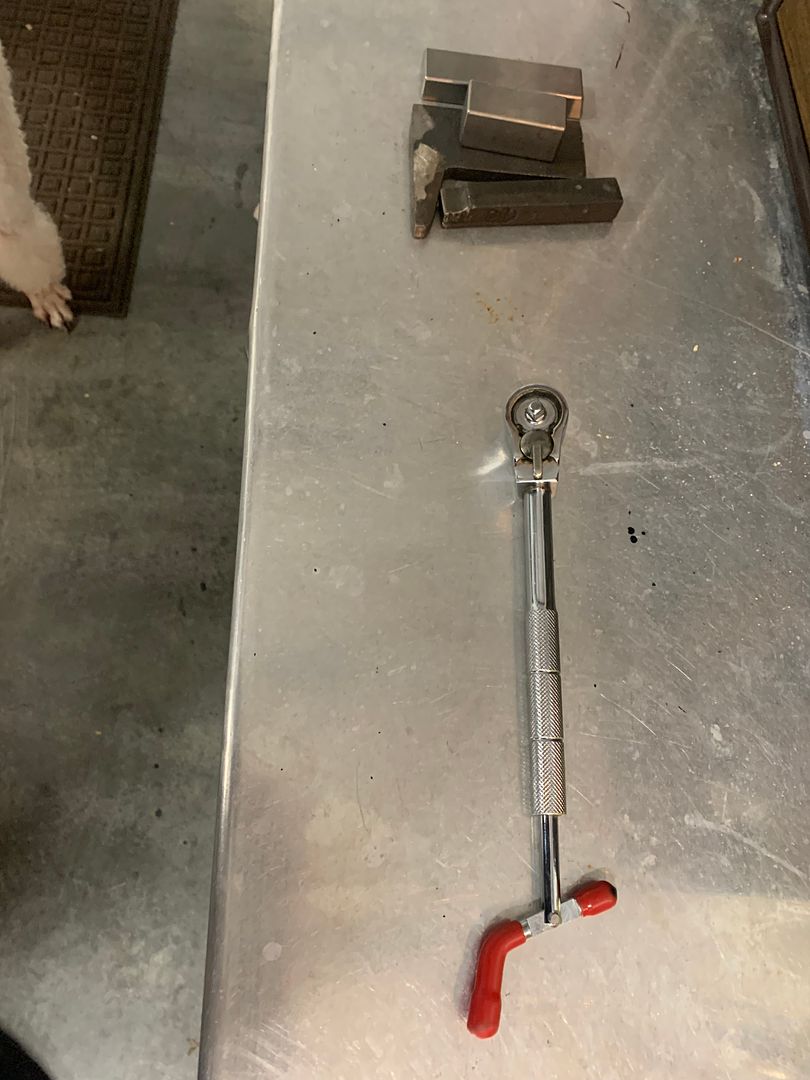
Having all the right tools cost money also.

I traveled to Cleveland Oh so a A&P could help me for the first one. My wife and I drove up there and stayed over night in a Hampton inn. She drove back home the next day with our dog by herself. I generously tipped my mechanic for his knowledge. He did provide me with plenty of rivets and some nice tungsten bucking bars to use.

So in my case a new one might have been cheaper honestly?

But then I would not have gained the knowledge to do it myself.

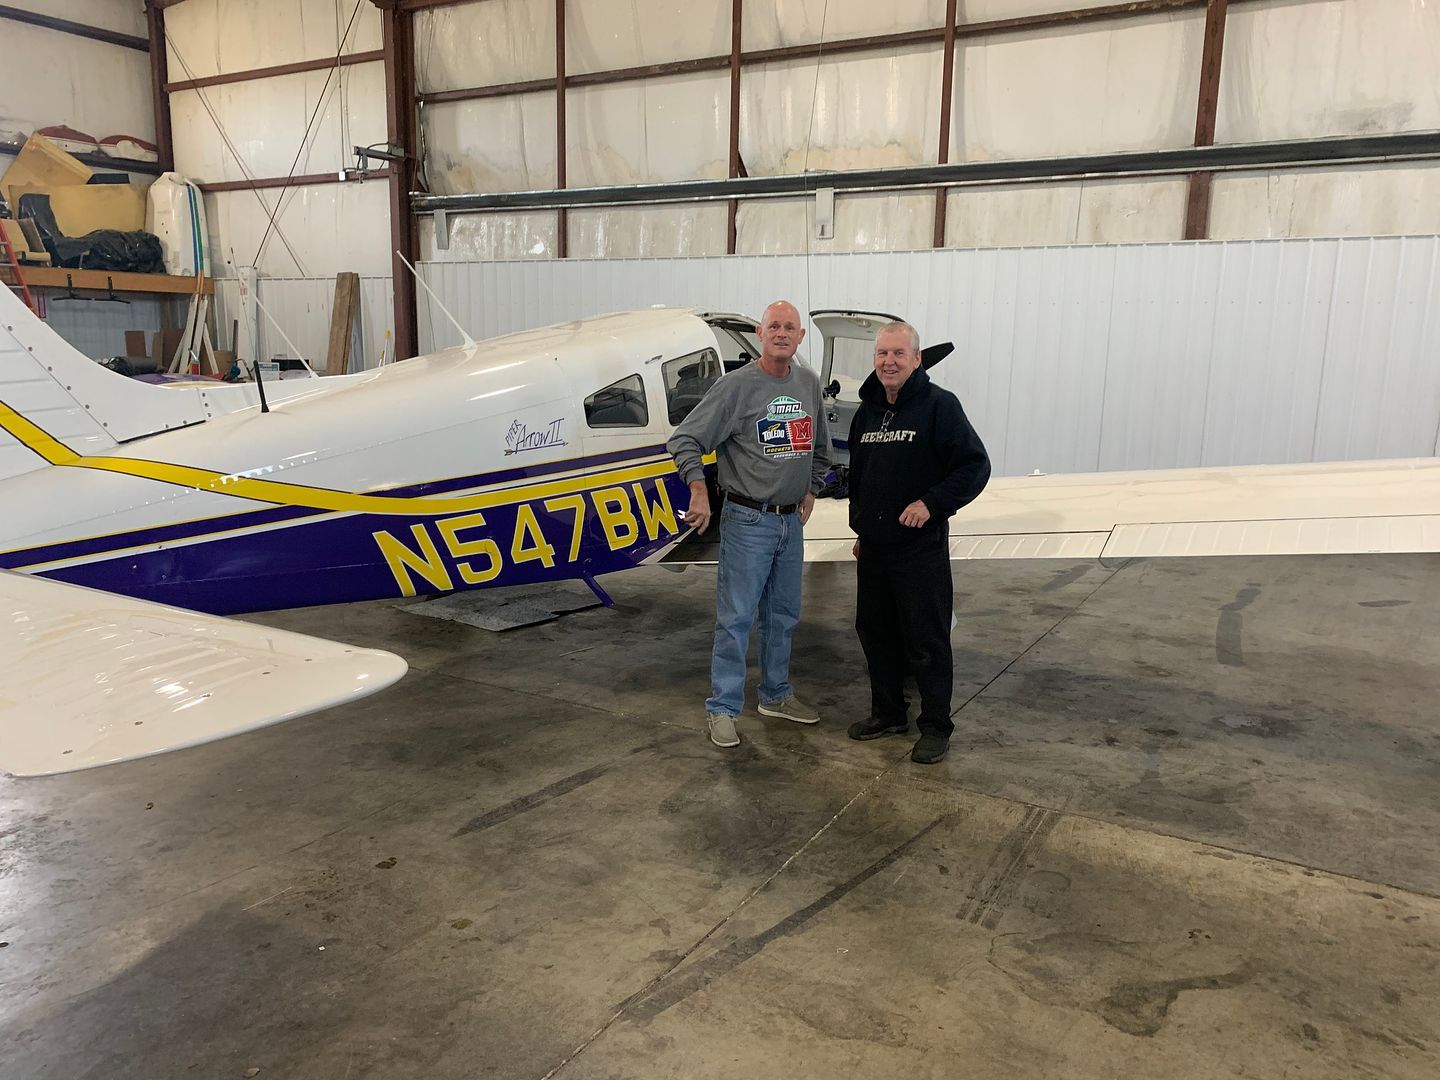
Then I flew back home in the left seat in my buddy's arrow (which was there getting a annual inspection done) to get complex time so I can get insurance to fly it by myself. So that is worth something. My buddy paid for the fuel to boot. Smartest guy I know in aviation. I should be paying to fly with him.
Greg on the left, 21 year Captain for SW and a senior standards check airmen. Jim on the right who has 50 years experience as a A&P/IA and a long time pilot. He keeps a fleet of planes in the air. I am so lucky to learn from these guys. These 2 guys have known each other since they were very young and best friends.
IMG_3711.HEIC
 
Last edited:
So a shop may charge about $400 labor & $100 parts?

That’s a LOT less than new and better than being

in the trees!
 
Parts are a whole lot more than 100, more like 1300.

So how would rivet this back together? Monel rivets first but I worry if I take the flap brackets off the flap they may not line up after drive the monel rivets? It looks like I don't have a choice? Any thoughts?
 
Last edited:
Just talked with my AP and he suggested that move the clecos to the back side and then drive the outer monel first and then the inner.
Any other thoughts? TIA
 
You might consider a simple deep u- shaped jig to replace the door when

doing the monels.

Gun 4x ? , hand or pneumatic squeezer?
 
FYI a recent airbox rebuild from the Airbox Doc w/ new arm assembly, valve assembly, & bearings was $1250 ($400 labor, $820 parts, $30 s/h).
 
FYI a recent airbox rebuild from the Airbox Doc w/ new arm assembly, valve assembly, & bearings was $1250 ($400 labor, $820 parts, $30 s/h).
Now you tell me.
McFarlane shaft with integal arm, bearings and rivets were 600 something for my 172. The flap valve they did not have in stock until the end of January, so I got it from Acorn Welding for 569 plus shipping, 600 bucks.
I put it back together tonight and back on the engine.
The shafts with integral arms cost more I noticed.IMG_3774.jpeg
IMG_3778.HEIC
 
Last edited:
I test flew my 172 this morning in the rain first time since the steering bungee and boots were replaced.
Don’t know what a new one feels but I imagine it is close to what it feel’s like now? No slop and I can keep it on the line much easier. Great feel now.
The air box sounds different and more solid. The air flapper inside is sealing on all 4 sides now inside the box and I think that maybe why it sounds a little different?
Been over 2 weeks since I have flown and wanted to get out there before tomorrows XC with better weather.
Flaps maintenance next after I fly it a bit to knock the rust off the camshaft.image.jpg
 
Yup. One can drip oil on their ends, but when they're full of old, hardened grease it makes little difference.
So is the best way to lube the needle bearings is to remove them? Or is it possible to get the oil into them without having to remove? If you don't have to remove then what's the best way to get access?
 
So is the best way to lube the needle bearings is to remove them? Or is it possible to get the oil into them without having to remove? If you don't have to remove then what's the best way to get access?
Removing them lets you wash out the old grease. Leaving that in there can prevent the needles from moving, which means they end up skidding instead of rotation, and stuff wears out quickly.

Oiling them in place makes more mess than anything.
 
Removing them lets you wash out the old grease. Leaving that in there can prevent the needles from moving, which means they end up skidding instead of rotation, and stuff wears out quickly.

Oiling them in place makes more mess than anything.
Thanks for the reply and advice!
 
Last week I opened up the access covers and disconnected the push rod moved the flap up and down. It seemed like some of the rollers were sliding instead of rolling? But it is hard to tell for sure since me moving them is different than the push rod moving them.
IMG_3817.JPG

Like Dan pointed out I did not have what it takes to get to the hardware on the aft rollers. I like to scope things out before I get too far and can't fly the plane. So I put the covers back on and kept flying.
I found this wrench on Ebay used and it came couple days ago.
IMG_3825.JPG

A few weeks ago I opened just one access panel and found a pretty big wasp nest and pulled it out. Then I found another mud daubers nest this past week that I will clean out when I remove the flap tonight. I have a XC I am gonna fly this afternoon and then it comes apart just in time for sleet and rain for the the next 2 days, so hopefully I don't miss any good flying weather. My old rollers are all greased out inside and out. So I don't think any are seized? Still haven't inspected the entire track until I get the rollers out of the way.
IMG_3815.JPG

I spent last week figuring out where the McFarlane rollers go, how to clean the rust preservative off and how to lube them. There is a STC for the aft rollers.
I already had in stock those nylon buttons that snap into the flaps to keep them from grinding on the wing since I replaced a few of them years ago. Some more will get replaced this time around.

I put a new oil door hinge on my buddy's arrow under supervision of his AP/IA last week. I am meeting him today to return those tungsten bucking bars. I used the bars on my air box and a rivet squeezer on the oil door hinge.
IMG_3820.JPG
 
Last edited:
I have got one side off. The flap tracks appear to be still serviceable according to the gauge. Visually I see no cracks. Blood pressure went down.IMG_3834.jpeg
But there is some wear mushrooming on both tracks. I still have to investigate more to see how bad. I am thinking I will lightly sand them down?

IMG_3830.jpeg
I have to get some aluminum oxide cloth tomorrow, I forgot about it until now.
The arms have some wear but under.020” closer to.005”-.009”.
Wing flap in my living room! lol
IMG_3838.jpeg
No way I can put it back together by myself.
 
Last edited:
The old rollers were caked in some really sticky thick grease, almost like glue. There were no washers on the forward rollers so SEB95-3 was never performed on this aircraft.
IMG_3842.HEIC

IMG_3849.HEIC

After I cleaned it with solvent it was loose, the axle/inner race in the bearing. Sloppy deal and I would not put them back in. So I am glad I have the mcfarlane rollers. They only get a drop or 2 of 30w oil is what I plan to use.
IMG_3853.HEIC

IMG_3841.HEIC
 
Last edited:
Did you try using the tool that McFarlane has for the aft roller?
Was completely removing the flap required or was is something that you wanted to do for other reasons?
 

Attachments

  • IMG_3234.jpeg
    IMG_3234.jpeg
    46 KB · Views: 8
Did you try using the tool that McFarlane has for the aft roller?
Was completely removing the flap required or was is something that you wanted to do for other reasons?
No I haven't tried putting it back together yet. Yes I have the tool.
Yes the flap had to come all the way off to inspect the tracks and arms, and I did find wear there. I will dress the wear out and install washers that should stop the wear for good. Also having good clean rollers in place that roll and not slide with protect the flap tracks for a long time.

Both of these wings were replacement wings after a tornado in 1990. So I have no idea how many hours are on the flaps. The tach just turned 2400 a couple days ago. I started flying this plane April 2018 and the tach was 1416 hr. Those rollers look like they have more than 2400 hours on them
 
Last edited:
I have got one side off. The flap tracks appear to be still serviceable according to the gauge. Visually I see no cracks. Should I strip the paint off? My mechanic has dye penetrate.
I have never seen a cracked track. But I have seen several flap cove skin support brackets cracked:

1704559066805.png

The turbulence through that flap gap rattles those skins and flexes the brackets until they crack. Look for cracks at the bend radii. It was bad on the flight training airplanes, where they're often doing slow flight with flaps extended and some power on. That regime also cracks the flap skin trailing edges at the rivets.
But there is some wear mushrooming on both tracks. I still have to investigate more to see how bad. I am thinking I will lightly sand them down?
A new, sharp, fine single-cut flat file dresses them off nicely. Don't scratch the rest of the track. Then dress with 320 Alox strip.
The old rollers were caked in some really sticky thick grease, almost like glue.
That's what grease or oil does. It attracts dust, gets wet in rain or snow, and various reactions create the sludge.

I have changed all those rollers and stuff myself, but it takes some practice and a few little tricks, some patience---no, wait, a LOT of patience---and various picks and screwdrivers and stuff. A bit of grease to hold the washers against the aft rollers, too, might be needed. Hang the forward ends and rollers first. Once the aft rollers and the track alignment spacers are installed in the aft outboard locations, make sure that no bolt ends are snagging on the cove skins or those little brackets as you move the flap up and down by hand. Push the flap inboard and outboard as the flap goes in and out to make sure you have clearances. The pushrod is disconnected for all of this, too.
 
One guy replaced both wings on his 172 with a pair from a newer model.

He did have a letter from Cessna author this.

When I extended them there was a terrible noise!

He had switched over the flap drive system sans adjustments.

New wings had 30 degree extension tracks.

Transmission was adjusted for 40 degree = crunch!


When involved with C-172 flaps it is important to note there are

Gross Weight Increase ( GWI) kits that are STC’d and increase

Max Gross Weight. They restrict flap travel to 30 degrees via

new stops and adjustments.


Assure adjustments are done correctly If the GWI is installed.
 
I have changed all those rollers and stuff myself, but it takes some practice and a few little tricks, some patience---no, wait, a LOT of patience---and various picks and screwdrivers and stuff. A bit of grease to hold the washers against the aft rollers, too, might be needed. Hang the forward ends and rollers first. Once the aft rollers and the track alignment spacers are installed in the aft outboard locations, make sure that no bolt ends are snagging on the cove skins or those little brackets as you move the flap up and down by hand. Push the flap inboard and outboard as the flap goes in and out to make sure you have clearances. The pushrod is disconnected for all of this, too.

Are curse words necessary tools? If so, are they typically customized, or are generic versions acceptable? If none are used, are you some sort of super-human? Don’t lie.
 
No I haven't tried putting it back together yet. Yes I have the tool.
Yes the flap had to come all the way off to inspect the tracks and arms, and I did find wear there. I will dress the wear out and install washers that should stop the wear for good. Also having good clean rollers in place that roll and not slide with protect the flap tracks for a long time.

Both of these wings were replacement wings after a tornado in 1990. So I have no idea how many hours are on the flaps. The tach just turned 2400 a couple days ago. I started flying this plane April 2018 and the tach was 1416 hr. That's about 1400+ hobbs hours. Those rollers look like they have more than 2400 hours on them. I have landed this plane 2700 times since 2018.

Just like the air box, it had more than 2400 hrs on it.
Thanks for your reply and sharing your experiences with us. My rollers were replaced over 30 years ago and they also compiled with the SB at that time. However the bearings have 30 years of grease and grime in them having never been removed enabling for proper cleaning. Looking at your photos my tracks are very similar in appearance. Looking at what you're currently working on is making me to consider doing the same.
 
Are curse words necessary tools? If so, are they typically customized, or are generic versions acceptable? If none are used, are you some sort of super-human? Don’t lie.
I avoid that, but sometimes it's not easy.
 
Turns out I had all kinds of aluminum oxide sand paper and cloth. 400 wrapped around an old steak knife handle fit real nice in the arms to clean them up. They were not bad except for one, still less than.020” deep.
Gave that flap some love today.
I am fitting the rollers ahead of time into it.
Sprayed it with mineral spirits first and wiped most grease and some bugs off including inside where the rollers go. Then went back with Aero Glaze mixed with water in a spray bottle and a new microfiber towel. It works so well, removes the rest of the bugs and grease. Leaves a nice slick surface, helps with future bugs removal.
Those towels do clean well…then throw them in the trash. Imo
It hasn’t been this clean since new and I didn’t have to bend over to get the bottom.
Ready to to be reinstalled.
IMG_3886.jpegIMG_3894.jpeg
 
Last edited:
On the bottom of this flap there is damage to the skin. Been there for years. Today I found a loose screw in there that caused the damage.

IMG_3898.jpeg
The screw I found and mud dauber nest I took out of the flap.
IMG_3864.jpeg
 
Last edited:
This is the MCSK-100 STC aft roller with washers built in. It only goes in one position ,inner one on each side.
(edited)_IMG_3888.png

The others are staged ready to go.
IMG_3891.HEIC

IMG_3890.HEIC

I inspected the rest and found no cracks. I did find both lock nuts on the push rod loose. Hopefully get my AP to help me today put it back on.
IMG_3884.HEIC
 
Last edited:
Right side back together, ready to fly.
My wife helped me for about 1.5 hours. We took breaks after each triumph.
The rollers look lined up with the right side to side play. Sure run smooth up and down now. One flap down and one to go. Later this week or next weekend as my buddy will be around to help I will replace the pilots side. Should be a little easier second time around? Fingers crossed. Hope to fly shortly or tomorrow then the rest of the week looks bad and I may do the other side then. Thanks for everyone’s help.

IMG_3901.jpeg
 
Last edited:
Back
Top