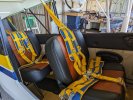
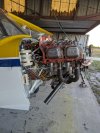
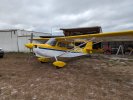
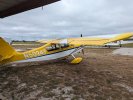
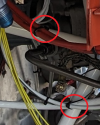
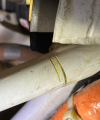
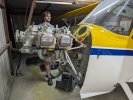
While the engine is off ....

The timeline of the thread confuses me a little. Independent of your voluntary airplane teardown/rebuild, how long did it take to get your engine back overhauled?

Trying to set expectations on my end, as I'm going on a month of just watching the legal lawn ornament formerly known as 'airplane' collecting dust in that hangar, and the mechanic saying his preferred engine shop was "still quoting parts" as of this weekend. I have a theory, but I'm trying to keep it to myself and confirm, before I make drastic changes to my current relationship and/or my involvement in the hobby going forward.
 
Independent of your voluntary airplane teardown/rebuild, how long did it take to get your engine back overhauled?

Can't really give you a straight answer, but I can clarify the timeline.

May '22: dropped off engine at shop. At time, shop said 3-4 months assuming order of cylinders came in. They currently had none.
Oct '22: visit. Engine was torn down, but still no cylinders available. I said no rush, my plane is currently a pile of parts.
Mar '23: visit. Shop had a huge stack of new cylinders. A week later it was ready to test run. I said wait until I called.
Oct '23: test run and pickup.

So 18 months total, but most of that was the engine sitting there waiting on me to tell them to move forward.

The same shop recently quoted my friend 6-8 weeks. Sounds like the supply chain and

This was my first rodeo. I learned the shop is not the only factor in the timeline. Removal, installation, and shipping time are also factors. Availability of other components and parts can also be a factor. Will probably take me the better part of a month to get flying AFTER I hang the engine.

Same goes for cost. When you hear $30K for an engine, keep in mind true cost will be well north of $40K after you factor in overhaul or replacement of accessories, new hoses, baffle repairs or replacement, possible repairs to mount and exhaust, removal and installation, etc. And hey, no time like the present to get an engine monitor and maybe overhaul that prop. Whole project can easily top $50K.
 
Last edited:
1699895557465.png

Nylon ties on engine mounts will erode the mount tubing. That engine moves those cables and the ties, with windblown dust eventually embedded in them, grinds the paint off and then into the steel.

The tubing wall is typically only .035" thick. A 10% damage depth, the thickness of a sheet of paper, trashes it, in accordance with AC43.13-1B. The paint will resist the abrasion better than the steel.

1699896055268.png
 
View attachment 122358

Nylon ties on engine mounts will erode the mount tubing. That engine moves those cables and the ties, with windblown dust eventually embedded in them, grinds the paint off and then into the steel.

The tubing wall is typically only .035" thick. A 10% damage depth, the thickness of a sheet of paper, trashes it, in accordance with AC43.13-1B. The paint will resist the abrasion better than the steel.

View attachment 122359
There are no nylon ties on the engine mount.
 
Getting close! Assembly complete. Did W&B today. Next step, add oil and fuel and check for leaks, then test run. Hoping for first flight on Friday if no issues arise.

Ed just out of curiosity: How much did the weight change? Also the CG?

-Skip
 
Ed just out of curiosity: How much did the weight change? Also the CG?

-Skip
Sensitive subject. Appears I left too many donuts in the hangar. Not sure exact increase, gotta go home tonight and get old data from my AFM.
 
Sensitive subject. Appears I left too many donuts in the hangar. Not sure exact increase, gotta go home tonight and get old data from my AFM.

Don’t feel too bad just saw a 69 C-172 gain about 13lbs when it was completely redone from nose to tail and converted to a full Dynon panel w/2-axis auto pilot.
 
Nice job. How did the weight and balance turn out compared to before the restoration?

Don’t feel too bad just saw a 69 C-172 gain about 13lbs when it was completely redone from nose to tail and converted to a full Dynon panel w/2-axis auto pilot.
I would be ecstatic with that. My weight gain was 40 pounds. CG moved aft one inch.
 
I would be ecstatic with that. My weight gain was 40 pounds. CG moved aft one inch.

Is the 40 pound increase "real" (i.e. based on a measured weight right before you took the airplane down) or based on what was in the books?
 
Is the 40 pound increase "real" (i.e. based on a measured weight right before you took the airplane down) or based on what was in the books?
Notional, based on old computed weight. The scale guy said those are always off.
 
Added fuel and oil late in the day. Found several minor leaks, which led to decision to check tightness of all fittings. Everything is leak free now. Plan to test run tomorrow morning.
 
In you poh, is oil included in empty weight, and did you add unusable fuel before weighing?
 
Did first test run of the engine today. Ran for 1 min then shut down and checked for leaks. Had a few wet spots, but easily resolved.

Tomorrow will run up to operating temp, test control functions, then check screens for metal. If all is clear, test flight on Saturday morning.
 
My son has the 120. “Dad, it’s got an exhaust leak I’m gonna fix for ya…”

Followed a day or two later by this:

Is this normal to fix an exhaust leak?!!!!

Ed, your bird is BEAUTIFUL and you’ve done an AMAZING job. Bravo! But I’m tryin not to do that!! You’re never more than a 30 second decision away…
 

Attachments

  • 268858FD-7FC5-4168-B84A-AFF5ADDBC28F.jpeg
    268858FD-7FC5-4168-B84A-AFF5ADDBC28F.jpeg
    3.3 MB · Views: 20
My son has the 120. “Dad, it’s got an exhaust leak I’m gonna fix for ya…”

Followed a day or two later by this:

Is this normal to fix an exhaust leak?!!!!

Ed, your bird is BEAUTIFUL and you’ve done an AMAZING job. Bravo! But I’m tryin not to do that!! You’re never more than a 30 second decision away…
Looks like the winter I decided to pull the engine in the Camaro to fix the leaky rear main and do a “little detailing”…and come spring, it had a new 383 and TKO 5-speed…
 
Looks like the winter I decided to pull the engine in the Camaro to fix the leaky rear main and do a “little detailing”…and come spring, it had a new 383 and TKO 5-speed…
The 3 most expensive words in aviation (or classic cars) are: "might as well".
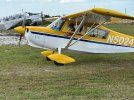
 
Had to dig this old thread up @Ed Haywood ! I'm afraid I'm about to be in the same boat.

Our Citabria is going in for annual, and one of the write-ups is a fuel "seep" in one wing. We are hopeful it is just a fitting or line that can be tightened or replaced, but if it is the tank itself...

To get the tank out, we will have to uncover the entire wing, which means a recover and repaint.

If you are going to do one wing, probably should do the other wing so they match...

If you are going to do the wings, then the fuselage should probably get done too...

We have wood spars yet, do we consider upgrading to metal?

While the plane is stripped and naked, what else might be worth doing???

This is looking to be a very long and expensive "annual".

I've seen tank surgery that was limited to cutting out a patch of the wing and repairing. What kind of shape is your current cover in, and what process was originally used to cover it?
 
Last edited:
This is looking to be a very long and expensive "annual".
FWIW: from my experience, I wouldn't jump down the recover rabbit hole just because there is a fuel leak. Unless the fabric is shot, I'd call it either a repair to fix the leak or call it a recover. Each route requires a different approach and plan. So best to make the decision up front to recover vs start with the leak, then the other wings, then the spars, and so on. You'll be money ahead.
 
I've seen tank surgery that was limited to cutting out a patch of the wing and recovering. What kind of shape is your current cover in, and what process was originally used to cover it?

I'd have to look at the logs to find out, just going off what our mechanic is telling us. He did say he didn't expect they could just cut and patch, the whole wing would have to be recovered. Except he is not interested in getting into the fabric work himself, he is shop is way too busy to take it on. They are going to do the annual, and see what they can find out through the inspection covers and wing root to see if it could be something easier, but if it comes to opening up the wing they are going to recommend somewhere else.
 
I've seen tank surgery that was limited to cutting out a patch of the wing and recovering. What kind of shape is your current cover in, and what process was originally used to cover it?
I took the tank out of our 7GCBC. Just opened up the tank bay by removing the fabric over it. One MUST recover that area as per the manuals for the process used, though. No mixing of systems.

The tank I removed had a crack across the top. Those tanks "oilcan" a bit due to vibration, and the aluminum work-hardens and fatigues and cracks. Not saying that's what your leak is, but it's a possibility. Other possibilities include a crack around the filler neck from people letting the neck support the fuel nozzle, or the tank retention straps have lost their rubber or felt cushions and eaten through the tank.
 
I'd have to look at the logs to find out, just going off what our mechanic is telling us. He did say he didn't expect they could just cut and patch, the whole wing would have to be recovered. Except he is not interested in getting into the fabric work himself, he is shop is way too busy to take it on. They are going to do the annual, and see what they can find out through the inspection covers and wing root to see if it could be something easier, but if it comes to opening up the wing they are going to recommend somewhere else.

He doesn't know what he is talking about. Search on the Facebook Citabria group and you'll find plenty of photos of cut and patch jobs.

You have a wood spar, so I assume your aircraft is a Bellanca or Champion, not ACA. If Bellanca and the covering is original, it is a proprietary process that is identical to Ceconite. The good news is that repairs are really easy with Ceconite, especially with the new cement that the revised process specifies instead of nitrate dope for patches. The bad news is spanning multiple ribs is a major repair, so you will need the paperwork in order.

Don't recover the aircraft or wings unless you wanted to do that anyways. If you just want to fly, find someone who knows fabric. This does not have to be a huge project.

I would probably pull the wing off to work on it. That's no big deal, just a few hoses and wires and 4 bolts. Will make the patching and painting way faster.
 
I took the tank out of our 7GCBC. Just opened up the tank bay by removing the fabric over it. One MUST recover that area as per the manuals for the process used, though. No mixing of systems.

The tank I removed had a crack across the top. Those tanks "oilcan" a bit due to vibration, and the aluminum work-hardens and fatigues and cracks. Not saying that's what your leak is, but it's a possibility. Other possibilities include a crack around the filler neck from people letting the neck support the fuel nozzle, or the tank retention straps have lost their rubber or felt cushions and eaten through the tank.
I could hear one of my fuel tanks flex/oil can each time I filled it. Eventually a small leak appeared, I kept flying it until the leak got worse. Then I had to remove the tank after I eliminated all other possibilities.
The crack was on the bottom of the tank from oil canning. Someone put a damaged tank in there that didn’t lay flat.
I think I rather deal with fabric then getting all those screws out?
Good to you, hope it is something simple?
 
One MUST recover that area as per the manuals for the process used, though. No mixing of systems.

The technicalities can get a little tricky here. Bellanca aircraft were covered with a proprietary process. However, if you obtain the service manual, you discover it is identical to the Ceconite process.
The Ceconite process was improved when Consolidated Aircraft Coatings bought it about 25 years ago. They relabeled PolyTak cement as Super Seam II. Since that was much stronger, the overlap requirements for patches and tapes were reduced, and old school repair methods like baseball stitching are no longer needed.
I would consider using the new ACA spec to attach the patch to the ribs. They have an insanely strong fiberglass reinforcing tape that is super easy to work with.
 
Had to dig this old thread up @Ed Haywood !
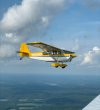
BTW, thanks for digging this up. Was great to review the memories of a happier time. Life has been tough since.

Since completing the project 18 months ago, I have flown 150 hours, including a trip from Florida to Oshkosh, and competed in 3 aerobatic contests.

markup_1000004505.jpg

I am going back and doing some improvements. Hope to cut about 25 pounds through EarthX battery and thinner floorboards. Also adding that 2nd AV-30 to get the classic 6 pack of flight instruments.
 
He doesn't know what he is talking about. Search on the Facebook Citabria group and you'll find plenty of photos of cut and patch jobs.

You have a wood spar, so I assume your aircraft is a Bellanca or Champion, not ACA. If Bellanca and the covering is original, it is a proprietary process that is identical to Ceconite. The good news is that repairs are really easy with Ceconite, especially with the new cement that the revised process specifies instead of nitrate dope for patches. The bad news is spanning multiple ribs is a major repair, so you will need the paperwork in order.

Don't recover the aircraft or wings unless you wanted to do that anyways. If you just want to fly, find someone who knows fabric. This does not have to be a huge project.

I would probably pull the wing off to work on it. That's no big deal, just a few hoses and wires and 4 bolts. Will make the patching and painting way faster.
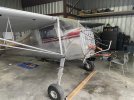
I'm just going off what I've been told. My partner has the logbooks, so I'm not sure what the covering is. The Citabria is a 1976, and I rather suspect its been recovered at least once since new.

I don't think any of us are interested in a recover, at least not financially at the moment. The paint and fabric seem to be in good shape, minus some minor paint cracking on the cowling. This airplane is our beat around, fly around the patch, land in grass plane. Its no museum piece but is mechanically in great working order, and cheap and fun to fly.

Guess we will see what the shop says once they get into it and go from there. Just the thought of recovering a wing made me think of this thread though, how a repair of that level snowballs.
 
Back
Top