Rebel Lord
Line Up and Wait
The sump valve is leaking on the Cherokee pretty bad. Is this something I as pilot can unthread and replace or do I need a mechanic?
Depends on how you look at it. If you apply the definition of preventative maintenance found in Part 1, to the list of prevent mx tasks in Part 43 Appdx A(c), you'll find your sump replacement is similar to other tasks listed.Is this something I as pilot can unthread and replace or do I need a mechanic?
Yes. Most folks don't know how little torque is required on pipe fittings. The torque chart from the Lycoming overhaul manual is instructive:DO NOT OVER-TORQUE. Cracking that collar brings a world of hurt. 40-45 INCH-lbs. MAX.

I tried that for like 10 minutes it was a solid stream and I kept messing with it until it was a consistent drip.Do you have a GATTS jar? If so, try opening the sump all the way and letting a good stream get going. Then close it by letting it spring back. That can often dislodge a bit of crud that might be the cause of the leak. Do that three or four times for good measure. Replacing still might be the best option, but this is a good temporary measure.
I will give this a try.Take a rubber hose (say 1/4 inch ID), put it up against the sump drain, push the drain open while you blow into the other end. If the problem is a bit of junk under the O-ring, it may blow clear. Of course, there is no guarantee that the same bit of junk won't get stuck again at a later date and it won't work if the O-ring is bad or the debris is really stuck. But for a quick, temporary, fix until you can get to a real repair...
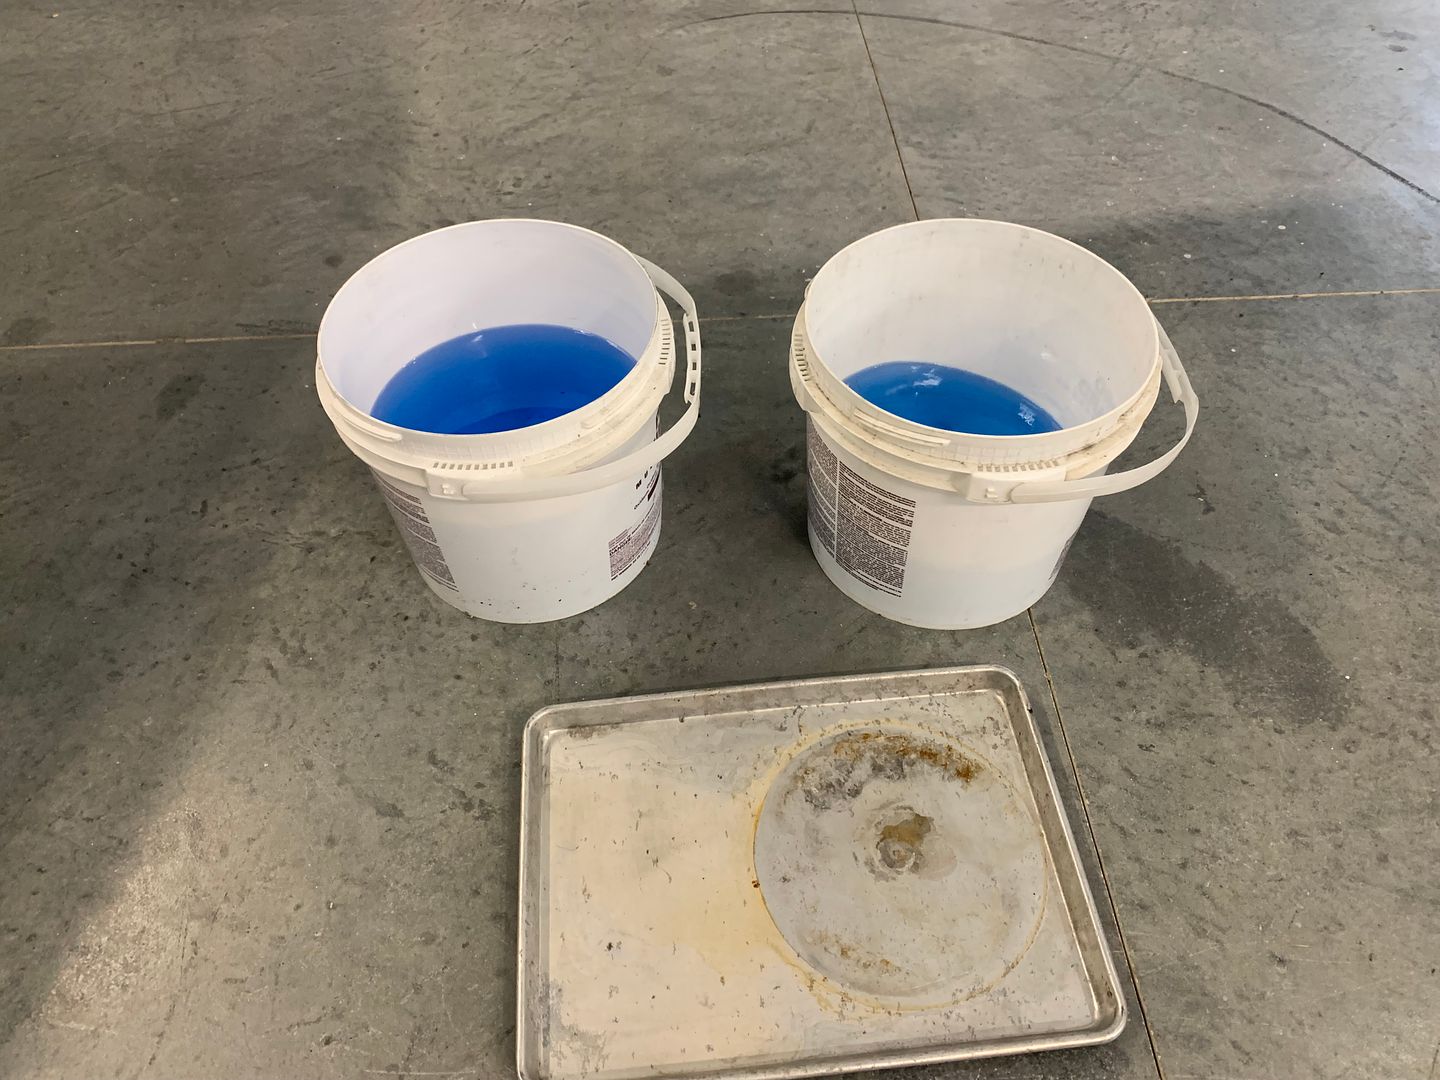
My mechanic and I replaced one of mine , we rolled the plane out in front of the hangar and drained the tank into these 2 clean buckets to flush the tank and look for any water or dirt. Lucky there was none. I covered those buckets with baking trays and poured it back into tank when finished replacing the sump drain.The sump valve is leaking on the Cherokee pretty bad. Is this something I as pilot can unthread and replace or do I need a mechanic?
Yeah I just went out and burned the tank down to about 2 gallons. Theres an old mechanic on the field I’ll probably have him do the swap.Defueling scares the crap out of me. Too many stories of really bad things happening. I'd rather do (and have done) the "quick swap" while leaking a half-cup of gas on the ramp than defuel. Just my preference.
You can run the tank down to 1/4 full or so. Turn the fuel selector to Off. Jack the opposite main gear or wing so that the remaining fuel goes to the outboard end of the tank, and replace the valve.Yeah I just went out and burned the tank down to about 2 gallons. Theres an old mechanic on the field I’ll probably have him do the swap.
That, too. I did that with a Commander 114 that had a seeping valve. I think that airplane had a Both position. Not common in low-wing airplanes. I did it in a Husky, too.Similar to Dan’s system; you can transfer a lot of fuel with selector in BOTH ( some in OFF) and
jacking one side. Then you can go to LEFT or RIGHT and jack other side to remove valve.
Note: Some Cessna POH or Owners Manuals specify when parking on uneven ground to go to LEFT
or RIGHT to prevent transfer .

Dan, you're a great resource. Thank you.We used to change the flight-school airplanes' drain valves once a year. That avoided stuff like sticking or leaking drains far from home on some cross-country trip. If the valve was showing corrosion, it got tossed. Corroded valves can stick open, and if the spring in it isn't stainless, it can break and now the thing won't stay shut.
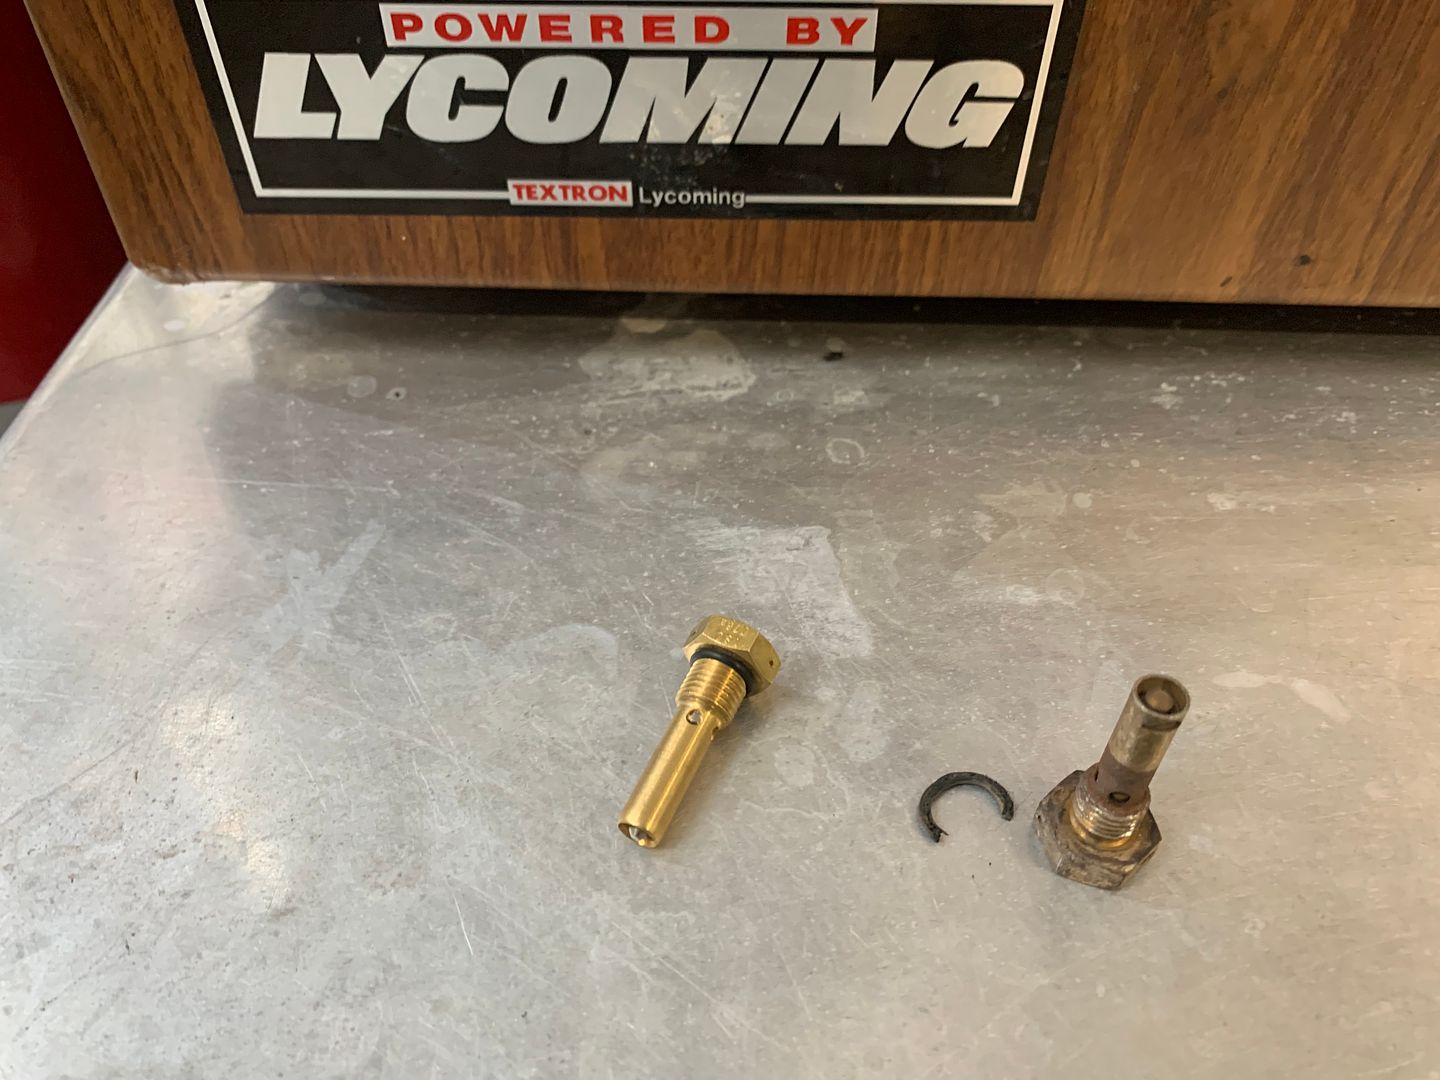
IIRC, the O-ring on the valve itself was an MS29513-006, and the one under the head of those with the 7/16" straight thread was an MS29513-012.
