High CO Readings

SoCal 182 Driver

Line Up and Wait
Joined
Sep 11, 2019
Messages
995
Display Name

Display name:
SoCal 182 Driver
Friends -

I have a newly installed XP470 in my C182. Probably 2 hours break-in on it at this point. I took the plane and new engine out over the weekend for a break-in flight, and noticed that the CO reading was much higher with the new XP470 than it was the old O-470-R (around 30 PPM vs. less than 10 PPM with the old engine).

It was a cold (for Southern California) day, and we were flying with the vents closed. Since it was a break-in flight, we were flying at full throttle, with mixture full rich. When we cracked the fresh air vents, the numbers came down to below 20 (at full throttle, full rich).

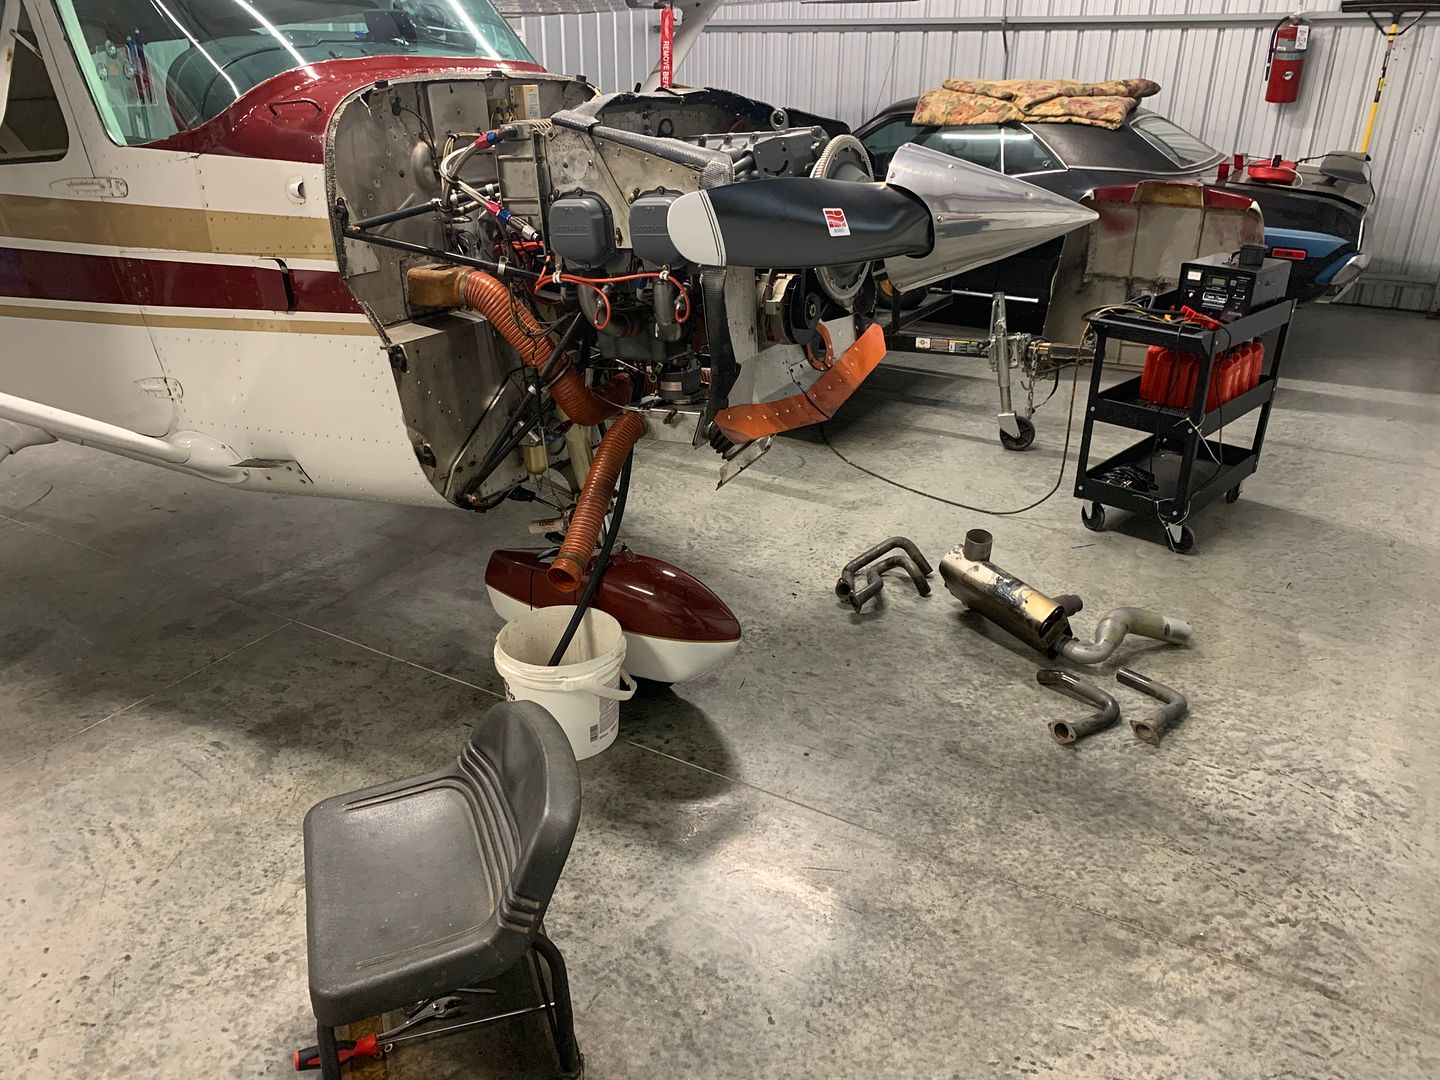
What are the obvious things I should look for when I have the cowling removed that might contribute to the higher CO reading?

Thanks!
 
If cabin heat pulls from an exhaust muff and the fresh air vent is integrated in the air flow, I’d be looking at the exhaust system.
 
Exhaust leak first. Door seals second. Duct tape down the inspection plates in the floor 3rd.
 
Pressure Check exhaust system in place.

CLEAN shop vac or my choice of a leaf blower.

Soapy water will tell the tale.
 
10 ppm is high in normal flight anyways. Think the full throttle/rich might be just exacerbating an existing condition. Agree with the other comments on exhaust issues. Was it inspected as part of the new engine install?
 
Pressure Check exhaust system in place.

CLEAN shop vac or my choice of a leaf blower.

Soapy water will tell the tale.
Is it as simple as duct taping vac hose to exhaust pipe, turning on the vac, and while it’s blowing air into the system checking the various slip joints, fittings, connections, etc?
 
Is it as simple as duct taping vac hose to exhaust pipe, turning on the vac, and while it’s blowing air into the system checking the various slip joints, fittings, connections, etc?
I have no hands-on experience....but I'm having trouble understanding how this might help to locate any cracks inside the heat exchanger for cabin heat. What am I missing?
 
I'm not an A&P, so take this with a grain of salt. My understanding is that on my plane the heat exchanger is the shroud around the muffler, which is connected to the interior heat valve via scat tubing. I was not using interior heat at the time the CO readings were high. The concern at this point is that something in the exhaust system is leaking, allowing carbon monoxide to seep into the cabin.
 
Just because you weren't using heat, doesn't mean the heater couldn't be the source. As far as I know, the valve that shuts off the heat to the cabin isn't necessarily bubble-tight and is certainly not immune to leaks and failure.

My Question.... and that I'm a tiny bit embarrassed to admit I don't know for sure
Is the typical shroud around the muffler field removable by an owner/pilot, so that it can be inspected in place, as described with the "shop-vac"?
Anything can be removed by the owner, but an A&P has to reinstall it. At least to my thinking, you don't need to remove the shroud to pressure test the system. I would think that putting the exhaust of a Shop-Vac into the exhaust stack of the engine would put sufficient pressure into the exhaust system to determine if there was a leak. At least I think that's the theory...
 
My opinion is that removal and reinstall is PM. Or should be.

No further disassembly needed.

If a snug fit in tailpipe duct tape not even needed.

Leaving spark plugs in will increase pressure.

You don’t really need a lot of pressure .

Dan T. Comment Here?

I have found many issues with this system that passed

visual check.

Also check the Firewall for being sealed where wires and cables pass

through.
 
You indeed might have to remove the shroud to apply soapy water to the exhaust can.
I would first spray soapy water on all the exhaust from the cylinder down to the tailpipe while pressurizing the exhaust (shop air into the exhaust, I have home-made fittings involving duct tape, to connect them. Others use different sources of air such as leafblowers)

It is normal to see some leakage from exhaust slip joints.
 
IIRC There is about 8 screws to open the shroud.

Note that an exhaust leak at the cylinder exhaust port flange can

erode the cylinder that will be hard to seal and could lead to

cylinder replacement. Water wears out rocks too!
 
Note that an exhaust leak at the cylinder exhaust port flange can erode the cylinder that will be hard to seal and could lead to cylinder replacement. Water wears out rocks too!
New engine and cylinders. Less than 3 hours on them. Likely the problem is elsewhere.
 
Look also at firewall penetrations. Seal any questionable pinholes with red RTV.

The CO2 monitor chirps when my newer engine (35 hours) is descending on closed throttle, such as on final. I assume it has to do with the mixture.

FWIW, OSHA exposure limit is 50ppm for 8 hours. So you are not in danger of incapacitation, unless it gets significantly worse.


I have a tube of high-temp RTV that I'm taking with me when the mechanic looks at the exhaust system on Saturday.

Thanks for the OSHA data. Good to know!
 
SoCal. I disagree.

Your exhaust was off.

When reinstalled it is possible to miss a gasket, nuts come loose and

things like that.

it is worthwhile checking.


btw- I first met RTV as an afterburner sealant.
 
SoCal. I disagree.

Your exhaust was off.

When reinstalled it is possible to miss a gasket, nuts come loose and

things like that.

it is worthwhile checking.


btw- I first met RTV as an afterburner sealant.
I'm having the exhaust system checked on Saturday by a different A&P than the one who did the engine installation. If there's an issue, hopefully he'll find it!
 
At least to my thinking, you don't need to remove the shroud to pressure test the system. I would think that putting the exhaust of a Shop-Vac into the exhaust stack of the engine would put sufficient pressure into the exhaust system to determine if there was a leak. At least I think that's the theory...
If you don't remove the shroud, the whole exercise is a waste of time. There might be a tiny crack in the muffler itself, under that shroud, and that's the usual path to the cabin.

So. Remove the shroud. Take a CLEAN vacuum cleaner, not one that has all sorts of dirt in the vacuum hose. That dirt will get blown into your nice new cylinders, scoring them up. Tape it to the tailpipe. Mix up some water and dish soap, lots of soap so it will form bubbles easily, and spray that on the whole muffler, including the end plates. Look for foam to appear. Cracks that are invisible even under a magnifier will show up under the soapy water. Check the exhaust gaskets with the soap, too. Something might be loose or distorted there.

In Canada this is an annual or 150-hour AD. Been that way for a long time here. I've found lots of cracks in strange places.
https://wwwapps.tc.gc.ca/Saf-Sec-Sur/2/cawis-swimn/AD_html.aspx?ad=CF-90-03&cn=CF&l=E
 
IMG_46501.jpg


IMG_46441.jpg

These are the best blow pruff gaskets and re useable. I remove my exhaust at least once a year to anti seize the slip joints.
IMG_2057.JPG

007_7.jpg
 
Last edited:
If you don't remove the shroud, the whole exercise is a waste of time. There might be a tiny crack in the muffler itself, under that shroud, and that's the usual path to the cabin.
I wasn't clear. My bad. I was referring to having access to the exhaust pipe to pressurize the system. Your points are well-taken.
 
I fly a 172 with powerflow exhaust that has been checked for leaks every annual. For 20 yrs, I’ve occasionally seen CO levels up 50ppm, usually in the spring or fall when I do not use the heater or air vents. I place portable CO monitors(3) around the cockpit to find the culprit, usually the passenger door. Pressuring the cabin usually resolves the problem. I find the relative wind, ie the crab angle I have to fly also affects CO entering the cabin. Although I check the exhaust and shroud every annual, I’m convinced it’s coming in thru the baggage door, drainage holes, passenger doors. Again it’s maybe 5-10% of the time, always resolved with cold or heater air pressuring the cabin.
 
I fly a 172 with powerflow exhaust that has been checked for leaks every annual. For 20 yrs, I’ve occasionally seen CO levels up 50ppm, usually in the spring or fall when I do not use the heater or air vents. I place portable CO monitors(3) around the cockpit to find the culprit, usually the passenger door. Pressuring the cabin usually resolves the problem. I find the relative wind, ie the crab angle I have to fly also affects CO entering the cabin. Although I check the exhaust and shroud every annual, I’m convinced it’s coming in thru the baggage door, drainage holes, passenger doors. Again it’s maybe 5-10% of the time, always resolved with cold or heater air pressuring the cabin.
Interesting points, I am sure your'e right.
Also fly with a powerflow exhaust for 1000+ tach hours now, love it. It does not have a muffler to rust, crack and leak. I keep mine free with anti seize and keep the prop balanced and I hope it last forever?

A few years ago I put new door seals on. It was very worthwhile as it made it quieter in the cabin and warmer in the winter. Never thought about CO, that is a good point for everyone to think about.
My original seals were not doing much and leaked everywhere.
IMG_0058.JPG

This one was crap.
IMG_0060.JPG

New one seals well, if not 100%
IMG_0071.JPG
 
Last edited:
I got a blower that we use to dry the dog, it is variable output and blows clean air. I would use it if I was going to pressurize my exhaust. It my case it is just as easy to remove it altogether and inspect.
I do it sometimes during oil changes.
AJOR3018.JPG

IMG_2070.JPG
 
Last edited:
You can also check for grey lead bromide dust to show where it could be leaking. Assuming you are using 100ll.
 

Attachments

  • Exhaust2.png
    Exhaust2.png
    181.8 KB · Views: 4
  • Exhaust1.png
    Exhaust1.png
    160.4 KB · Views: 4
PT and soapy water is much more effective at finding leaks than the best

visual inspection can do.

Case in point is the 172 muffler on Gary’s aircraft.

There is a “horseshoe” where the pressure can meets tailpipe.

When one of the spot welds breaks you can’t see it, but it

bubbles nicely! Not really nice though.

Remove and inspect is good for other things though.
 
Although I check the exhaust and shroud every annual, I’m convinced it’s coming in thru the baggage door, drainage holes, passenger doors. Again it’s maybe 5-10% of the time, always resolved with cold or heater air pressuring the cabin.
This is another reason to realize that airplanes are not cars. Cars have that long tailpipe that carries the exhaust all the way to the aft end of the vehicle, and the outlet is located to discourage any gases entering the car. The airplane has that short tailpipe just ahead of the doors and gear legs and other places the exhaust can sneak into the cabin. Remember too that the rotating prop causes a swirl in the prop blast at lower speeds that can move that exhaust sideways enough to get into odd places.
On my Cessna 185, I had to have good rubber seals around the landing gear springs/fuselage connection.
Yes. I've found those missing altogether. They rot and fall apart and mechanics just ignore them because they don't know why they were there. Some older models only had a closer-fitting aluminum closure plate that could easily let exhaust in.

The 172 is poorly sealed at its main gear. Just a plastic fairing there. On the '70(?) and later models with the round leg, an aluminum fairing is used to make the gear look more stout and to streamline it. Gases can get into a worn and cracked fairing and find their way up into the fuselage. The plastic fairing is on the outside of that fairing and can't stop that.
 
Take a CLEAN vacuum cleaner, not one that has all sorts of dirt in the vacuum hose.

To add, I also placed a double layered cloth over the hose before inserting into the muffler, just to help with anything that I might have missed cleaning it out.

Here is a pic of the horseshoe @Magman refers to, although this is the new muffler.
It's exactly where I found the crack when I got high co readings.

1708039575635.png
 
This is another reason to realize that airplanes are not cars. Cars have that long tailpipe that carries the exhaust all the way to the aft end of the vehicle, and the outlet is located to discourage any gases entering the car. The airplane has that short tailpipe just ahead of the doors and gear legs and other places the exhaust can sneak into the cabin. Remember too that the rotating prop causes a swirl in the prop blast at lower speeds that can move that exhaust sideways enough to get into odd places.
I've got a ginormous hole for my gear legs directly aft of my exhaust pipe. It's oversized because I preemptively welded on the larger hoops for the aluminum gear in case I upgrade. Now I know why my CO monitor chirps when I cut power to land. Was wondering if perhaps I had a hole in my muffler or firewall. But seems like that big hole under the gear leg is a more likely culprit.

PXL_20240216_005034546.jpg
 
Some aircraft ( Cardinal RG ?) have scoops on the fuselage to slightly

pressurize and reduce drawing in CO. Cars often have no OFF on fan

and just a real LOW to do the same.
 
Great thread here.

I used to use a portable CO monitor but would forget to turn it on half the time. I’m absolutely LOVING the Lightspeed Delta Zulu headset which records the CO levels that I can look at after the flight to see any trends.

IMG_3455.jpeg
 
Some aircraft ( Cardinal RG ?) have scoops on the fuselage to slightly

pressurize and reduce drawing in CO. Cars often have no OFF on fan

and just a real LOW to do the same.
I've got pretty effective vents so easy to get airflow into the cabin. The gear leg holes open into the area under the floorboards. My floorboards are not even remotely airtight because I did not install carpet. I'll start keeping the vents a scoshe open except when it is really cold.
 
Back
Top