First ever attemp at building a fiberglass part

bnt83

Final Approach
Joined
Dec 31, 2012
Messages
9,853
Location
Lincoln NE
Display Name

Display name:
Brian
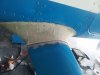
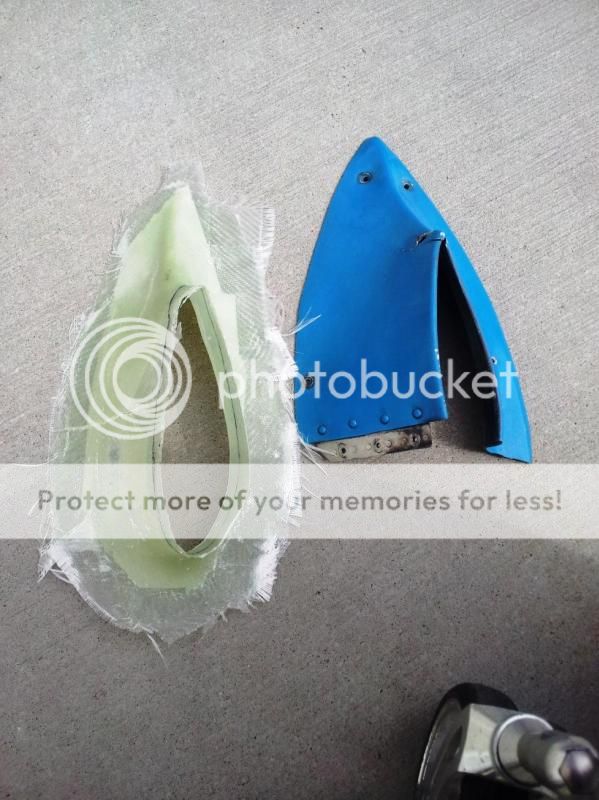
I sure learned a lot but I think I should start over on this one. Not enough meat on the edges. It also seems like the resin pot life was short and I didn't mix a lot :confused:. I have extra slow hardener on the way for another attempt.

 
Slow hardener will help. There's no need for any extra glass layers to be full size... Strips around the edges wil work.

Don't know if you familiar with peel ply but it can help in several ways. 1) to give you an even semi-smooth finish 2) to give you a finish that you can easily add more cloth, resin, or fill to.

A good epoxy, or even better, a good polyester filler (Evercoat Metal Glaze), is what you'll want for the final smooth surface before paint.
 
Make a form to build it over. You can use wood, foam, anything to hold the shape. Use some type of mold release, I think you will have better luck.
 
Better yet, spray the bad part with silicone, use tape to hold it in shape, spray inside to fill with low expansion foam, allow to cure, pull out, shape as needed, paint for smooth surface, silicone and make part with fiberglass. I bet that would work well.
 
You're getting there. It looks a ton better than my first try! So, you've got it formed up, and it's smaller than the part you are trying to copy sooooooo,, here's an idea. Let this be your female mold. As mentioned, you can now smooth it a bit, and spray with a good dose of silicone release agent, or you can cover it with some simple saran wrap and use a hair dryer to get the saran wrap to shrink right onto the female mold part, then start again.

Try using a body filler plastic spatula to smooth in the resin.

Have fun.
 
It seems like I didn't get a decent # of plies throughout the whole part. I felt pretty rushed when the first cup of epoxy started to gel and at that point I might have been half done. Then I ran out on the second batch.

I wasn't well prepared....

I just checked the last cup, it didn't cue correctly as suspected, a bit short on hardener. A bubble when hitting the pump...

I do have a peel ply, but I need the extra slow hardener to get everything in place.

I have some filler to add to epoxy and I was planning on using that over a thinner weight top most fiberglass cloth.
 
Last edited:
Better yet, spray the bad part with silicone, use tape to hold it in shape, spray inside to fill with low expansion foam, allow to cure, pull out, shape as needed, paint for smooth surface, silicone and make part with fiberglass. I bet that would work well.

I've seen people use the "gap filling" aerosol cans of foam but not sure how well that would work
 
I've seen people use the "gap filling" aerosol cans of foam but not sure how well that would work

I think the key would be a low expansion type, you could mold from the inside or outside. Another option would be pourable urethane, but that starts getting expensive. The foam in cans gets pretty hard and you can shape with a rasp and file, or build up by adding more foam. Haven't tried it myself, but it could work.

You did a good job free hand, but I think it would be easier to form it over something.

Good luck.
 
Use the part you are duplicating as the mold,use wax paper as the release. If not worried about weight use marine mat,and roving. Don't be afraid of using a file,then some gel coat. Good first attempt ,better than most.
 
Brian,
I have just finished a repair of a pair of broken wheel pants and had similar problems as you. On one of the last rounds of repair, I used cream hardener and it was more reasonable than the clear liquid stuff. It still hardened before I was finished so, throw away and make another batch. I'm at the smooth and prime stage now so.......maybe. My satisfaction is perhaps measured by the lack of a photo of my work ! Good luck with the slow hardener if you decide to go again.
 
It seems like I didn't get a decent # of plies throughout the whole part. I felt pretty rushed when the first cup of epoxy started to gel and at that point I might have been half done. Then I ran out on the second batch.

I wasn't well prepared....

I just checked the last cup, it didn't cue correctly as suspected, a bit short on hardener. A bubble when hitting the pump...

I do have a peel ply, but I need the extra slow hardener to get everything in place.

I have some filler to add to epoxy and I was planning on using that over a thinner weight top most fiberglass cloth.

Prep is everything. I mean everything! The key would be a slower curing agent for the mix. Make the part 2-3" larger than the finished part, trim when cured.
 
I have clear packing tape but duct would form a bit better.
Clear packing tape works great... Use it all the time. If you forget to use release wax , it usually doesn't matter.

Re filler: mixing up glass heads with resin for gross filling is fine, but you have to wait for it to cure for subsequent coats. Using for one gross fill pass is my approach. Premixed epoxy fill is even better. But using polyester fill for subsequent passes is best. Stuff like Metal Glaze (aka good Bondo) harden in minutes. Sand very easily to a fine smooth finish. Took me awhile to learn and accept that using polyester fill over my epoxy composites is the most productive way to go.
 
It seems like I didn't get a decent # of plies throughout the whole part. I felt pretty rushed when the first cup of epoxy started to gel and at that point I might have been half done. Then I ran out on the second batch.

I wasn't well prepared....

I just checked the last cup, it didn't cue correctly as suspected, a bit short on hardener. A bubble when hitting the pump...

I do have a peel ply, but I need the extra slow hardener to get everything in place.

I have some filler to add to epoxy and I was planning on using that over a thinner weight top most fiberglass cloth.

When you have compound curve surfaces, you really want some mat in there with the woven.
 
This time I laid oil based clay (Chavant) on the airplane then sprayed with polyvinyl alcohol. The extra slow hardener helped. I'll give the parts another day to cure before pulling them.


Last edited:
Much better!

Its kinda fun, but good lord MESSY. I've experimented enough that I think I have the process figured out pretty well. I'll probably use these two. There is a huge mess in the hangar right now lol. :lol:

These also came out about 100% lighter weight than the first try.

It can be frustrating glassing upside :mad2:
 
Last edited:
Now look up vacuum bagging. You can use an old aircraft pump and a motor from Grainger for your vacuum supply.
 
Now look up vacuum bagging. You can use an old aircraft pump and a motor from Grainger for your vacuum supply.

I've done it a long time ago in A&P school of course (flat sandwich on top of a table <extremely simple shape>) and I could probably even borrow a pump from work, but I reeeeeaaaaalllllly don't want to tie up more money in supplies.

I think by the time I got the bag in place and everything in this case, the resin would have gelled to the point where bagging wouldn't have made a big impact.

I'm slow. This one handed thing kinda sucks. :rofl:
 
Last edited:
Made some progress after work
 

Attachments

  • 10409512_10152456418878218_4839741066999611311_n.jpg
    10409512_10152456418878218_4839741066999611311_n.jpg
    93 KB · Views: 44
I've done it a long time ago in A&P school of course (flat sandwich on top of a table <extremely simple shape>) and I could probably even borrow a pump from work, but I reeeeeaaaaalllllly don't want to tie up more money in supplies.

I think by the time I got the bag in place and everything in this case, the resin would have gelled to the point where bagging wouldn't have made a big impact.

I'm slow. This one handed thing kinda sucks. :rofl:

See, I was gonna say, it appears to me you're doing better than I could with two forepaws, and you're doing it with one! Hats off to you.
 
you'll want to cure the part at 150 dF for at least two hours to get full strength. Otherwise, it will have a short life.

Best way to cure fiberglass parts is to build a box using insulated foam board, and a 1500 watt hair dryer or heat gun with a temperature probe activated shut off. The hair dryers are actually preferred since they provide a higher volume of diffused heat.

What do the composite homebuilders do? Find and industrial sized oven? Many long EZs are approaching 20 to 30 years old.

This is a fairing...
 
What do the composite homebuilders do? Find and industrial sized oven? Many long EZs are approaching 20 to 30 years old.

This is a fairing...

That guy was full it. Probably neber built anytyhing bigger than an RC something.

We have canards with 4000 hours on them that were never post cured. Shorter life my butt. Shows how unknowledgeable forum trolls like to spout nonsense because they can.....
 
Last edited:
That guy was full it. Probably neber built anytyhing bigger than an RC something.

We have canards with 4000 hours on them that were never post cured. Shorter life my butt. Shows how unknowledgeable forum trolls like to spout nonsense because they can.....

If using polyester, he isn't exactly full of it. Polyester will leave uncured styrene in the matrix if just cured with MEKP, one has to postcure to 90°C for 15 minutes or so to finish curing them. This is the same issue that causes blisters on boat bottoms. For a fairing that isn't in water, not a big issue, for structural components I would go ahead especially if built at minimum weight.
 
I post-cure structural stuff. For a fairing, it's a waste. The early gear structure on the Vari-Eze didn't use post curing and they had a lot of early droopy gear legs. The later Long-Eze was both heavier, and also post cured and held up much better. For something like this, don't bother, or put it in direct sun without the UV covering for an hour. Sure, it'll absorb some UV, but the sun will cure it right up. Slower resins can use some direct sun as well to get it to the Nth degree on curing.

Clay sure is messy. Then - I think back to use foam blocks, and a rasp, hot wire, 80 grit, micro-bubbles, file, green scrubber and the mess that made! Clay looks pretty good. lol
 
Or if you cook something in the oven tonight, leave a thermometer in there and as it cools below 170°F, just toss the parts in there for a bit. Only if you want to, it will make the paint adhere better though.
 
What do the composite homebuilders do? Find and industrial sized oven? Many long EZs are approaching 20 to 30 years old.

This is a fairing...

You can do it with a heat gun, it just takes time.
 
I hate the smell of polyester so to me it's worth the extra money to buy epoxy. The kit says do not exceed 140 degrees F. I applied two 500 watt shop lights about 26 or so inches away from the surfaces, one on the upper and one on lower for about 8 hours. It cured very nicely.

Not to mention pre warming the resin components and letting it stand for at least a minute after thorough mixing.

I had some three year old stuff I tried the first time and the results kinda sucked. This kit is brand new and worked perfect :D

Epoxy is a better material for most things, it doesn't require post curing, but it would benefit as well, no biggie on a fairing. We usually post cure epoxy repairs with heat lamps. Epoxy does cause reactions in people with what appears to be a cumulative exposure fashion. I know people who have worked with it for years then boom, one day, anaphylactic reaction. Even though it doesn't stink like the ester resins, you are probably well served using a vapor mask.
 
There are all different types of epoxy and they do have shelf lives as you found out. Some epoxies won't benefit from a raised temp cure, some will. The characteristic you are interested in is the Tg or glass transition temperature. Simply stated this is the temperature where the epoxy will change from a more rigid, higher strength "crystalline" state to a less strong, more rubbery state. Using an elevated cure temperature will raise the Tg in many epoxies making a stronger more robust part. You can typically find this info from the manufacturer of the epoxy.

Nice job on the parts you made btw...
 
Epoxy is a better material for most things, it doesn't require post curing, but it would benefit as well, no biggie on a fairing. We usually post cure epoxy repairs with heat lamps. Epoxy does cause reactions in people with what appears to be a cumulative exposure fashion. I know people who have worked with it for years then boom, one day, anaphylactic reaction. Even though it doesn't stink like the ester resins, you are probably well served using a vapor mask.

In fact, if you are repeated exposed to some epoxies you will absolutely develop dermatitis. I used it for years in a prior life and had no problems and had many employees who were the same way. Then I would have know it alls who would be sloppy when handing the stuff and get it on themselves, they would tell me stuff like this never causes me a problem. Usually within a few weeks they would have a problem. I finally smartened up and would fire people who would not pay attention to safety precautions.
 
That guy was full it. Probably neber built anytyhing bigger than an RC something.

We have canards with 4000 hours on them that were never post cured. Shorter life my butt. Shows how unknowledgeable forum trolls like to spout nonsense because they can.....

I am a factory trained composite expert in Cirrus aircraft, and other corporate business aircraft that use composites. Trained by the people that make the materials too, not just the planes.

All resins benefit from curing, both epoxy and polyester. Polyester is generally unfit for aircraft structures but it is what Corvette shops use and what many many untrained people fix their planes with.

You can skip post cure at your own risk.
 
Last edited:
I'm a self-taught, ex surfer dude from CA who's broken a half dozen boards made from various resins, and cores.

A gear fairing, made from polyester, no post-cure, painted with some simple Krylon will outlast most of the rest of the plane. worst case, it falls off after 15 years and you get to make another one.

pfft.
 
Oooh -nice job on the wheel pant. I like how you reinforced the tabs on the cover plate. Mine was pretty worn, with one hole torn open, but I was able to use it as it was.
 
Back
Top