TIps for correcting "bent" baffling?

Jim_R

En-Route
Joined
Feb 17, 2010
Messages
2,567
Display Name
Jim
I've got a Cherokee with a Lycoming O-360-A4A. I replaced the baffling a couple of years ago and maybe didn't pay as much attention to it afterwards as I should have, but I'm paying more attention now: I just recently had an engine overhaul, and so recently I've spent a lot of time inspecting the engine bay and reviewing CHTs from break-in flights, etc.

One thing I've noticed is that CHTs on 1 and 3 are running a little hotter than 2 and 4. I've gone back in the engine monitor logs and realized that was true prior to the overhaul. Inspecting the baffling, I've identified a corner of one of the silicone strips that is bent backwards instead of forwards, so I'm guessing there's a "leak" on that side that might be compromising cooling.

The "bent" part is the silicone portion of the baffle, not the metal portion, and it's been "trained" that way for a couple of years now, so simply trying to bend it forward doesn't really do anything--it just flops right back to where it wants to be.

Any tips for how to "re-train" that bit of silicone to bend in the correct direction? Is it ruined such that I just need to replace it?

Any suggestions for how to observe the way that baffle is sitting after the cowl is installed (I.e., how to confirm that it's "fixed")?
 
No idea if this would work ...
Bend it to its proper position and gently heat with a heat gun?

If you have a spare piece of silicone baffling you could test it for hot malleability.

Or, punch a tiny hole in the silicone. Thread safety wire through it and secure the safety wire at a location where it will hold the silicone in the proper orientation. Go fly. Perhaps over time the baffle will "retrain."

Or, perhaps you could remove the piece, flip it around, and reinstall.

Here's a semi-related tip. Line the underside of your VERY expensive cowling with metal foil duct tape along the soft baffle contact lines. This will save the cowling from a slow sanding by grit on the baffling.
 
No idea if this would work ...
Bend it to its proper position and gently heat with a heat gun?

If you have a spare piece of silicone baffling you could test it for hot malleability.
I have thought of this but haven't tried it yet. One of the reasons I posted here was to save the trouble of trying things that others know will not work (it's about an hour round-trip to the airport, so not an insignificant investment to "give it a shot"). Hopefully someone with personal knowledge / practical experience will chime in.

Or, punch a tiny hole in the silicone. Thread safety wire through it and secure the safety wire at a location where it will hold the silicone in the proper orientation. Go fly. Perhaps over time the baffle will "retrain."
This is an interesting idea, though I would be concerned that the safety wire could saw or slice through the silicone and render that part of the baffle useless. I wonder if something more forgiving/sacrificial, like a couple of inches of painter's tape or similar, could do the same thing without risk of damage? The tape would only need to hold long enough to get the cowl back on; presumably the baffle would stay in the right position once constrained by the cowl.

Or, perhaps you could remove the piece, flip it around, and reinstall.
Except that the rest of the span of that baffle is currently bent in the correct direction, so spinning it around would just make the problem bigger. There's only one edge/corner that is bent backwards...something like ~1.5" of a ~6" span.

Here's a semi-related tip. Line the underside of your VERY expensive cowling with metal foil duct tape along the soft baffle contact lines. This will save the cowling from a slow sanding by grit on the baffling.
:thumbsup:
 
Last edited:
Can you use a 2nd pair of hands to hold it in the forward position as you close the cowl?

I think if the silicone can’t be placed in the forward position and stay there with the forward cowl in-place, then there is something inherently incorrect- silicone or baffle too short. It should stay in the forward position under pressure (i.e., at all speeds).
 
Often the soft seals have been replaced with material that is too narrow

and will not do its job. One way to address this is to attach another piece

of silicone to the existing piece. Ugly may work and get trimmed later.

Some aircraft you can reach in the inlet and fold forward.


At the lower rear there are some “scoop” hard baffles that often distort.

Sometimes you can even put fingers between the “scoop” and the cylinders

which means cooling air is not being forced between the fins.


Adjusting baffles is time well spent.
 
I've got a Cherokee with a Lycoming O-360-A4A. I replaced the baffling a couple of years ago and maybe didn't pay as much attention to it afterwards as I should have, but I'm paying more attention now: I just recently had an engine overhaul, and so recently I've spent a lot of time inspecting the engine bay and reviewing CHTs from break-in flights, etc.

One thing I've noticed is that CHTs on 1 and 3 are running a little hotter than 2 and 4. I've gone back in the engine monitor logs and realized that was true prior to the overhaul. Inspecting the baffling, I've identified a corner of one of the silicone strips that is bent backwards instead of forwards, so I'm guessing there's a "leak" on that side that might be compromising cooling.

The "bent" part is the silicone portion of the baffle, not the metal portion, and it's been "trained" that way for a couple of years now, so simply trying to bend it forward doesn't really do anything--it just flops right back to where it wants to be.

Any tips for how to "re-train" that bit of silicone to bend in the correct direction? Is it ruined such that I just need to replace it?

Any suggestions for how to observe the way that baffle is sitting after the cowl is installed (I.e., how to confirm that it's "fixed")?
McFarlane sells a tool that slices the baffle which helps it to confirm to the cowl.
I have used one on my seals.
Sounds like what you need?
 
Last edited:
Use a narrow strip of duct tape to pull it into shape. Stick the other end of the duct tape to the inside of the aluminum baffles. The rubber baffle material may (or may not) retrain itself over the next couple dozen flight hours. If it doesn't, replacing the rubber baffles (or just a bit of 'em) isn't a big deal.
 
Last edited:
Try using a paint stirring stick to ensure the baffle strip is bent the correct way when you put the upper cowl back on. Put the cowl on loosely and then slide the stick between the cowl and baffles. After everything is fastened, use a flashlight to check that the baffles are still positioned correctly. Go fly and then check it again. If it doesn't stay in position, you need a wider section of baffle in that spot.
 
You should be able to see, by looking into the cooling air inlets in the front of the cowl, the silicone seals strips and their positions. Use a good flashlight. I made a tool from some 1/4" steel rod, with a 90° hook on one end and a 180° bend as a handle at the other, like an old fireplace poker. Long enough to reach the rear baffle seals from outside the cowl. Use the hooked end to pull forward any seals that are bent backwards at the rear and sides.
 
A picture would help, but a touch of red RTV as a glue to hold in the right orientation can work. The way the right angle joints fold matters as well.
 
A picture would help, but a touch of red RTV as a glue to hold in the right orientation can work. The way the right angle joints fold matters as well.
You don't dare glue the baffle seal to the cowling. That will tear the aluminum baffles apart as the engine moves on its shockmounts.

And there is nothing else to glue it to.
 
You don't dare glue the baffle seal to the cowling. That will tear the aluminum baffles apart as the engine moves on its shockmounts.

And there is nothing else to glue it to.
Not at all what I was suggesting. Where the baffles make a right angle in the rear, they can fold back slipping by each other. A dot of RTV between where the two baffles meet can keep them in the right orientation. So a silicone baffle to silicone baffle joint.

I have no earthly idea how you could glue the baffles to the cowling or how you could ever remove the cowling once you did.

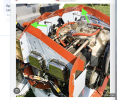
Here's a picture of what I'm trying to explain. The way those baffles fold, they can blow out so they don't seal the airflow. Some way of restraining them where they overlap can help.
Screenshot 2026-01-11 at 4.37.14 PM.png
 
Last edited:
I'm more concerned that you might have excessive worry over CHTs during break in.
 
I'm more concerned that you might have excessive worry over CHTs during break in.
No, I'm not concerned about the CHTs. Just noticed that it seems like one half of the engine is consistently hotter than the other half, and thinking about why that might be.
 
Try using a paint stirring stick to ensure the baffle strip is bent the correct way when you put the upper cowl back on. Put the cowl on loosely and then slide the stick between the cowl and baffles. After everything is fastened, use a flashlight to check that the baffles are still positioned correctly. Go fly and then check it again. If it doesn't stay in position, you need a wider section of baffle in that spot.
I like the concept, but am not sure where I could insert the stick and reach the baffles in a way that would get them to stay in place when the cowl is fully seated. I guess maybe there might be an angle from the back side that could work, but the location I need to reach is in the middle rear.
 
You should be able to see, by looking into the cooling air inlets in the front of the cowl, the silicone seals strips and their positions. Use a good flashlight. I made a tool from some 1/4" steel rod, with a 90° hook on one end and a 180° bend as a handle at the other, like an old fireplace poker. Long enough to reach the rear baffle seals from outside the cowl. Use the hooked end to pull forward any seals that are bent backwards at the rear and sides.
This seems like what I need. Thanks!
 
Not at all what I was suggesting. Where the baffles make a right angle in the rear, they can fold back slipping by each other. A dot of RTV between where the two baffles meet can keep them in the right orientation. So a silicone baffle to silicone baffle joint.

I have no earthly idea how you could glue the baffles to the cowling or how you could ever remove the cowling once you did.

Here's a picture of what I'm trying to explain. The way those baffles fold, they can blow out so they don't seal the airflow. Some way of restraining them where they overlap can help.
View attachment 148916
Gotcha. But you'd need to apply that RTV with the cowl on and the baffles in place, or they won't be able to slip into a right relationship when the cowl is installed.
 
Gotcha. But you'd need to apply that RTV with the cowl on and the baffles in place, or they won't be able to slip into a right relationship when the cowl is installed.
RTV, cowl on, get the baffles in place, allow the RTV to harden.
 
McFarlane sells a tool that slices the baffle which helps it to confirm to the cowl.
I have used one on my seals.
Sounds like what you need?
Neat- both the tool and the McFarlane baffle seal material. Too bad I just replaced all of my baffle seal recently :mad2:
 
Back
Top