MickYoumans
Cleared for Takeoff
- Joined
- Jan 26, 2012
- Messages
- 1,334
- Location
- 2J5 / KBXG - Georgia
- Display Name
Display name:
MickYoumans
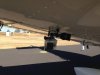
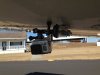
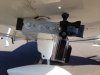
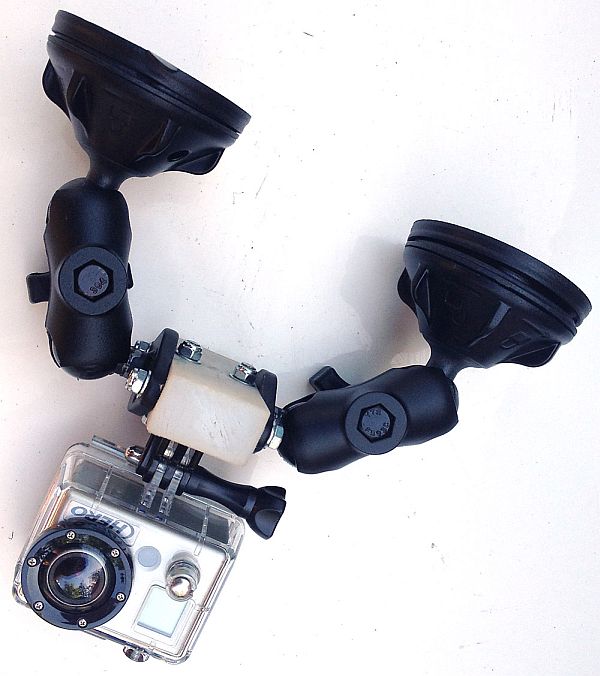
I have been looking for a way to mount my GoPro camera to the outside of my Cherokee, but was not happy with the commercially available options I could find. I made a DIY GoPro mount for my Cherokee that bolts through the tie down ring under the passenger side wing. My mount cost less than $15 for all parts including the metal plates, hardware and tape. I thought I would share my idea with everyone here. It is very easy to make and only requires two cuts with a hack saw. It is also super easy to install and remove, plus the mount fits very nice in the case I have for my GoPro.
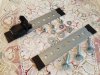
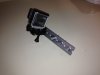
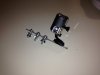
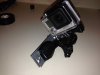
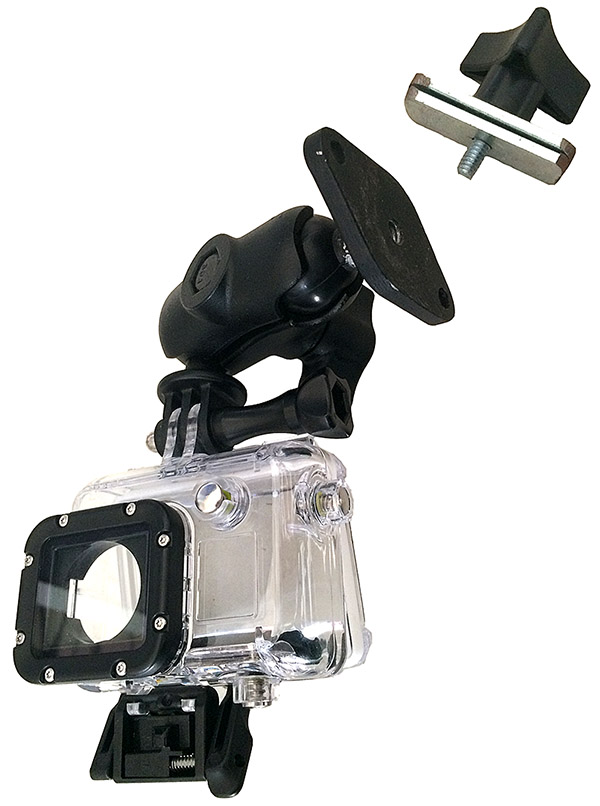
The first picture is of the metal used to make the mounting plates. I took a picture of the description label so you would have the size and thickness of the steel strip. It is just wide enough to accommodate the width of the flat GoPro stick-on mount that came with the camera. I would not recommend going with a thinner steel stock because I think it would be to flimsy and potentially vibrate. I didn’t want to go any thicker to hold down on the weight. I cut two 8” pieces with a hack saw out of the strip of steel. I sanded the burrs from the edges and taped the edges with electrical tape to help prevent accidental scratches to the plane. After sticking the GoPro mount on the steel plate, I went ahead and clipped in the mating GoPro arm. I also put a couple wraps of electrical tape around this for added insurance to securely hold the GoPro stick on mount and arm to the steel strip. I then assembled the two strips of metal together using the largest diameter bolts that would fit the holes in the steel strips. It worked out that I needed to mount these bolts in every other hole with the middle bolt going through the tie-down ring and the other two bolts to the front and back on the outside of the ring. I used flat washers on the outsides of the plate followed by a lock washer and wing nut. When installing the mount on the tie-down ring, it works best to leave the two outside bolts in place but loose enough to slip the tie-down ring between the two plates then run the middle bolt though the plates and tie-down ring. When the three bolts and wing nuts are finger tightened, this bracket is very secure. The GoPro mounting arms are the ones that came with the camera. I did not buy any additional GoPro parts. You will need to install two GoPro arm joints so the camera will hang down at a right angle from the mounting plates. If you have the GoPro app on your iPhone or iPad, use it to see how your camera is aimed and adjust the arms accordingly and tighten. You will also need to go to the settings and flip the picture so it will be correctly oriented since the camera is hanging upside down. With the wi-fi enabled on the GoPro camera, I was able to start and stop my GoPro from inside my airplane using my iPhone and monitor what was being recorded on it.
If anyone else gives this a try, let me know how it works out for you.