BGF_Yankee
Line Up and Wait
Well, about 2 months ago I went and lost my mind. My wife and I decided that we were ready to sell our trusty Lance and go with its red-headed, twin engined, step-brother the Seneca II. After looking at the same inventory, over and over again, for a couple of months, we finally decided on a candidate that had been based in Annapolis, MD. We flew up commercially and flew N5687V home this past weekend.


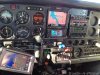
It didn't take long into the flight home to realize that I was not keen on the JPI EDM760 that was installed in the panel. Almost immediately I decided to give the new Electronics International Twin CGR-30P the nod for install since I'd had such a good experience all the way around in the Lance.

Don't get me wrong, I am not excited about having to start the process over again, but at least it won't totally be from scratch. AND, I feel like we learned quite a bit after the install process last time. I'm hoping that it's a little more streamlined this time around.
To reiterate a little bit about why I chose the EI CGR offering last time, the things that drew me to EI were their customer service, their rebate program, their cost as a primary replacement for several gauges in my panel, and the fact that the CGR will fit a standard 3 1/8" instrument bay without having to slice up my panel overlay.
Once again, the first thing you do when ordering the CGR-30P is to download and fill out a "Configuration Requirements" worksheet. This sheet allows you to select the features you want for your instrument and then tailor them to your specific aircraft. All of this information comes right from your POH (or other related aircraft/engine manuals). This sheet is submitted at the time of your order to the folks at EI and lets them customize the instrument just for your aircraft. This is where I noticed the first difference between the last install and this time around. Since there are two engines, you should fill out two separate worksheets.

"But Zach, why would I do that? Won't both gauges be the same??" Well yes, that could potentially be true, but it didn't take long to realize that all the same functions I built into my last CRG-30P wouldn't need duplication across two gauges this time around. For example, you don't need to have system voltage listed twice, so that freed up one slot to go ahead and include an open spot on the right engine gauge to include outside air temperature.


I also noticed this time around that what used to be a seven page document has morphed into fifteen pages. I'm sure as Electronics International has continued to develop the CGR-30P (and it's cousin the CGR-30C), additional options have become available and/or are more detailed.
Once again this time around though, you can select and customize (to an extent) the options that you want included for your own aircraft. This is not a "cookie cutter" gauge, and is certainly one of the nice things about this instrument. Some of the options have a cost associated with them, some don't. It all depends on how you decide to set up the gauge and distribute the parameters. Once the decisions have been made, you set about filling in the appropriate details for the selected parameters as they pertain to your particular aircraft. As an example, the Seneca II was offered with standard fuel tanks that hold a total of 93 usable gallons, or with extended range tanks that hold a total of 123 usable gallons. If you don't notate this correctly, it will throw off your totalization numbers.


It was nice to see some new options available this time around. For example, the Automatic Dimming Control is a feature I am really looking forward to.
I can't thank our own Dave Arata enough for all of the help he has provided to me during this ordering process. I know I am wearing him out with all of the questions that I have. I had fully intended on copying my worksheet from the last time around, but different aircraft require different things. Thank you again Dave.
Lead time right now is about four to five weeks, so once again, I'm going to settle in and re-read the installation manual so that I'll be ready when my goodie box arrives! I've got some other "upgrades" that I'll be doing on my new plane, as well as an annual inspection next month, so I've got plenty to keep me busy in the meantime.
This thread may be quiet for a few weeks, but I'm happy to answer any questions in the meantime!
It didn't take long into the flight home to realize that I was not keen on the JPI EDM760 that was installed in the panel. Almost immediately I decided to give the new Electronics International Twin CGR-30P the nod for install since I'd had such a good experience all the way around in the Lance.
Don't get me wrong, I am not excited about having to start the process over again, but at least it won't totally be from scratch. AND, I feel like we learned quite a bit after the install process last time. I'm hoping that it's a little more streamlined this time around.
To reiterate a little bit about why I chose the EI CGR offering last time, the things that drew me to EI were their customer service, their rebate program, their cost as a primary replacement for several gauges in my panel, and the fact that the CGR will fit a standard 3 1/8" instrument bay without having to slice up my panel overlay.
Once again, the first thing you do when ordering the CGR-30P is to download and fill out a "Configuration Requirements" worksheet. This sheet allows you to select the features you want for your instrument and then tailor them to your specific aircraft. All of this information comes right from your POH (or other related aircraft/engine manuals). This sheet is submitted at the time of your order to the folks at EI and lets them customize the instrument just for your aircraft. This is where I noticed the first difference between the last install and this time around. Since there are two engines, you should fill out two separate worksheets.
"But Zach, why would I do that? Won't both gauges be the same??" Well yes, that could potentially be true, but it didn't take long to realize that all the same functions I built into my last CRG-30P wouldn't need duplication across two gauges this time around. For example, you don't need to have system voltage listed twice, so that freed up one slot to go ahead and include an open spot on the right engine gauge to include outside air temperature.
I also noticed this time around that what used to be a seven page document has morphed into fifteen pages. I'm sure as Electronics International has continued to develop the CGR-30P (and it's cousin the CGR-30C), additional options have become available and/or are more detailed.
Once again this time around though, you can select and customize (to an extent) the options that you want included for your own aircraft. This is not a "cookie cutter" gauge, and is certainly one of the nice things about this instrument. Some of the options have a cost associated with them, some don't. It all depends on how you decide to set up the gauge and distribute the parameters. Once the decisions have been made, you set about filling in the appropriate details for the selected parameters as they pertain to your particular aircraft. As an example, the Seneca II was offered with standard fuel tanks that hold a total of 93 usable gallons, or with extended range tanks that hold a total of 123 usable gallons. If you don't notate this correctly, it will throw off your totalization numbers.
It was nice to see some new options available this time around. For example, the Automatic Dimming Control is a feature I am really looking forward to.
I can't thank our own Dave Arata enough for all of the help he has provided to me during this ordering process. I know I am wearing him out with all of the questions that I have. I had fully intended on copying my worksheet from the last time around, but different aircraft require different things. Thank you again Dave.
Lead time right now is about four to five weeks, so once again, I'm going to settle in and re-read the installation manual so that I'll be ready when my goodie box arrives! I've got some other "upgrades" that I'll be doing on my new plane, as well as an annual inspection next month, so I've got plenty to keep me busy in the meantime.
This thread may be quiet for a few weeks, but I'm happy to answer any questions in the meantime!
Last edited:
")