Jay Honeck
Touchdown! Greaser!
As many of you know, I've been a big proponent of mogas in low compression airplane engines for almost 20 years. I've run over 12,000 gallons of that sweet 87 octane, ethanol-free, unleaded mogas through my O-200, O-320, and O-540-powered aircraft, pumping it from fuel trucks I built.
The first truck ("The Mighty Grape") was a purple '95 Nissan pickup truck. I had a 55-gallon tank fabricated and we installed an electric pump and 20' of hose. It worked great, until the day it literally broke in half as the shop tried to lift it on the hoist. Iowa winters were hard on crappy Japanese steel.
The second truck ("The Green Grape") was a green '95 Toyota T-100. I simply moved the entire rig over to the new truck, wired it up and kept on a-pumping.
When we moved to Texas in 2010, I could not find a reliable or handy source of unpolluted car gas. After a few months, I gave my tank/pump away to a mechanic friend, and ended up trading for an '07 F-150, which I still have. A few months later, I found a reliable source of ethanol-free car gas near the Sam's Club we frequent. It was perfect. But I resisted building another fuel truck, because the 100LL pumps were just so danged handy...
Fast forward to this year. At my condition inspection, I am shocked to learn that two of my cylinders are in the low 70s for compression -- on a 500 hour O-360 that is run every few days. One in particular is BARELY at 70, and we can hear air hissing through the exhaust valve. Bore-scoping shows a cylinder absolutely packed with lead "crud". Argh.
Since then I've been "treating" the engine with Marvel Mystery Oil, leaning the crap out of it, and vowed to get rid of this horrible 100LL fuel -- a fuel that my O-360 was NEVER designed to use.
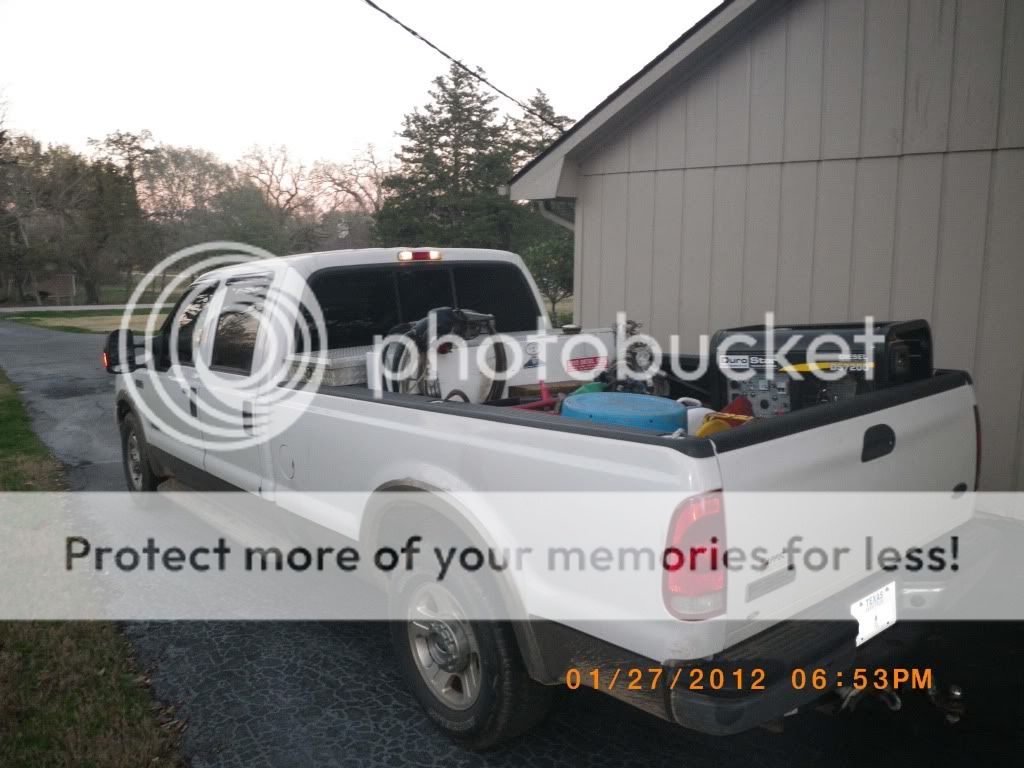
So, I have built another fuel truck. ("The Might Grape III -- the Burgundy Edition") If you've ever wondered about how to go about doing this, here are the steps:
1. Find a "Tractor Supply Store" in your area. This is SO much easier than the way I did my first tank, which was to find a company that manufactured tanks and have it made to fit my (itty-bitty) Nissan truck bed.
2. Pick a Size. They handle a wide variety of tanks to fit all trucks. The standard 100 gallon tank fits perfectly in the bed of an F-150. Smaller sizes are available, but bigger is better.
3. Buy a 12-volt pump. They have three sizes -- I opted for the middle, 15 gallon-per-minute size.
4. ADD A FILTER. Amazingly, these rigs don't come standard with a fuel filter. I plumbed in a standard BIG fuel filter, which looks just like the oil filters we use on our airplanes.
5. Miscellaneous stuff (gasoline pipe thread stuff, electrical connectors, etc)
The tank fits perfectly in the bed of your truck. There are four mounting L-plates with 8 holes drilled welded to the tank, but they only provide four mounting bolts. These are inserted through holes you must drill in the bed of your truck.
The tank actually sits up on rubber donuts, not unlike Lord engine mounts. Insert them and tighten everything down. It helps if you have a small wife who can hold the nut under the truck bed while you torque the bolt from above. (It also helps if you have ramps, or another way to get your truck up in the air a bit.)
After that, it's a matter or installing the pump (you need a BIG pipe wrench to torque everything down), the filler cap, and wiring everything up -- which consists of 2 wires running all the way to the battery, with an in-line 25 amp fuse that they provide with the pump.
Total time to install: A leisurely four hours. If you kicked butt, you could do it in an hour.
Optional Items
Back in 2000, we went round and round on rec.aviation about whether or not it was necessary to build a static reel/clip, to ground the truck and the plane. The consensus was that -- although it was probably a waste of time -- it couldn't hurt to do so.
SO, I added a static line on a retractable reel that is grounded to the truck bed, and clips onto the exhaust pipe of the plane -- exactly like the grounding line at the airport.
This is nothing more than a commonly available retractable extension cord, available for about $60. Cut the main end off, and install a ring connector that you can bolt to the bed of the truck. Cut the other end off and install a giant alligator clip.
The Numbers
Total cost (with tax): $935.
Total savings per gallon, currently, mogas vs 100LL: $1.80/gallon.
We plan on burning 10 gallons per hour, so total savings per hour: $18.00
Flight time to pay for fuel tank: 51.9 hours
Total savings over a 2000 hour engine life: $36,000.
Obviously these numbers vary with the price of avgas and mogas. However, I did this with my O-540, and saved enough to rebuild the engine.
That said, I did NOT do this for the savings. In fact, judging by how awful the inside of this engine looked (compared to the pristine innards of my mogas-powered O-540), it would probably be worth using this fuel even if it cost the same.
Bottom line: 100LL has FOUR TIMES more lead than the 80 octane avgas my engine was designed to use. This extra lead causes problems everywhere, from fouled plugs to dirty oil.
Here are some pix of the new rig.


The filler for the transfer tank is on the same side as the filler for the truck's gas tank. THIS IS IMPORTANT. I installed this wrong on my previous fuel truck, which meant when I wanted to gas up both tanks I had to stretch the hose to the other side of the truck -- not always possible without moving the truck.
This time, I made certain they were on the same side, and it's much easier to fill.


My truck is often parked at my hotel -- a very public place. As a result, I have locks on both the filler cap and the spout handle.

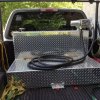
This is a detail of the retractable static line. It works great -- way better than most airport versions -- but could IMHO be eliminated without any loss of safety. Still, I'm a "belt and suspenders" guy, so I added it to the rig.

The first truck ("The Mighty Grape") was a purple '95 Nissan pickup truck. I had a 55-gallon tank fabricated and we installed an electric pump and 20' of hose. It worked great, until the day it literally broke in half as the shop tried to lift it on the hoist. Iowa winters were hard on crappy Japanese steel.
The second truck ("The Green Grape") was a green '95 Toyota T-100. I simply moved the entire rig over to the new truck, wired it up and kept on a-pumping.
When we moved to Texas in 2010, I could not find a reliable or handy source of unpolluted car gas. After a few months, I gave my tank/pump away to a mechanic friend, and ended up trading for an '07 F-150, which I still have. A few months later, I found a reliable source of ethanol-free car gas near the Sam's Club we frequent. It was perfect. But I resisted building another fuel truck, because the 100LL pumps were just so danged handy...
Fast forward to this year. At my condition inspection, I am shocked to learn that two of my cylinders are in the low 70s for compression -- on a 500 hour O-360 that is run every few days. One in particular is BARELY at 70, and we can hear air hissing through the exhaust valve. Bore-scoping shows a cylinder absolutely packed with lead "crud". Argh.
Since then I've been "treating" the engine with Marvel Mystery Oil, leaning the crap out of it, and vowed to get rid of this horrible 100LL fuel -- a fuel that my O-360 was NEVER designed to use.
So, I have built another fuel truck. ("The Might Grape III -- the Burgundy Edition") If you've ever wondered about how to go about doing this, here are the steps:
1. Find a "Tractor Supply Store" in your area. This is SO much easier than the way I did my first tank, which was to find a company that manufactured tanks and have it made to fit my (itty-bitty) Nissan truck bed.
2. Pick a Size. They handle a wide variety of tanks to fit all trucks. The standard 100 gallon tank fits perfectly in the bed of an F-150. Smaller sizes are available, but bigger is better.
Cost of tank: $349.99
3. Buy a 12-volt pump. They have three sizes -- I opted for the middle, 15 gallon-per-minute size.
Cost of pump: $399.99
4. ADD A FILTER. Amazingly, these rigs don't come standard with a fuel filter. I plumbed in a standard BIG fuel filter, which looks just like the oil filters we use on our airplanes.
Cost of filter adaptor and filter: $47.00
5. Miscellaneous stuff (gasoline pipe thread stuff, electrical connectors, etc)
Cost: $12.00
The tank fits perfectly in the bed of your truck. There are four mounting L-plates with 8 holes drilled welded to the tank, but they only provide four mounting bolts. These are inserted through holes you must drill in the bed of your truck.
The tank actually sits up on rubber donuts, not unlike Lord engine mounts. Insert them and tighten everything down. It helps if you have a small wife who can hold the nut under the truck bed while you torque the bolt from above. (It also helps if you have ramps, or another way to get your truck up in the air a bit.)
After that, it's a matter or installing the pump (you need a BIG pipe wrench to torque everything down), the filler cap, and wiring everything up -- which consists of 2 wires running all the way to the battery, with an in-line 25 amp fuse that they provide with the pump.
Total time to install: A leisurely four hours. If you kicked butt, you could do it in an hour.
Optional Items
Back in 2000, we went round and round on rec.aviation about whether or not it was necessary to build a static reel/clip, to ground the truck and the plane. The consensus was that -- although it was probably a waste of time -- it couldn't hurt to do so.
SO, I added a static line on a retractable reel that is grounded to the truck bed, and clips onto the exhaust pipe of the plane -- exactly like the grounding line at the airport.
This is nothing more than a commonly available retractable extension cord, available for about $60. Cut the main end off, and install a ring connector that you can bolt to the bed of the truck. Cut the other end off and install a giant alligator clip.
Cost of grounding cord: $60.00
The Numbers
Total cost (with tax): $935.
Total savings per gallon, currently, mogas vs 100LL: $1.80/gallon.
We plan on burning 10 gallons per hour, so total savings per hour: $18.00
Flight time to pay for fuel tank: 51.9 hours
Total savings over a 2000 hour engine life: $36,000.
Obviously these numbers vary with the price of avgas and mogas. However, I did this with my O-540, and saved enough to rebuild the engine.
That said, I did NOT do this for the savings. In fact, judging by how awful the inside of this engine looked (compared to the pristine innards of my mogas-powered O-540), it would probably be worth using this fuel even if it cost the same.
Bottom line: 100LL has FOUR TIMES more lead than the 80 octane avgas my engine was designed to use. This extra lead causes problems everywhere, from fouled plugs to dirty oil.
Here are some pix of the new rig.


The filler for the transfer tank is on the same side as the filler for the truck's gas tank. THIS IS IMPORTANT. I installed this wrong on my previous fuel truck, which meant when I wanted to gas up both tanks I had to stretch the hose to the other side of the truck -- not always possible without moving the truck.
This time, I made certain they were on the same side, and it's much easier to fill.


My truck is often parked at my hotel -- a very public place. As a result, I have locks on both the filler cap and the spout handle.

This is a detail of the retractable static line. It works great -- way better than most airport versions -- but could IMHO be eliminated without any loss of safety. Still, I'm a "belt and suspenders" guy, so I added it to the rig.

Last edited:

 ....
....


 ....
....


